1 LVGL移植

本文使用的环境如下:

  • STM32H743
  • FreeRTOS
  • st7789 lcd(320*240)
  1. 下载 LVGL源码,本文使用Release v9.1.0

  2. 将压缩包解压到工程目录,例如stm32h7xx_cmake_project/components/lvgl-9.1.0,如下所示:
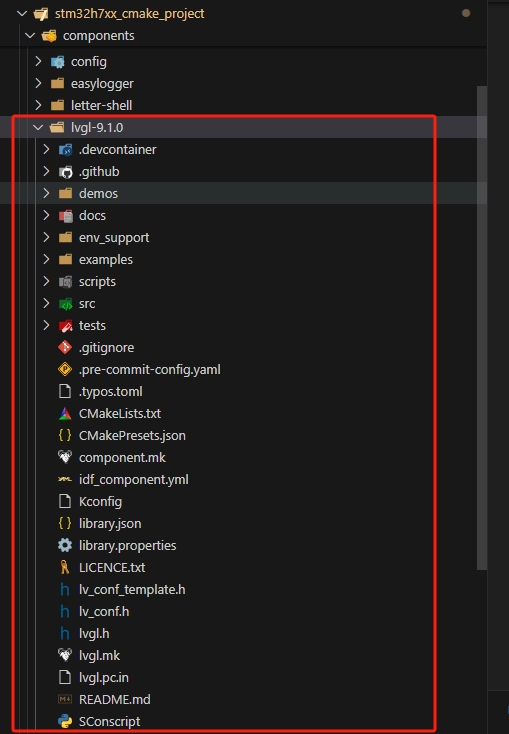
vscode_cmake_stm32_lvgl移植及显示优化_LVGL

  3. 在工程目录下创建LVGL,其包含portinguiapp

  4. lvgl-9.1.0目录下的lv_conf_template.h复制一份为lv_conf.h, 并作以下修改:

    • #if 0 /*Set it to "1" to enable content*/改为#if 1 /*Set it to "1" to enable content*/使能lv_conf.h文件内容;
    • 定义#define MY_DISP_HOR_RES 320#define MY_DISP_VER_RES 240,指明显示屏的尺寸;
  5. 请根据主CMakeLists.txt,自行加入以下内容:

add_subdirectory(./lvgl-9.1.0)aux_source_directory(LVGL/porting LVGL_PORTING)
aux_source_directory(LVGL/app LVGL_APP)target_sources(${CMAKE_PROJECT_NAME} PRIVATE${LVGL_PORTING}${LVGL_APP}
)target_link_libraries(${CMAKE_PROJECT_NAME} PRIVATElvgllvgl_demos
)target_include_directories(${CMAKE_PROJECT_NAME} PRIVATE./LVGL/porting./LVGL/app
)
  • 1.
  • 2.
  • 3.
  • 4.
  • 5.
  • 6.
  • 7.
  • 8.
  • 9.
  • 10.
  • 11.
  • 12.
  • 13.
  • 14.
  • 15.
  • 16.
  • 17.
  • 18.
  • 19.
  • 20.
  1. lvgl-9.1.0/examples/porting/lv_port_disp_template.clvgl-9.1.0/examples/porting/lv_port_disp_template.h复制到LVGL/porting中,并重命名为lv_port_disp.clv_port_disp.h,该文件与显示屏以及lvgl初始化显示屏相关;

    • #if 0改为#if 1,以使能文件内容;
    • 使用例子一方式显存,如下所示:
    /* Example 1* One buffer for partial rendering*/
    static lv_color_t buf_1_1[MY_DISP_HOR_RES * 10];                          /*A buffer for 10 rows*/
    lv_display_set_buffers(disp, buf_1_1, NULL, sizeof(buf_1_1), LV_DISPLAY_RENDER_MODE_PARTIAL);/* Example 2* Two buffers for partial rendering* In flush_cb DMA or similar hardware should be used to update the display in the background.*/
    // static lv_color_t buf_2_1[MY_DISP_HOR_RES * 10];
    // static lv_color_t buf_2_2[MY_DISP_HOR_RES * 10];
    // lv_display_set_buffers(disp, buf_2_1, buf_2_2, sizeof(buf_2_1), LV_DISPLAY_RENDER_MODE_PARTIAL);/* Example 3* Two buffers screen sized buffer for double buffering.* Both LV_DISPLAY_RENDER_MODE_DIRECT and LV_DISPLAY_RENDER_MODE_FULL works, see their comments*/
    // static lv_color_t buf_3_1[MY_DISP_HOR_RES * MY_DISP_VER_RES];
    // static lv_color_t buf_3_2[MY_DISP_HOR_RES * MY_DISP_VER_RES];
    // lv_display_set_buffers(disp, buf_3_1, buf_3_2, sizeof(buf_3_1), LV_DISPLAY_RENDER_MODE_DIRECT);
    • 1.
    • 2.
    • 3.
    • 4.
    • 5.
    • 6.
    • 7.
    • 8.
    • 9.
    • 10.
    • 11.
    • 12.
    • 13.
    • 14.
    • 15.
    • 16.
    • 17.
    • 18.
    • 实现显示刷新到屏幕
    static void disp_flush(lv_display_t * disp_drv, const lv_area_t * area, uint8_t * px_map)
    {if(disp_flush_enabled) {/*The most simple case (but also the slowest) to put all pixels to the screen one-by-one*/int32_t x;int32_t y;for(y = area->y1; y <= area->y2; y++) {for(x = area->x1; x <= area->x2; x++) {/*Put a pixel to the display. For example:*//*put_px(x, y, *px_map)*/LCD_Draw_Point(x, y, *(uint16_t *)px_map);  // 画点px_map++;px_map++;   // 注意,根据实际显示屏位数修改,笔者使用16位的,因此此处需要自增多一次}}}/*IMPORTANT!!!*Inform the graphics library that you are ready with the flushing*/lv_display_flush_ready(disp_drv);
    }
    • 1.
    • 2.
    • 3.
    • 4.
    • 5.
    • 6.
    • 7.
    • 8.
    • 9.
    • 10.
    • 11.
    • 12.
    • 13.
    • 14.
    • 15.
    • 16.
    • 17.
    • 18.
    • 19.
    • 20.
    • 21.
    • 22.
    • 23.
  2. app文件夹中,创建lvgl_thread.clvgl_thread.h,如下:

    • lvgl_thread.h
    #ifndef __LVGL_THREAD_H__
    #define __LVGL_THREAD_H__#ifdef __cplusplus
    extern "C" {
    #endif
    #include<stdint.h>int lvgl_app_init(void);
    #ifdef __cplusplus
    }
    #endif#endif
    • 1.
    • 2.
    • 3.
    • 4.
    • 5.
    • 6.
    • 7.
    • 8.
    • 9.
    • 10.
    • 11.
    • 12.
    • 13.
    • 14.
    • 15.
    • 16.
    • 17.
    • lvgl_thread.c
    #include "lvgl_thread.h"#include "FreeRTOS.h"
    #include "task.h"#include "lvgl.h"
    #include "lv_port_disp.h"
    #include "lv_demos.h"char *demo_name = "benchmark";void lv_example_get_started_1(void)
    {/*Change the active screen's background color*/lv_obj_set_style_bg_color(lv_screen_active(), lv_color_hex(0x003a57), LV_PART_MAIN);/*Create a white label, set its text and align it to the center*/lv_obj_t * label = lv_label_create(lv_screen_active());lv_label_set_text(label, "Hello world");lv_obj_set_style_text_color(lv_screen_active(), lv_color_hex(0xffffff), LV_PART_MAIN);lv_obj_align(label, LV_ALIGN_CENTER, 0, 0);
    }static void lvgl_thread_entry(void *arg) {(void)arg;lv_init();lv_port_disp_init();// lv_port_indev_init();// lv_user_gui_init();lv_tick_set_cb(&xTaskGetTickCount);// lv_demos_create(NULL, -1);// lv_demos_create(&demo_name, 2);lv_example_get_started_1();/* handle the tasks of LVGL */while(1) {lv_task_handler();vTaskDelay(pdMS_TO_TICKS(10));}
    }int lvgl_app_init(void) {xTaskCreate(lvgl_thread_entry, "lvgl_thread", 4096, NULL, 10, NULL);return 0;
    }
    • 1.
    • 2.
    • 3.
    • 4.
    • 5.
    • 6.
    • 7.
    • 8.
    • 9.
    • 10.
    • 11.
    • 12.
    • 13.
    • 14.
    • 15.
    • 16.
    • 17.
    • 18.
    • 19.
    • 20.
    • 21.
    • 22.
    • 23.
    • 24.
    • 25.
    • 26.
    • 27.
    • 28.
    • 29.
    • 30.
    • 31.
    • 32.
    • 33.
    • 34.
    • 35.
    • 36.
    • 37.
    • 38.
    • 39.
    • 40.
    • 41.
    • 42.
    • 43.
    • 44.
    • 45.
    • 46.

    至此,移植工作已做完,直接构建工程,应该能编译通过。

2 LVGL性能测试

前面中,我们已经把LVGL的例子库添加到工程了,因此可以使用LVGL例子对系统进行性能测试。

  1. 打开lv_conf.h,修改以下宏定义:
#define LV_USE_DEMO_WIDGETS 1
#define LV_USE_DEMO_BENCHMARK 1
#define LV_MEM_SIZE (128 * 1024U)       /*[bytes]*/
#define LV_USE_PERF_MONITOR 1          // 显示帧数
  • 1.
  • 2.
  • 3.
  • 4.
  1. lvgl_thread.c中修改static void lvgl_thread_entry(void *arg)
static const char *demo_name = "benchmark";
static void lvgl_thread_entry(void *arg) {(void)arg;lv_init();lv_port_disp_init();// lv_port_indev_init();// lv_user_gui_init();lv_tick_set_cb(&xTaskGetTickCount);// lv_demos_create(NULL, -1);lv_demos_create(&demo_name, 2);/* handle the tasks of LVGL */while(1) {lv_task_handler();vTaskDelay(pdMS_TO_TICKS(10));}
}
  • 1.
  • 2.
  • 3.
  • 4.
  • 5.
  • 6.
  • 7.
  • 8.
  • 9.
  • 10.
  • 11.
  • 12.
  • 13.
  • 14.
  • 15.
  • 16.
  • 17.
  1. 编译运行可以发现,fps基本为0,这种情况下,与LVGL代码无太大关系了,与硬件平台相关,将在下一节分析原因并优化;

3 ST7789显示优化

st7789部分显示函数:

void LCD_Write_Data(uint8_t data){HAL_SPI_Transmit(&hspi1, data, 1, 100); 
}void LCD_Write_Data_16Bit(uint16_t data)
{LCD_Write_Data(data >> 8);LCD_Write_Data(data & 0xFF);
}void LCD_Draw_Point(uint16_t x, uint16_t y, uint16_t color)
{LCD_Set_Windows(x, y, x, y);LCD_Write_Data_16Bit(color); 
}void LCD_Fill(uint16_t x1, uint16_t y1, uint16_t x2, uint16_t y2, uint16_t *color)
{int i,j;LCD_Set_Windows(x1, y1, x2, y2);for (i = y1; i <= y2; i++) {for (j = x1; j <= x2; j++){LCD_Write_Data_16Bit(*color ++);}}
}
  • 1.
  • 2.
  • 3.
  • 4.
  • 5.
  • 6.
  • 7.
  • 8.
  • 9.
  • 10.
  • 11.
  • 12.
  • 13.
  • 14.
  • 15.
  • 16.
  • 17.
  • 18.
  • 19.
  • 20.
  • 21.
  • 22.
  • 23.
  • 24.
  • 25.
  • 26.
  • 27.

笔者在没有优化显示时,st7789 fps值很低,原因分析如下:

  • st7789使用的是spi接口,每次只写一个点,时间开销都消耗在LCD_Set_Windows,此时软spi还是硬spi,速率差异不大;
  • stm32 spi速率过低;
  • stm32 spi在无dma的情况对cpu资源开销大。

3.1 优化disp_flush

将原来每次只画一个点,改为填充一块区域,修改完后会发现fps值有所提高,大概fps为2-3,笔者spi速率92MHz。

static void disp_flush(lv_display_t * disp_drv, const lv_area_t * area, uint8_t * px_map)
{if(disp_flush_enabled) {/*The most simple case (but also the slowest) to put all pixels to the screen one-by-one*/LCD_Fill(area->x1, area->y1, area->x2, area->y2, px_map);}/*IMPORTANT!!!*Inform the graphics library that you are ready with the flushing*/lv_display_flush_ready(disp_drv);
}
  • 1.
  • 2.
  • 3.
  • 4.
  • 5.
  • 6.
  • 7.
  • 8.
  • 9.
  • 10.
  • 11.

分析LCD_Fill,每画一个点需要执行LCD_Write_Data两次,每次传输一个字节就要调用一次spi hal库中的发送操作,时间开销都花在了函数调用上,是否减少函数调用次数能提高显示效果?

3.2 减少spi传输调用次数

LCD_FILL改为如下:

void LCD_Fill(uint16_t x1, uint16_t y1, uint16_t x2, uint16_t y2, uint16_t *color)
{uint32_t size = (x2 - x1 + 1) * (y2 - y1 + 1) * 2;uint32_t send_size = size > LCD_BUF_MAX ? LCD_BUF_MAX : size;LCD_Set_Windows(x1, y1, x2, y2);uint8_t *data = (uint8_t *)color;SPI_CS_LOW();while(size) {for(uint32_t i = 0; i < send_size; i += 2) {lcd_buf[i] = data[i + 1];lcd_buf[i + 1] = data[i];}HAL_SPI_Transmit(&hspi1, lcd_buf, send_size, 100); size -= send_size;data += send_size;if(size > LCD_BUF_MAX) {send_size = LCD_BUF_MAX;}else {send_size = size;}}SPI_CS_HIGH();
}
  • 1.
  • 2.
  • 3.
  • 4.
  • 5.
  • 6.
  • 7.
  • 8.
  • 9.
  • 10.
  • 11.
  • 12.
  • 13.
  • 14.
  • 15.
  • 16.
  • 17.
  • 18.
  • 19.
  • 20.
  • 21.
  • 22.
  • 23.
  • 24.
  • 25.

修改完后,发现fps大大提高了,大于15fps。虽然fps提高了,显示比较流畅,全屏刷时还是能看得出闪烁,但这种方式带来的是cpu开销过大,毕竟每次发送完都要等待发送完成。如果将spi改为DMA是否能降低cpu开销?

3.3 使用SPI DMA

此处贴出对HAL库SPI操作的二次封装,不对SPI DMA初始化讲解,毕竟STM32CubeMX能生成,本小节重点在于如何同步发送完成。下列使用了一个信号进行发送完成同步。

#include "bsp_spi.h"
#include "spi.h"
#include "user_config.h"#include "FreeRTOS.h"
#include "semphr.h"extern SPI_HandleTypeDef hspi1;
extern SPI_HandleTypeDef hspi4;
extern DMA_HandleTypeDef hdma_spi1_rx;
extern DMA_HandleTypeDef hdma_spi1_tx;
extern DMA_HandleTypeDef hdma_spi4_rx;
extern DMA_HandleTypeDef hdma_spi4_tx;#define SPI_RW_LOCK(name, direction) \
static SemaphoreHandle_t name##_##direction##_sem = NULL;\
static int name##_##direction##_rw_lock(void) {\if(__get_IPSR() != 0U) {\BaseType_t yield;\yield = pdFALSE;\if (xSemaphoreTakeFromISR (name##_##direction##_sem, &yield) == pdPASS) {\portYIELD_FROM_ISR (yield);\return 0;\}\} \else {\if (xSemaphoreTake (name##_##direction##_sem, (TickType_t)portMAX_DELAY) == pdPASS) {\return 0;\}\}\return -1;\
}\
static int name##_##direction##_rw_unlock(void) {\if(__get_IPSR() != 0U) {\BaseType_t yield;\yield = pdFALSE;\if (xSemaphoreGiveFromISR (name##_##direction##_sem, &yield) == pdPASS) {\portYIELD_FROM_ISR (yield);\return 0;\}\} \else {\if (xSemaphoreGive (name##_##direction##_sem) == pdPASS) {\return 0;\}\}\return -1;\
}#define SPI_INIT(name) \
{\name##_tx_sem = xSemaphoreCreateBinary(); \xSemaphoreGive(name##_tx_sem); \
}// #define SPI_SEND_DATA_FUNC(name) \
// int name##_send_data(const uint8_t *data, uint16_t len) \
// {\
//     HAL_SPI_Transmit(&h##name, data, len, 100); \
// 	return len;\
// }#define SPI_SEND_DATA_FUNC(name) \
int name##_send_data(const uint8_t *data, uint16_t len) \
{\HAL_SPI_Transmit_DMA(&h##name, data, len); \name##_tx_rw_lock(); \return len;\
}SPI_RW_LOCK(spi1, tx)
SPI_SEND_DATA_FUNC(spi1)int spi_init(void) {
#if USE_SPI1MX_SPI1_Init();SPI_INIT(spi1);
#endifreturn 0;
}int bsp_spi_send(uint8_t spi_id, const uint8_t *data, uint16_t size) {if(spi_id == SPI1_ID) {spi1_send_data(data, size);}return 0;
}void HAL_SPI_TxCpltCallback(SPI_HandleTypeDef *hspi) {if(hspi == &hspi1) {spi1_tx_rw_unlock();}
}void HAL_SPI_RxCpltCallback(SPI_HandleTypeDef *hspi) {(void) hspi;}
  • 1.
  • 2.
  • 3.
  • 4.
  • 5.
  • 6.
  • 7.
  • 8.
  • 9.
  • 10.
  • 11.
  • 12.
  • 13.
  • 14.
  • 15.
  • 16.
  • 17.
  • 18.
  • 19.
  • 20.
  • 21.
  • 22.
  • 23.
  • 24.
  • 25.
  • 26.
  • 27.
  • 28.
  • 29.
  • 30.
  • 31.
  • 32.
  • 33.
  • 34.
  • 35.
  • 36.
  • 37.
  • 38.
  • 39.
  • 40.
  • 41.
  • 42.
  • 43.
  • 44.
  • 45.
  • 46.
  • 47.
  • 48.
  • 49.
  • 50.
  • 51.
  • 52.
  • 53.
  • 54.
  • 55.
  • 56.
  • 57.
  • 58.
  • 59.
  • 60.
  • 61.
  • 62.
  • 63.
  • 64.
  • 65.
  • 66.
  • 67.
  • 68.
  • 69.
  • 70.
  • 71.
  • 72.
  • 73.
  • 74.
  • 75.
  • 76.
  • 77.
  • 78.
  • 79.
  • 80.
  • 81.
  • 82.
  • 83.
  • 84.
  • 85.
  • 86.
  • 87.
  • 88.
  • 89.
  • 90.
  • 91.
  • 92.
  • 93.
  • 94.
  • 95.
  • 96.
  • 97.
  • 98.
  • 99.
  • 100.
  • 101.
  • 102.
  • 103.
  • 104.

将spi改为dma方式传输之后,整个系统cpu占用有所大大降低,但是笔者之前spi使用了96MHz,此时显示屏颜色不对。说明spi时序已经超限了,此时需要降低SPI传输速率,笔者将96MHz降至48MHz,显示就正常了。虽然SPI传输速率降低,但是fps值未受影响。