经过无数次的尝试,终于还是让我做出来了
准备工作
设置接口加签方式
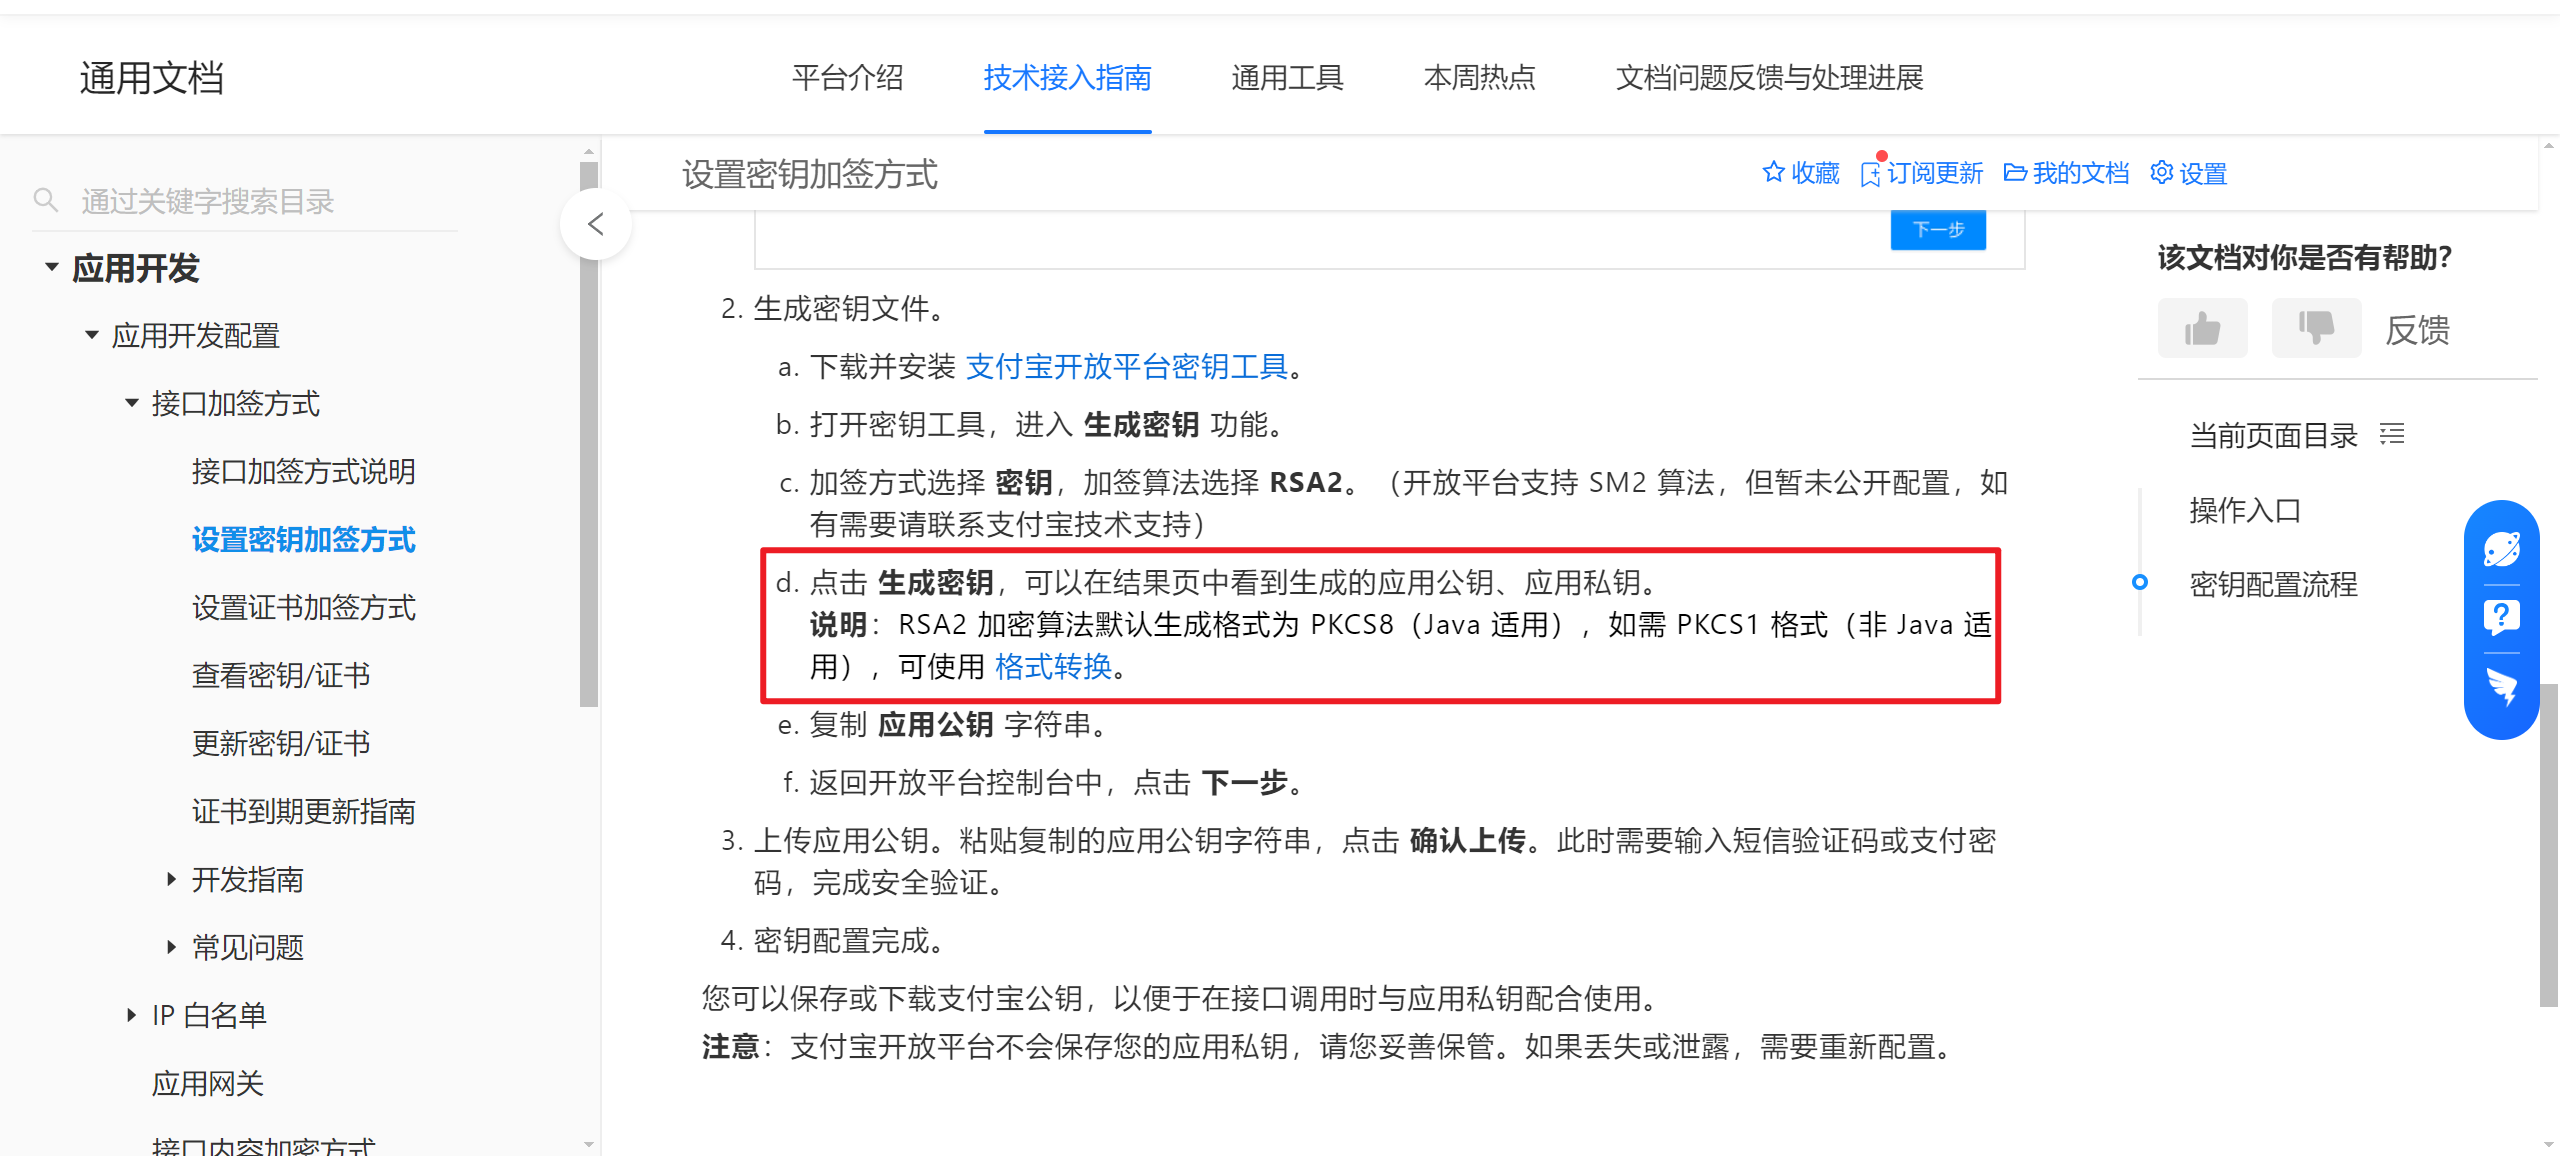
使用支付宝小程序订阅消息,首先要设置接口加签方式,需要下载支付宝开放平台密钥工具,按照步骤生成秘钥,然后按照支付宝设置密钥加签方式添加接口加签方式。
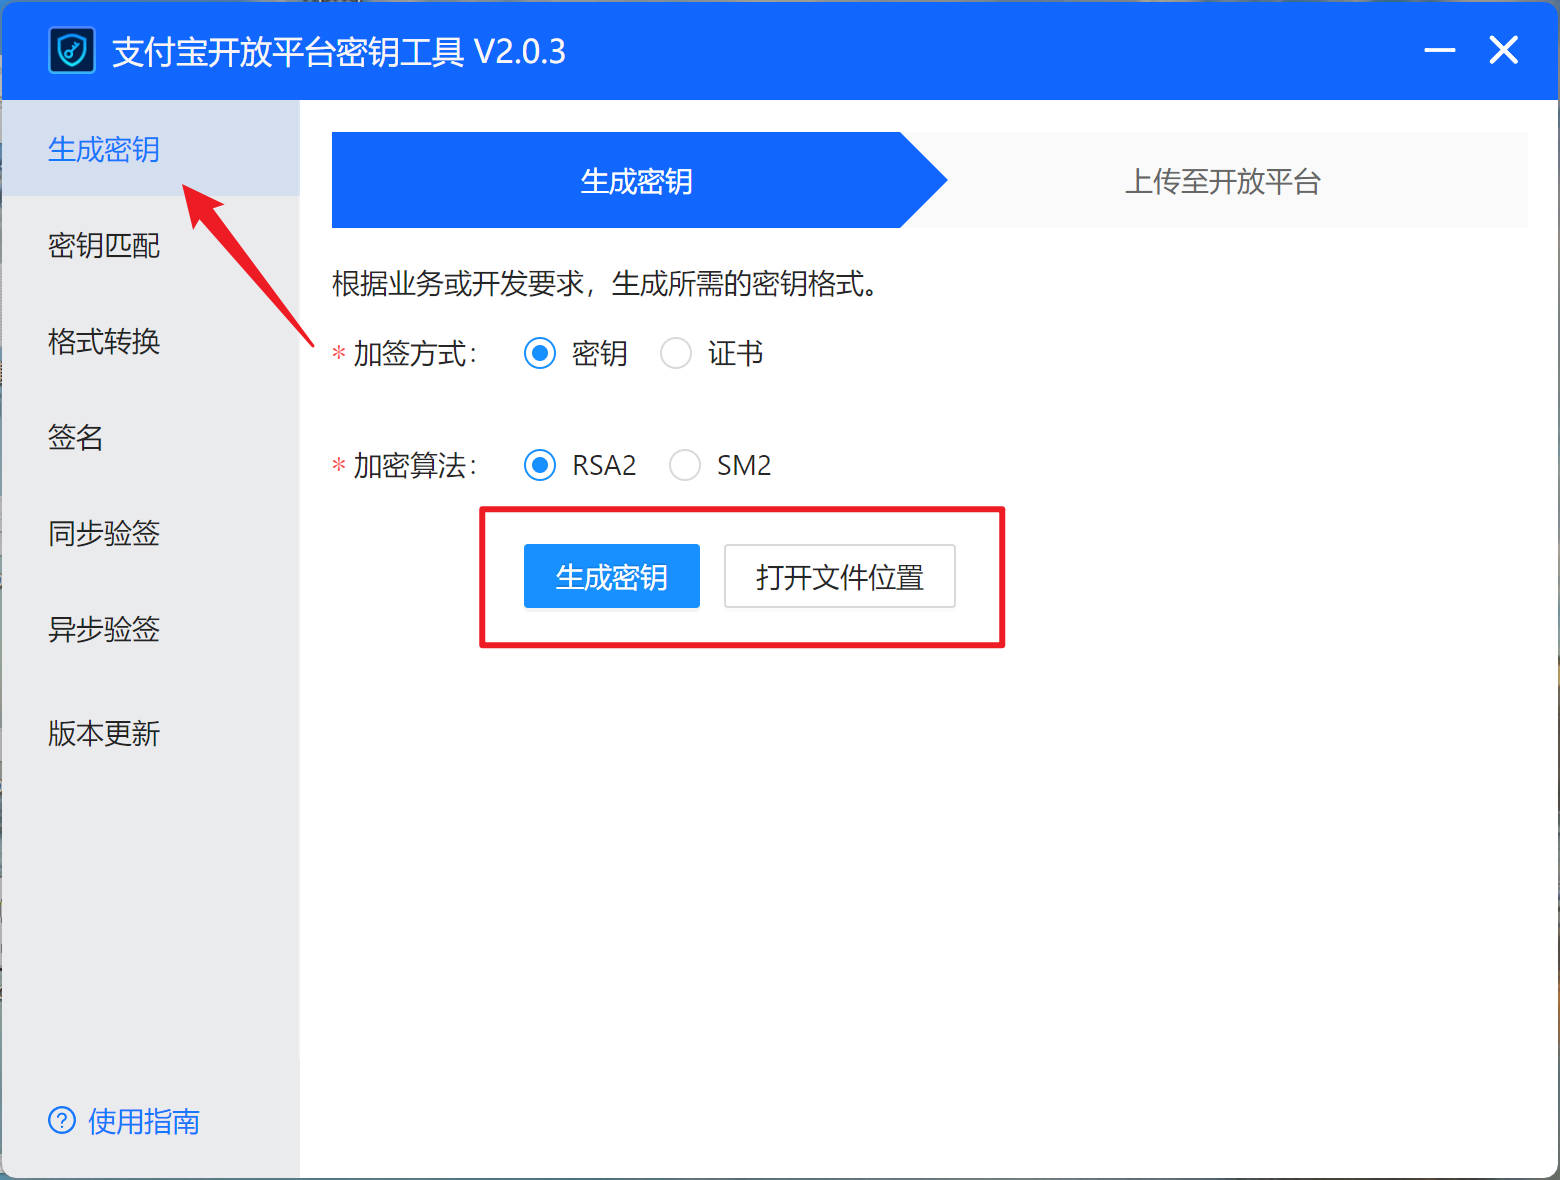
有一点需要注意的,因为要在云函数中使用,所以需要把私钥PKCS1格式
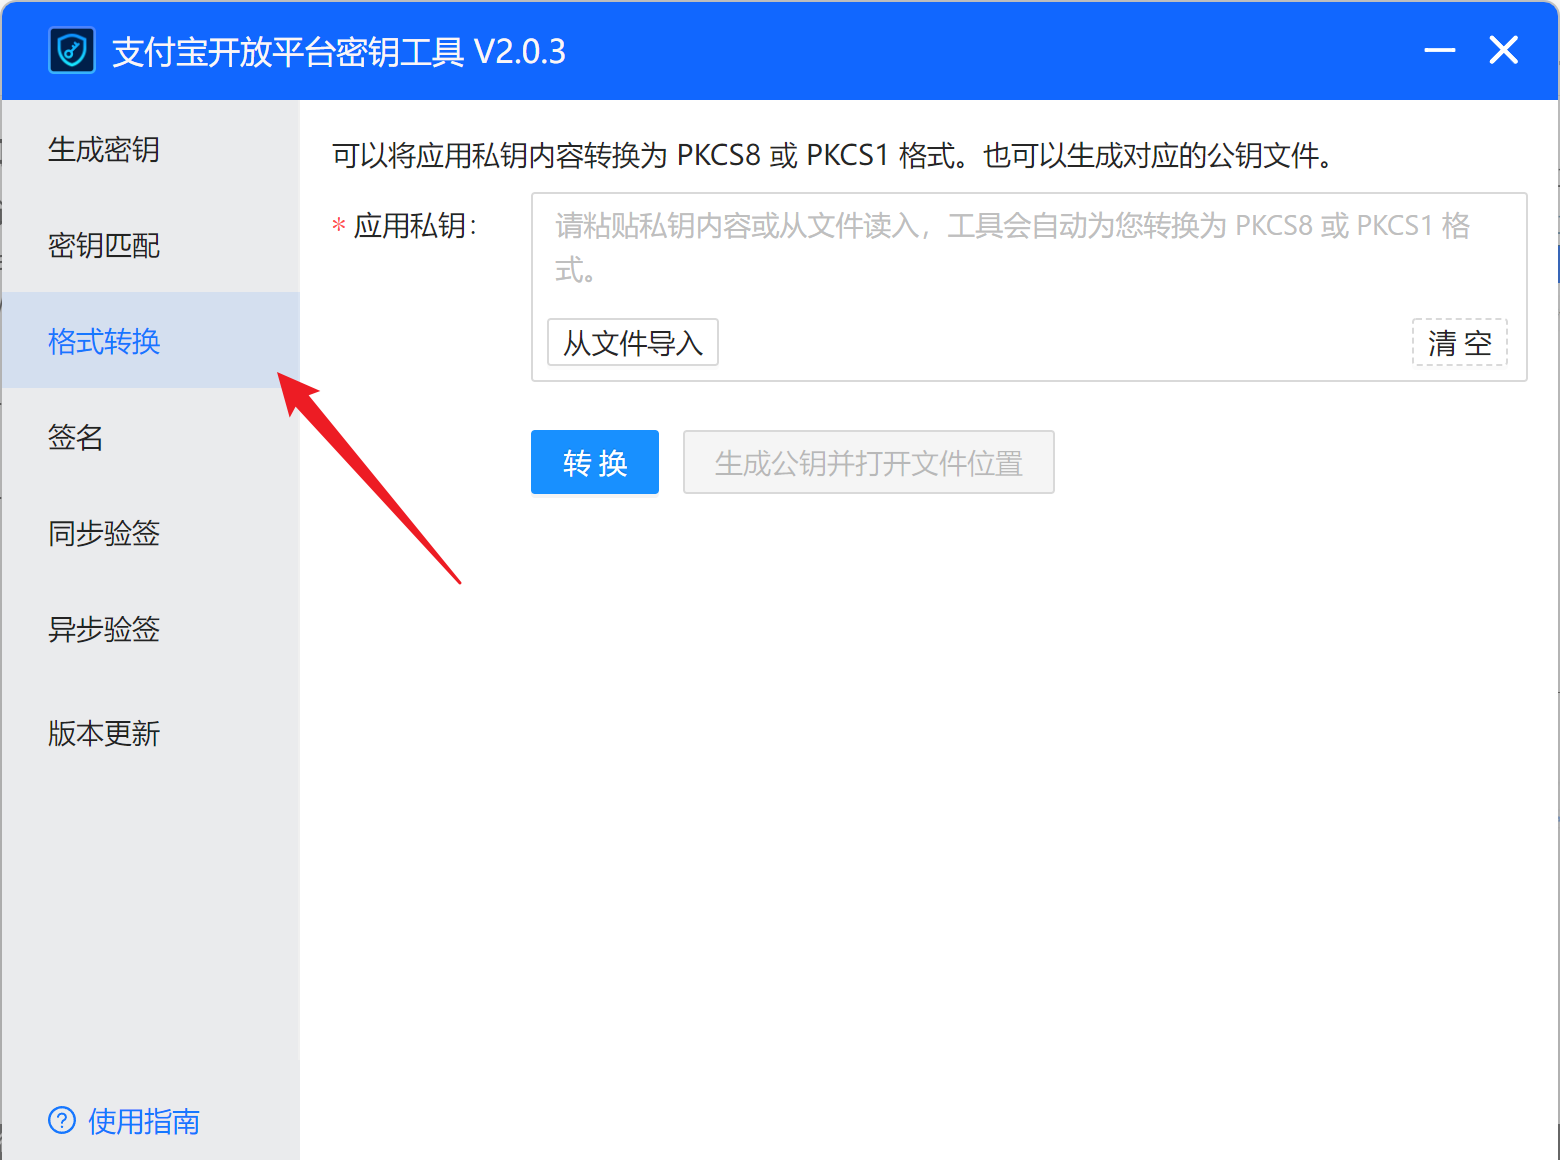
然后设置接口加签方式:小程序控制台 》 开发设置 》 接口加签方式
用户授权订阅消息
在前端js中使用加一个按钮,让用户主动授权订阅消息
// #ifdef MP-ALIPAY
my.requestSubscribeMessage({//需要用户订阅的消息模板的id的集合entityIds: [user_template_id], // 消息模板idsuccess: (res) => {console.log("订阅成功", res)uni.showToast({icon: 'success',title: '订阅成功'})},fail: (res) => {uni.showToast({icon: 'error',title: '订阅失败'})console.log("订阅失败", res)}
})
// #endif
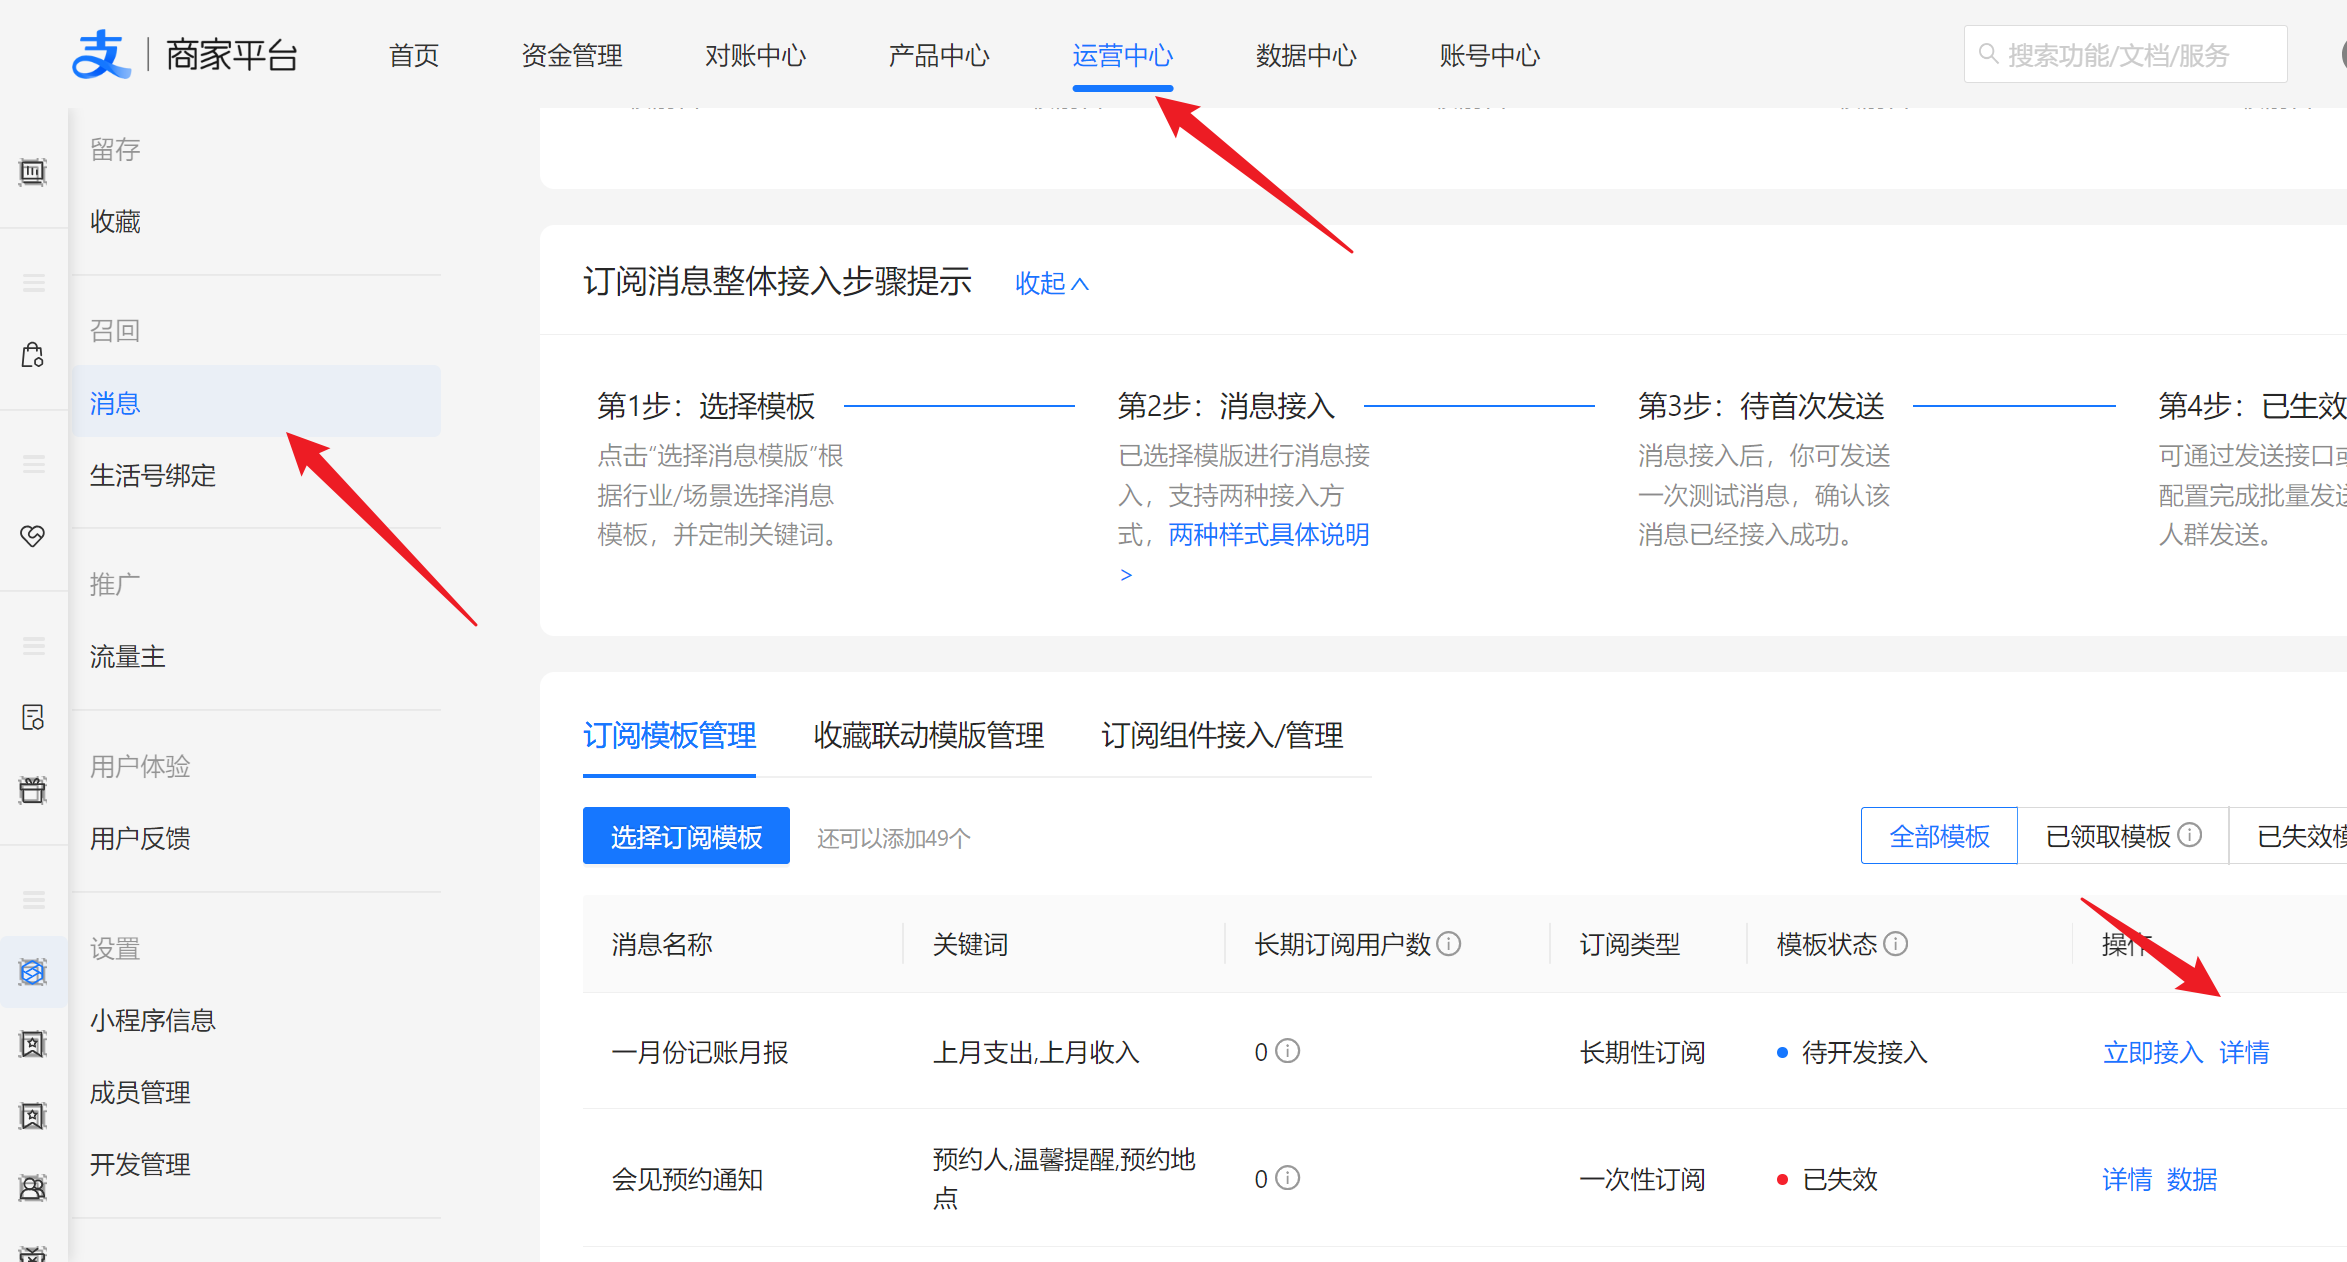
获取user_template_id
通过商家平台》运营中心》消息,获取user_template_id
 ### 获取用户的userId 这个需要两步走
- 获取code,在前端js中使用
my.getAuthCode获取authCode,并传达给云函数getuid;
// #ifdef MP-ALIPAY
my.getAuthCode({scopes: 'auth_user',success: res => {const authCode = res.authCodeif (authCode) {// 云函数uniCloud.callFunction({name: 'getuid',data: {code: authCode}})}},fail: err => {console.log('my.getAuthCode 调用失败', err


