Step1. 环境配置
安装 uv
curl -LsSf https://astral.sh/uv/install.sh | sh
Question: 什么是 uv 呢和 conda 比有什么区别?
Answer: 一个用 Rust 编写的超快速 (100x) Python 包管理器和环境管理工具,由 Astral 开发。定位为 pip 和 venv 的替代品,专注于速度、简单性和现代 Python 工作流。
创建项目目录
uv init mcp_server_test
cd mcp_server_test
创建虚拟环境并激活
uv venv
source .venv/bin/activate
安装依赖包
uv add "mcp[cli]" httpx requests
Step2. 实现 MCP Server
创建 weather.py
import requests
from mcp.server.fastmcp import FastMCP# 初始化 MCP 服务器
mcp = FastMCP("WeatherServer")HEWEATHER_API_KEY = "你的 key"  # ← 填入你的和风天气Key 去https://dev.qweather.com/这里申请def get_city_id(city_name: str) -> str:"""根据中文城市名获取和风天气 location ID"""url = "https://geoapi.qweather.com/v2/city/lookup"params = {"location": city_name,"key": HEWEATHER_API_KEY}response = requests.get(url, params=params)data = response.json()if data.get("code") == "200" and data.get("location"):print(data)return data["location"][0]["id"]else:raise ValueError(f"找不到城市: {city_name},错误信息: {data}")def get_weather(city_name: str) -> str:"""根据城市中文名返回当前天气中文描述"""try:location_id = get_city_id(city_name)url = "https://devapi.qweather.com/v7/weather/now"params = {"location": location_id,"key": HEWEATHER_API_KEY}response = requests.get(url, params=params)data = response.json()if data.get("code") != "200":return f"天气查询失败:{data.get('code')}"now = data["now"]return (f"🌍 城市: {city_name}\n"f"🌤 天气: {now['text']}\n"f"🌡 温度: {now['temp']}°C\n"f"💧 湿度: {now['humidity']}%\n"f"🌬 风速: {now['windSpeed']} m/s\n")except Exception as e:return f"查询出错:{str(e)}"@mcp.tool('query_weather', '查询城市天气')
def query_weather(city: str) -> str:"""输入指定城市的中文名称,返回当前天气查询结果。:param city: 城市名称:return: 格式化后的天气信息"""return get_weather(city)if __name__ == "__main__":# 以标准 I/O 方式运行 MCP 服务器mcp.run(transport='stdio')
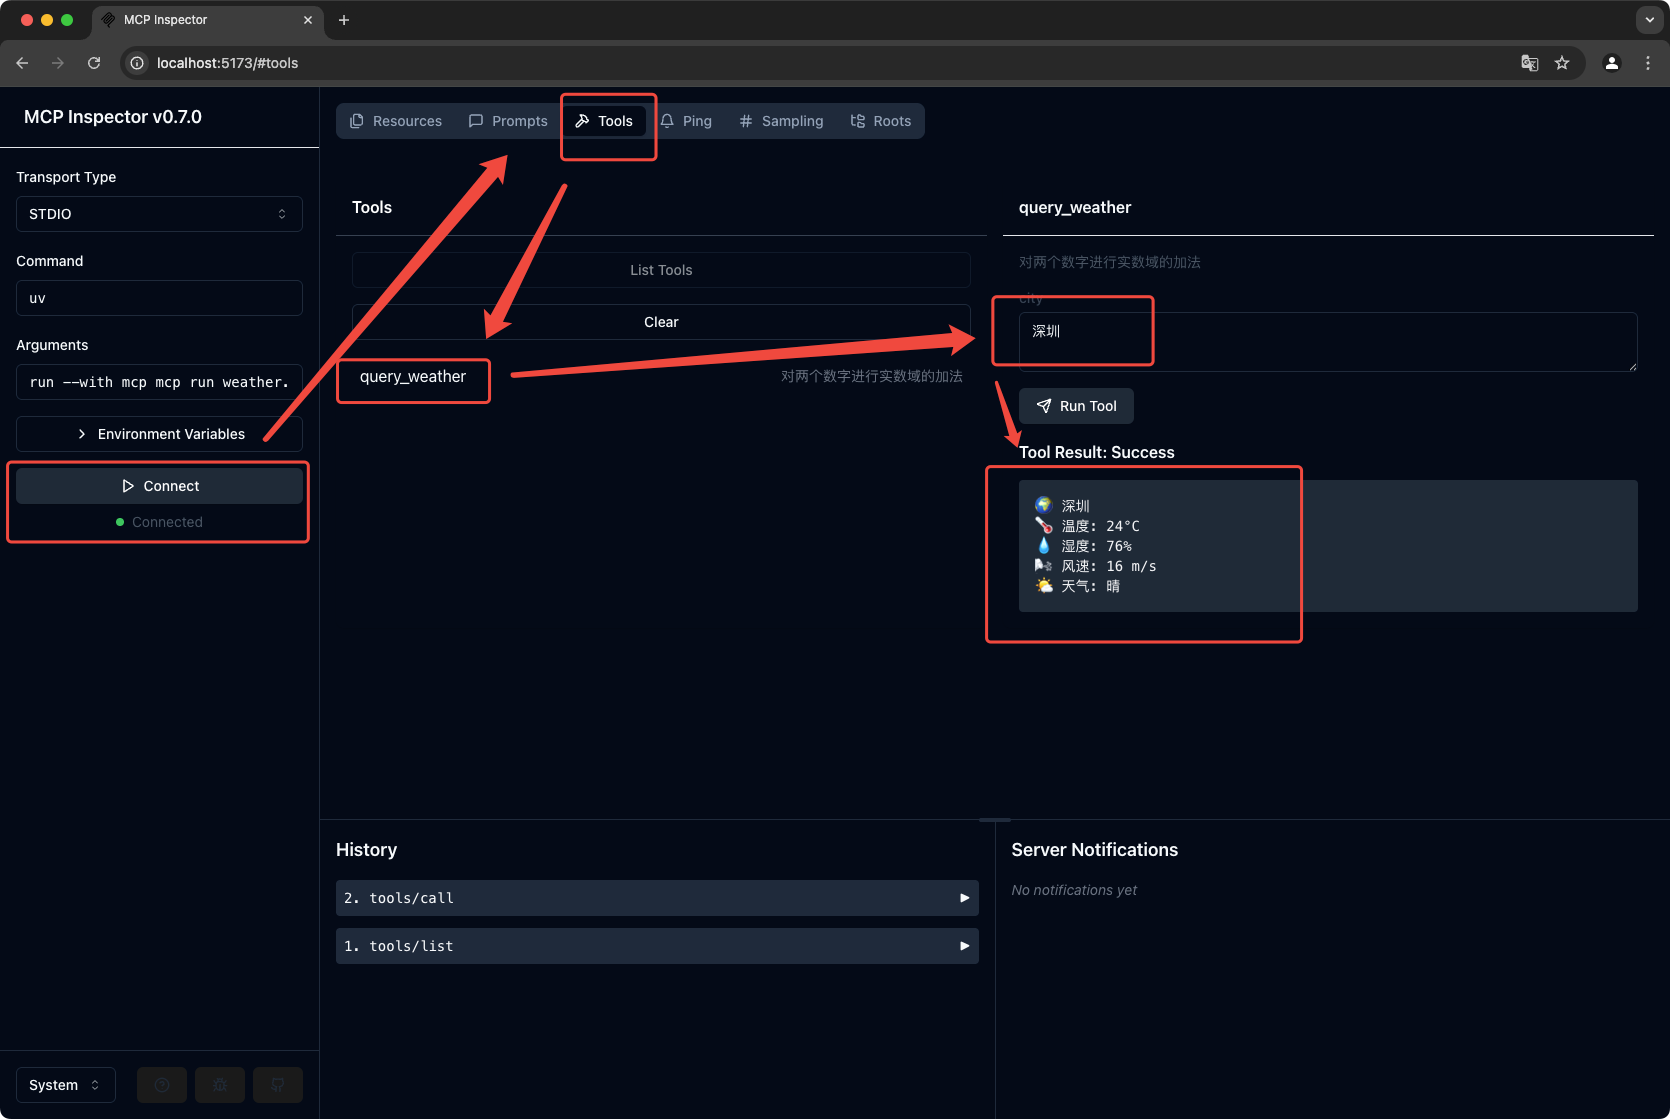
Step3. 测试 MCP Server
运行测试
mcp dev weather.py
看到下面输出就启动成功了
mcp dev weather.py
Starting MCP inspector...
Proxy server listening on port 3000🔍 MCP Inspector is up and running at http://localhost:5173 🚀
Step4. 修改MCP Server 做成 SSE 服务
import mcp.types as types
import requests
import uvicorn
from mcp.server.lowlevel import Server
from mcp.server.sse import SseServerTransport
from starlette.applications import Starlette
from starlette.routing import Mount, Route# ================================
# 1) 你的和风天气API Key
# ================================
HEWEATHER_API_KEY = ""  # ← 填入你的和风天气Key(例如 "abc123xxxxxx")# ================================
# 2) 查询天气核心逻辑
# ================================
def get_city_id(city_name: str) -> str:"""根据中文城市名获取和风天气 location ID"""url = "https://geoapi.qweather.com/v2/city/lookup"params = {"location": city_name,"key": HEWEATHER_API_KEY}response = requests.get(url, params=params)data = response.json()if data.get("code") == "200" and data.get("location"):# 如果成功找到城市return data["location"][0]["id"]else:raise ValueError(f"找不到城市: {city_name},错误信息: {data}")def get_weather(city_name: str) -> str:"""根据城市中文名返回当前天气(中文描述、温度、湿度、风速)"""try:location_id = get_city_id(city_name)url = "https://devapi.qweather.com/v7/weather/now"params = {"location": location_id,"key": HEWEATHER_API_KEY}response = requests.get(url, params=params)data = response.json()if data.get("code") != "200":return f"天气查询失败:{data.get('code')}"now = data["now"]return (f"🌍 城市: {city_name}\n"f"🌤 天气: {now['text']}\n"f"🌡 温度: {now['temp']}°C\n"f"💧 湿度: {now['humidity']}%\n"f"🌬 风速: {now['windSpeed']} m/s\n")except Exception as e:return f"查询出错:{str(e)}"# ================================
# 3) MCP Server 定义
# ================================
app = Server("mcp-weather")# (A) 工具调用处理器:根据工具名称选择执行逻辑
@app.call_tool()
async def call_tool_handler(name: str, arguments: dict
) -> list[types.TextContent | types.ImageContent | types.EmbeddedResource]:"""MCP 工具调用处理器"""if name == "query_weather":if "city" not in arguments:raise ValueError("Missing required argument 'city'")# 调用上面封装好的 get_weatherweather_info = get_weather(arguments["city"])return [types.TextContent(type="text", text=weather_info)]else:raise ValueError(f"Unsupported tool name: {name}")# (B) 工具列表:告知 MCP 端都有哪些可调用的工具
@app.list_tools()
async def list_tools() -> list[types.Tool]:"""定义可用的 MCP 工具列表"""return [types.Tool(name="query_weather",description="查询指定城市天气信息(基于和风天气API)",inputSchema={"type": "object","required": ["city"],"properties": {"city": {"type": "string","description": "要查询的城市名(中文)"}},},),]# ================================
# 4) SSE + Starlette 路由
# ================================
sse = SseServerTransport("/messages/")async def handle_sse(request):"""处理 /sse 路由的 SSE 连接,并将其接入 MCP Server。"""async with sse.connect_sse(request.scope, request.receive, request._send) as streams:# 运行 MCP 应用,处理输入输出await app.run(streams[0], streams[1], app.create_initialization_options())starlette_app = Starlette(debug=True,routes=[Route("/sse", endpoint=handle_sse),Mount("/messages/", app=sse.handle_post_message),],
)# ================================
# 5) 启动服务器
# ================================
if __name__ == "__main__":uvicorn.run(starlette_app, host="127.0.0.1", port=8081)
Step5. 配置 Cherry Studio
安装 Cherry Studio
https://cherry-ai.com/
配置模型 api
https://api.baystoneai.com/
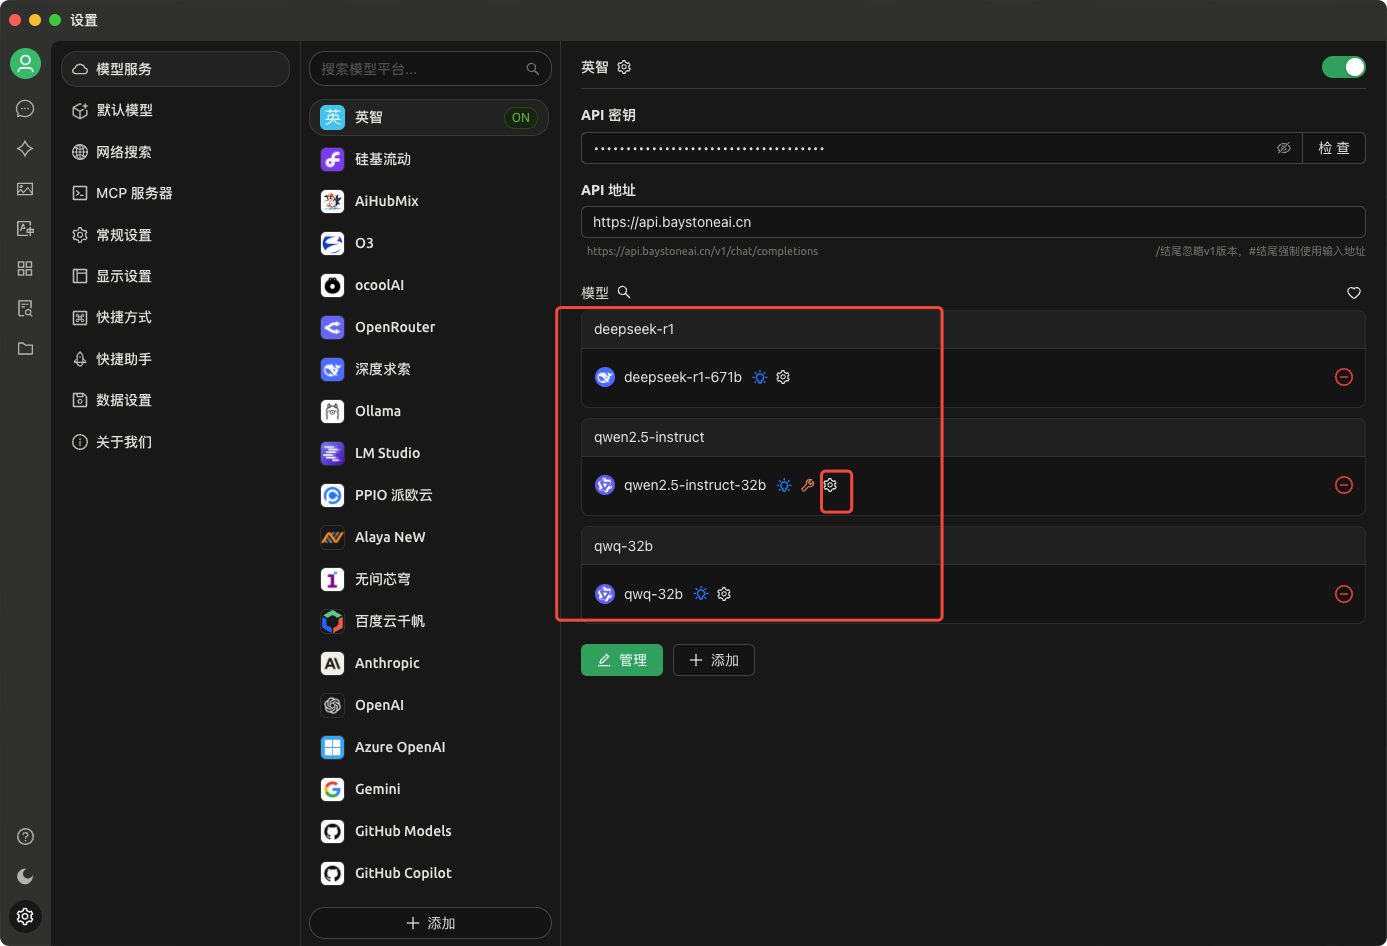
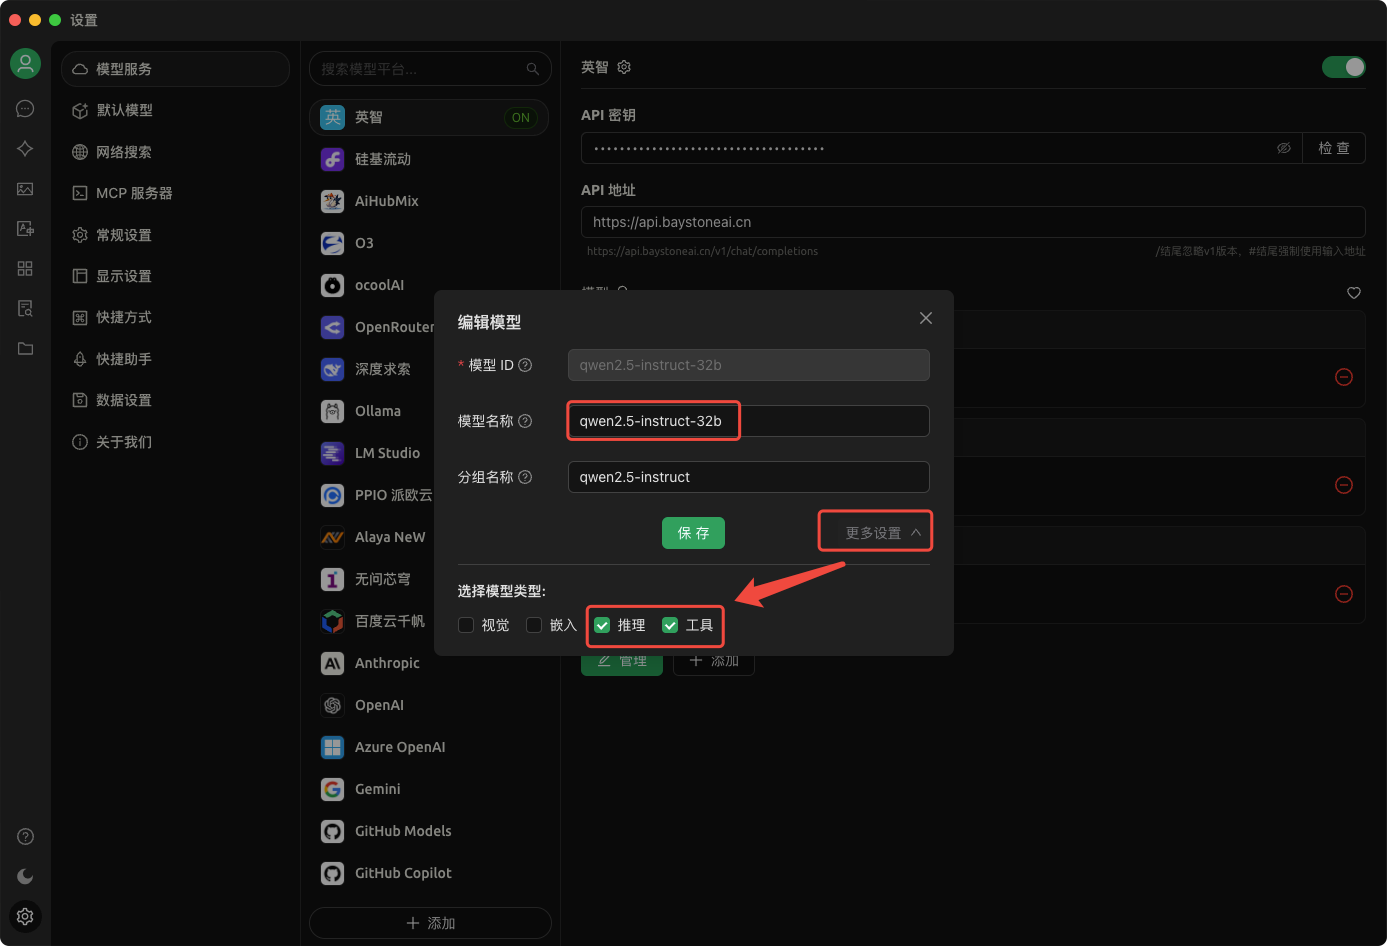
这里需要选择 工具 推理 这两项
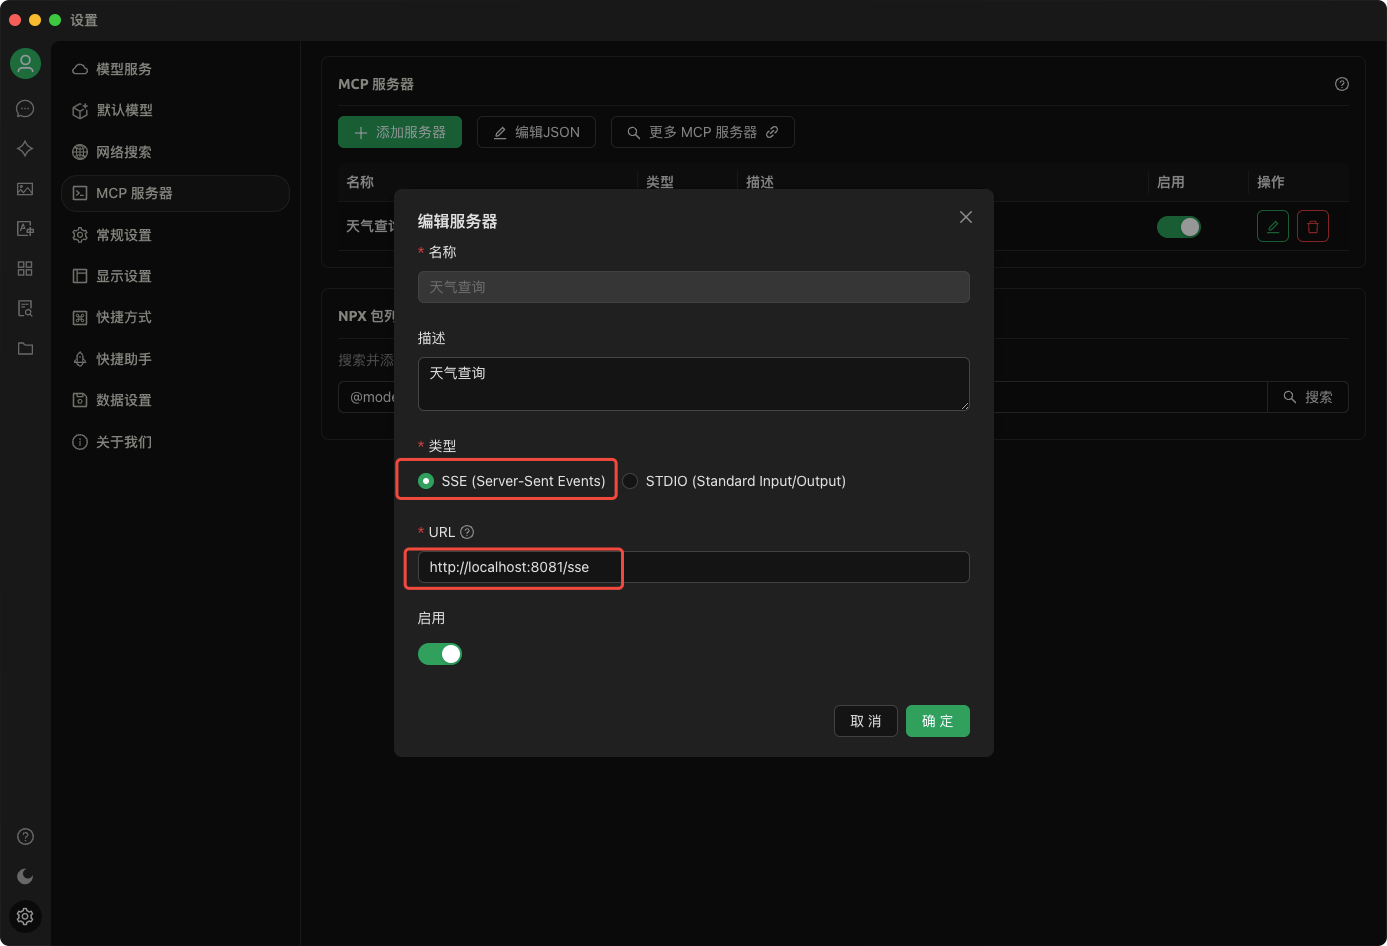
然后是在这里选择你的 MCP 服务
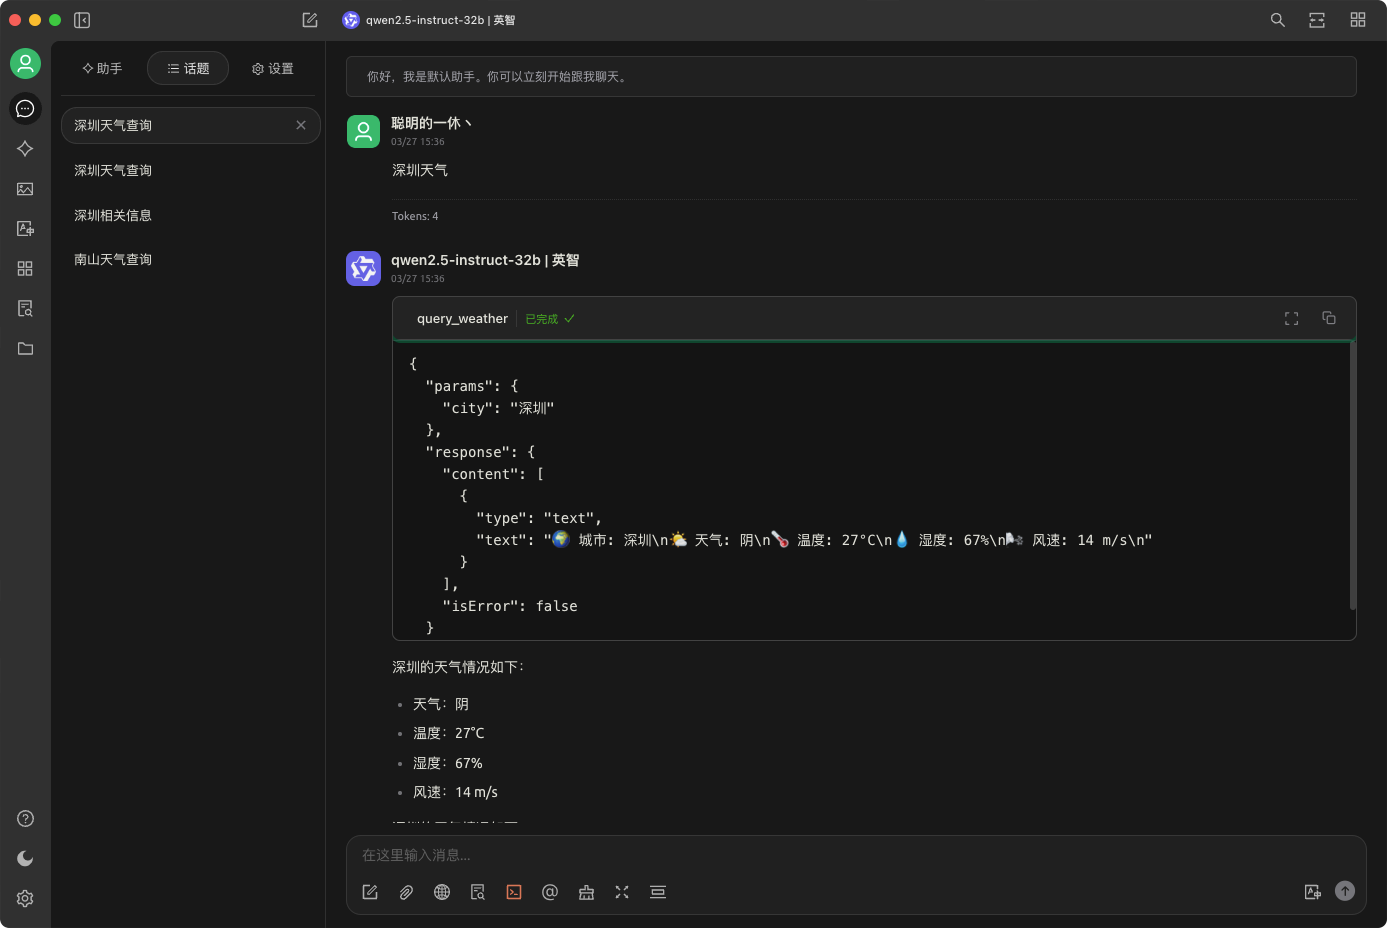
接下来就可以对话啦,让我们看看测试效果


)
