目录
Git
参考文章
常用操作
ArkTS的网络编程
Http编程
发送请求
GET
POST
处理响应
JSON数据解析
处理响应头
错误处理
Web组件
用生命周期钩子实现登录验证功能
思路
代码示例
解读
纯记录学习日记,杂乱,误点的师傅可以×掉了😋
学下Git相关💑,以Gitee为例
最后补充了点ArkTS网络编程相关知识(没新东西)🤬
Git
参考文章
Gitee上传代码保姆级教程(亲测有效)
超级详细的GitBash使用教程
使用Gitee多人项目协作开发的流程实例
Git 使用 —Git基本指令的使用
常用操作
本地pull远程文件夹
git clone https://gitee.com/z3r4y/ctf.git查看远程和本地分支映射关系
git branch -a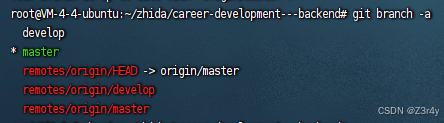
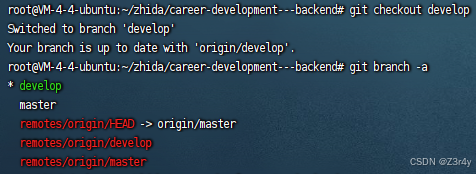
切换分支模式到develop
添加并命名远程仓库
git remote add origin https://gitee.com/z3r4y/ctf.git添加一个远程仓库,并将其命名为
origin。这个远程仓库的URL是https://gitee.com/z3r4y/ctf.git,表示在Gitee平台上的一个仓库。
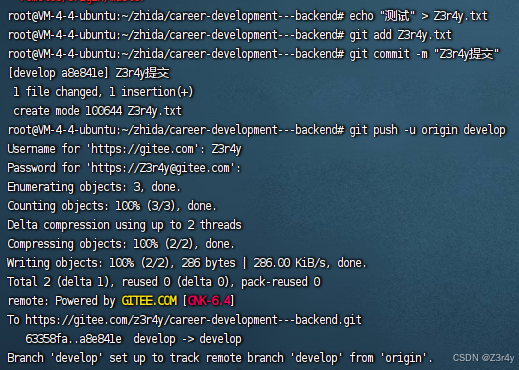
develop开发完成后push代码到develop的分支
1.推送前注明本次推送目的
git add . (.代表目录下所有文件)
git commit -m '本次提交的说明'(说明信息为必填项,最好是信息有意义,便于后期理解)
2.本地仓库推送至指定的远程仓库中
git push -u origin develop
ArkTS的网络编程
所有语言的网络编程都差不多,ArkTS也没新东西
Http编程
发送请求
GET
import http from '@ohos.net.http';// 创建一个 HTTP 请求对象
let httpRequest = http.createHttp();// 发送 GET 请求
httpRequest.request({method: 'GET',url: 'https://jsonplaceholder.typicode.com/todos/1',header: {'Content-Type': 'application/json'}
}, (err, data) => {if (!err) {// 处理响应数据console.log('Response: ' + data.result);} else {// 处理错误console.error('Request failed: ' + err.message);}
});
POST
import http from '@ohos.net.http';// 创建一个 HTTP 请求对象
let httpRequest = http.createHttp();// 发送 POST 请求
httpRequest.request({method: 'POST',url: 'https://jsonplaceholder.typicode.com/posts',header: {'Content-Type': 'application/json'},data: JSON.stringify({title: 'foo',body: 'bar',userId: 1})
}, (err, data) => {if (!err) {// 处理响应数据console.log('Response: ' + data.result);} else {// 处理错误console.error('Request failed: ' + err.message);}
});
处理响应
JSON数据解析
大多数HTTP API返回的数据都是JSON格式的。解析JSON数据是处理响应的常见操作。
httpRequest.request({method: 'GET',url: 'https://jsonplaceholder.typicode.com/todos/1',header: {'Content-Type': 'application/json'}
}, (err, data) => {if (!err) {try {let jsonResponse = JSON.parse(data.result);console.log('Title: ' + jsonResponse.title);} catch (e) {console.error('Failed to parse JSON response: ' + e.message);}} else {console.error('Request failed: ' + err.message);}
});
处理响应头
有时候,需要检查和处理响应头中的信息。例如,获取内容类型或认证信息。
httpRequest.request({method: 'GET',url: 'https://example.com/api/data',header: {'Accept': 'application/json'}
}, (err, data) => {if (!err) {console.log('Content-Type: ' + data.header['Content-Type']);let jsonResponse = JSON.parse(data.result);console.log('Data: ', jsonResponse);} else {console.error('Request failed: ' + err.message);}
});
错误处理
在处理HTTP请求时,错误处理是一个关键部分。通过检查错误对象的属性,开发者可以确定错误的类型并采取相应的措施。
基本错误处理
示例:
httpRequest.request({method: 'GET',url: 'https://jsonplaceholder.typicode.com/invalid-endpoint',header: {'Content-Type': 'application/json'}
}, (err, data) => {if (!err) {console.log('Response: ' + data.result);} else {console.error('Request failed: ' + err.message);}
});
根据HTTP状态码处理错误
根据不同的HTTP状态码,执行不同的错误处理逻辑。
示例:
httpRequest.request({method: 'GET',url: 'https://jsonplaceholder.typicode.com/todos/1',header: {'Content-Type': 'application/json'}
}, (err, data) => {if (!err) {console.log('Response: ' + data.result);} else {switch (err.status) {case 404:console.error('Error 404: Resource not found');break;case 500:console.error('Error 500: Internal server error');break;default:console.error('Request failed with status: ' + err.status);}}
});
Web组件
直接看这个👇
WebAPI官方文档
用生命周期钩子实现登录验证功能
在ArkUI中,可以利用生命周期方法来实现一个登录身份状态验证的组件。通过在组件的初始化阶段检查用户的身份状态,并根据状态在UI上显示不同的内容或进行相应的跳转操作。
思路
- 初始化:在组件初始化时(
onInit方法),检查用户的身份状态。 - 身份验证:根据身份状态决定显示登录页面还是主页面。
- 资源清理:在组件销毁时(
onDestroy方法),清理资源。
代码示例
@Entry
@Component
struct LoginStatusComponent {@State isLoggedIn: boolean = false;onInit() {this.checkLoginStatus();}onDestroy() {this.cleanup();}checkLoginStatus() {// 假设有一个函数 isUserLoggedIn() 返回用户的登录状态this.isLoggedIn = isUserLoggedIn();if (!this.isLoggedIn) {this.redirectToLogin();}}redirectToLogin() {// 跳转到登录页面的逻辑router.push({url: 'pages/LoginPage'});}cleanup() {console.log('Cleaning up resources...');// 清理资源的逻辑}build() {if (this.isLoggedIn) {return this.buildMainPage();} else {return this.buildLoginPage();}}buildMainPage() {return Column() {Text("Welcome, User!").fontSize(30)Button("Logout").onClick(() => {this.logout();})}}buildLoginPage() {return Column() {Text("Please log in.").fontSize(30)Button("Log In").onClick(() => {this.login();})}}login() {// 模拟登录操作this.isLoggedIn = true;// 更新登录状态后重新检查this.checkLoginStatus();}logout() {// 模拟注销操作this.isLoggedIn = false;// 更新登录状态后重新检查this.checkLoginStatus();}
}// 假设是一个检查用户登录状态的函数
function isUserLoggedIn(): boolean {// 模拟一个登录检查return false; // 默认用户未登录
}
解读
onInit:在组件初始化时调用checkLoginStatus方法,检查用户的登录状态。checkLoginStatus:使用isUserLoggedIn函数检查用户是否已登录。如果未登录,则调用redirectToLogin方法跳转到登录页面。redirectToLogin:使用router.push方法跳转到登录页面。onDestroy:在组件销毁时调用cleanup方法,清理资源。build:根据用户的登录状态,决定显示主页面还是登录页面。buildMainPage和buildLoginPage:分别构建主页面和登录页面的UI。login和logout:模拟登录和注销操作,并更新登录状态。


![[C++] STL数据结构小结](http://pic.xiahunao.cn/nshx/[C++] STL数据结构小结)


