1. 网络类型简介
移动设备一般都具备移动网络和无线WIFI的连接能力,有些还可以接入有线以太网,这些网络可以根据需要随时切换。鸿蒙APP可以自动适应上述的网络,一般来说,会优先使用WIFI或者有线以太网,移动网络因为要收费,不会首选使用。但是在某些特殊情形下,可能要求必须使用某一种网络,比如必须使用蜂窝网络,这时候就需要显示的配置一下,指定app使用该网络类型。
2. Web组件及控制器常用方法
网络连接相关能力位于connection模块下,使用如下的方式导入:
import connection from '@ohos.net.connection'
connection模块包括了众多的操作方法,就本文而言,重点需要掌握的是如下四个:
1)getAllNets(): Promise<Array<NetHandle>>
获取所有处于连接状态的网络列表,使用Promise方式作为异步方法。
2)getConnectionProperties(netHandle: NetHandle): Promise<ConnectionProperties>
获取netHandle对应的网络的连接信息,使用Promise方式作为异步方法。
3)getNetCapabilities(netHandle: NetHandle): Promise<NetCapabilities>
获取netHandle对应的网络的能力信息,使用Promise方式作为异步方法。
4)setAppNet(netHandle: NetHandle): Promise<void>;
绑定App到指定网络,绑定后的App只能通过指定网络访问外网,使用Promise方式作为异步方法。
3. 获取网络连接信息并选择一种绑定到应用
本示例会列出所有激活中的网络,然后可以选择其中一种绑定到当前APP,最后可以通过访问指定的网页验证是否绑定成功,示例运行后的初始界面如下所示:
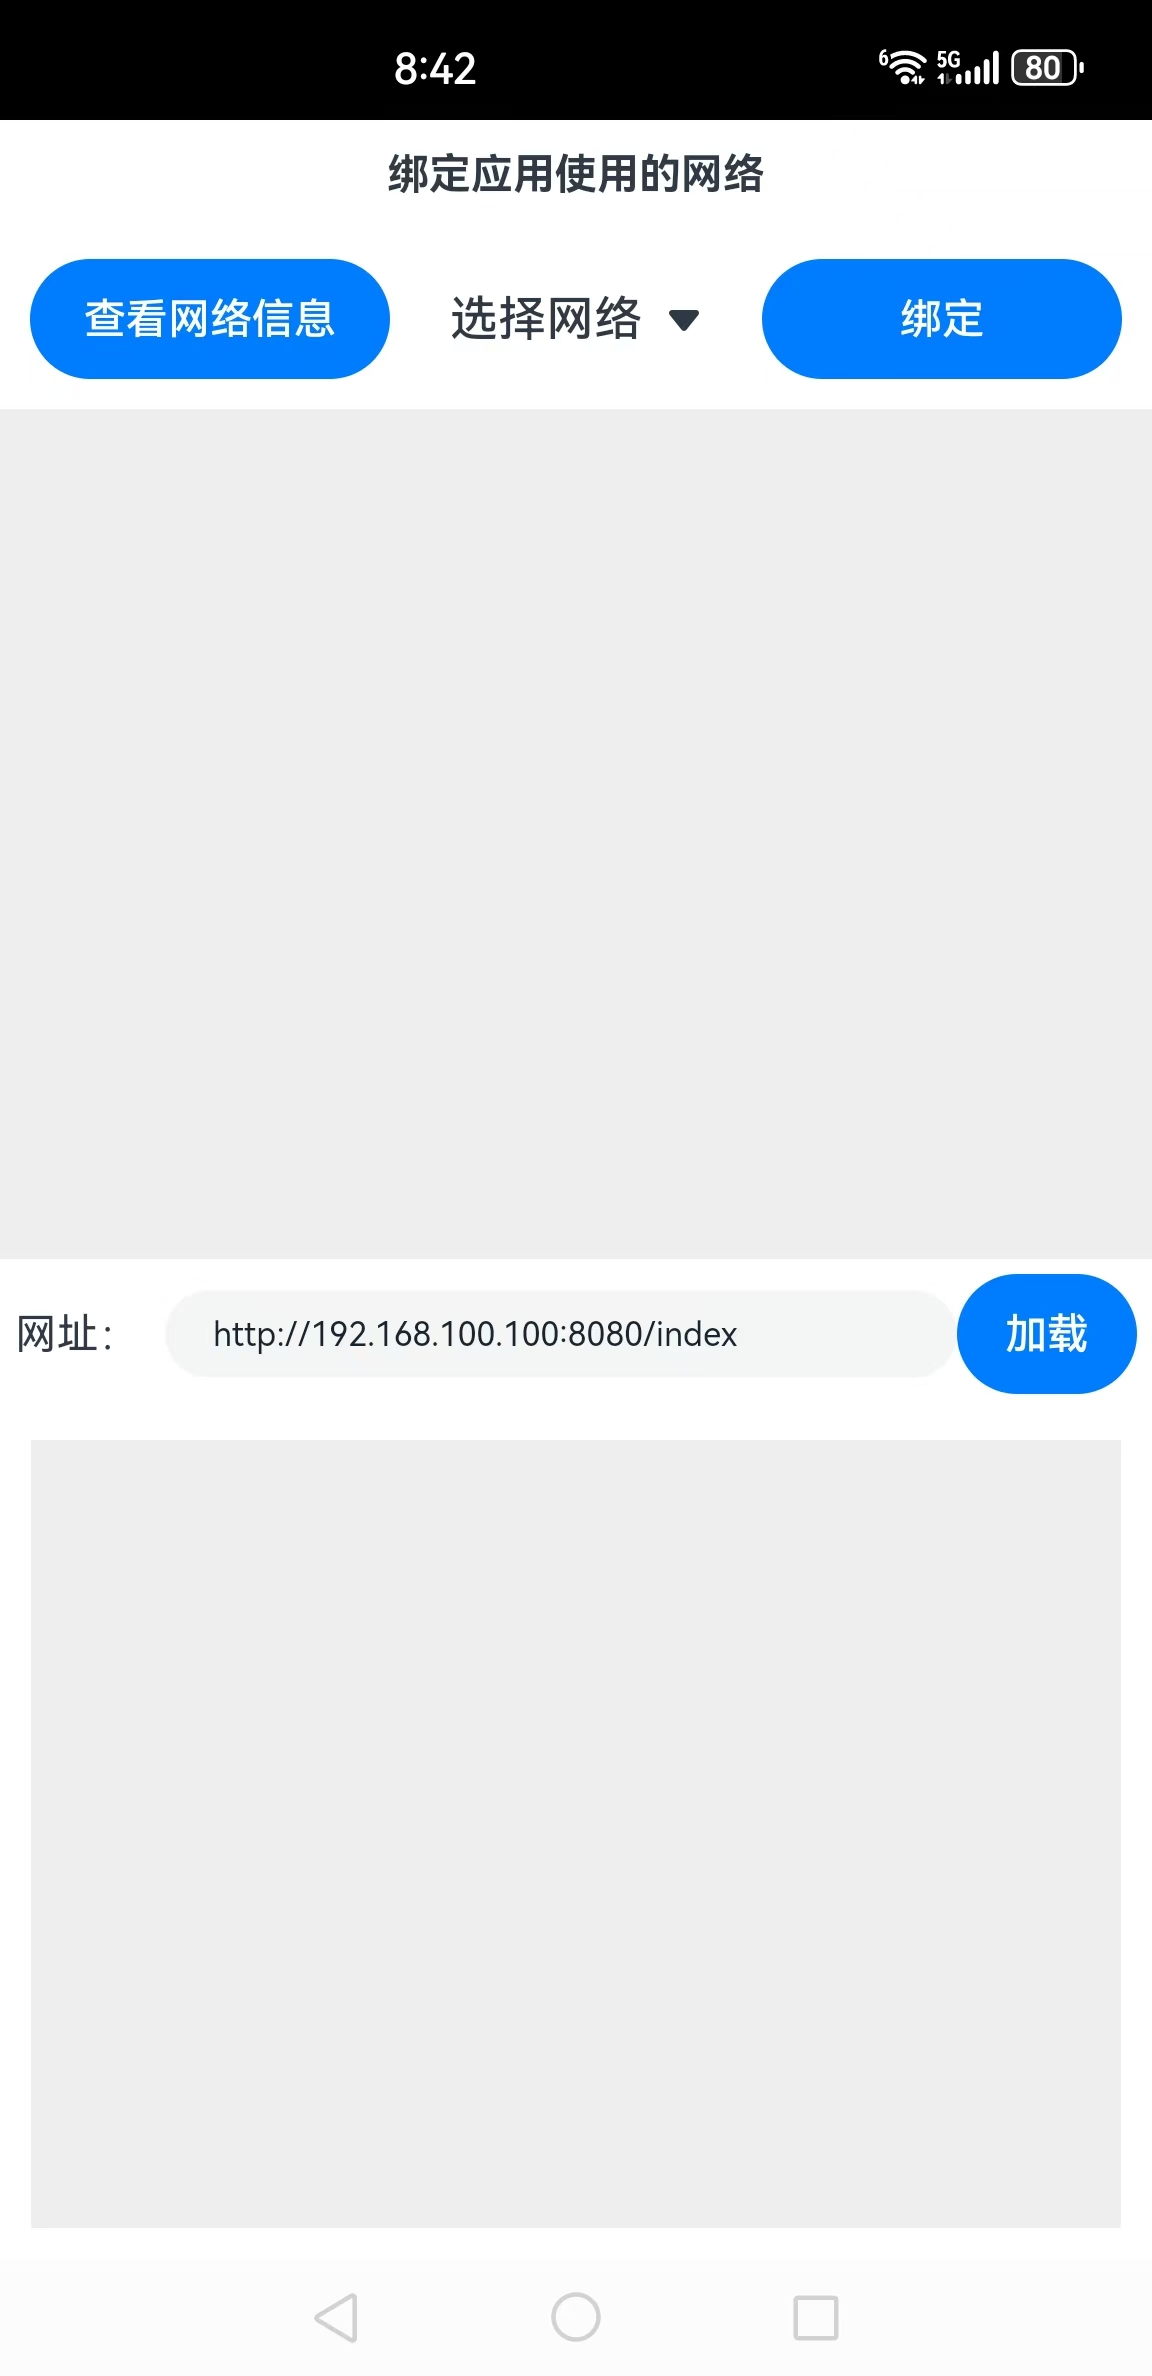
下面详细介绍创建该应用的步骤。
步骤1:创建Empty Ability项目。
步骤2:在module.json5配置文件加上对权限的声明:
"requestPermissions": [{"name": "ohos.permission.GET_NETWORK_INFO"},{"name": "ohos.permission.INTERNET"}]这里添加了获取WIFI信息以及访问互联网的权限。
步骤3:在Index.ets文件里添加如下的代码:
import connection from '@ohos.net.connection';
import web_webview from '@ohos.web.webview'
@Entry
@Component
struct Index {//连接、通讯历史记录@State msgHistory: string = ''scroller: Scroller = new Scroller()//网络类型列表@State netShowArray: Array<SelectOption> = new Array<SelectOption>()//网络句柄数组netHandleArray: Array<connection.NetHandle> = new Array<connection.NetHandle>()//选中的网络序号selectNetIndx: number = 0//要测试的网址@State webUrl: string = "http://192.168.100.100:8080/index"//显示网页的控制器controller: web_webview.WebviewController = new web_webview.WebviewController()
build() {Row() {Column() {Text("绑定应用使用的网络").fontSize(14).fontWeight(FontWeight.Bold).width('100%').textAlign(TextAlign.Center).padding(10)
Flex({ justifyContent: FlexAlign.SpaceBetween, alignItems: ItemAlign.Center }) {Button("查看网络信息").width(120).fontSize(14).flexGrow(0).onClick(() => {this.ShowNetInfo()})
Select(this.netShowArray).width(100).value("选择网络").flexGrow(1).onSelect((index, value) => {this.selectNetIndx = index})
Button("绑定").width(120).fontSize(14).flexGrow(0).onClick(() => {connection.setAppNet(this.netHandleArray[this.selectNetIndx]).then(() => {this.msgHistory += "绑定成功\r\n"}).catch((error) => {this.msgHistory += "绑定出错" + error.message + "\r\n"})})}.width('100%').padding(10)
Scroll(this.scroller) {Text(this.msgHistory).textAlign(TextAlign.Start).fontSize(10).padding(10).width('100%').backgroundColor(0xeeeeee)}.align(Alignment.Top).backgroundColor(0xeeeeee).height(200).flexGrow(1).scrollable(ScrollDirection.Vertical).scrollBar(BarState.On).scrollBarWidth(20)
Flex({ justifyContent: FlexAlign.Start, alignItems: ItemAlign.Center }) {Text("网址:").fontSize(14).width(50).flexGrow(0)
TextInput({ text: this.webUrl }).onChange((value) => {this.webUrl = value}).width(110).fontSize(11).flexGrow(1)
Button("加载").onClick(() => {this.controller.loadUrl(this.webUrl);}).width(60).fontSize(14).flexGrow(0)}.width('100%').padding(5)
Web({ src: this.webUrl, controller: this.controller }).padding(10).width('100%').backgroundColor(0xeeeeee).height(200).flexGrow(1)}.width('100%').justifyContent(FlexAlign.Start).height('100%')}.height('100%')}
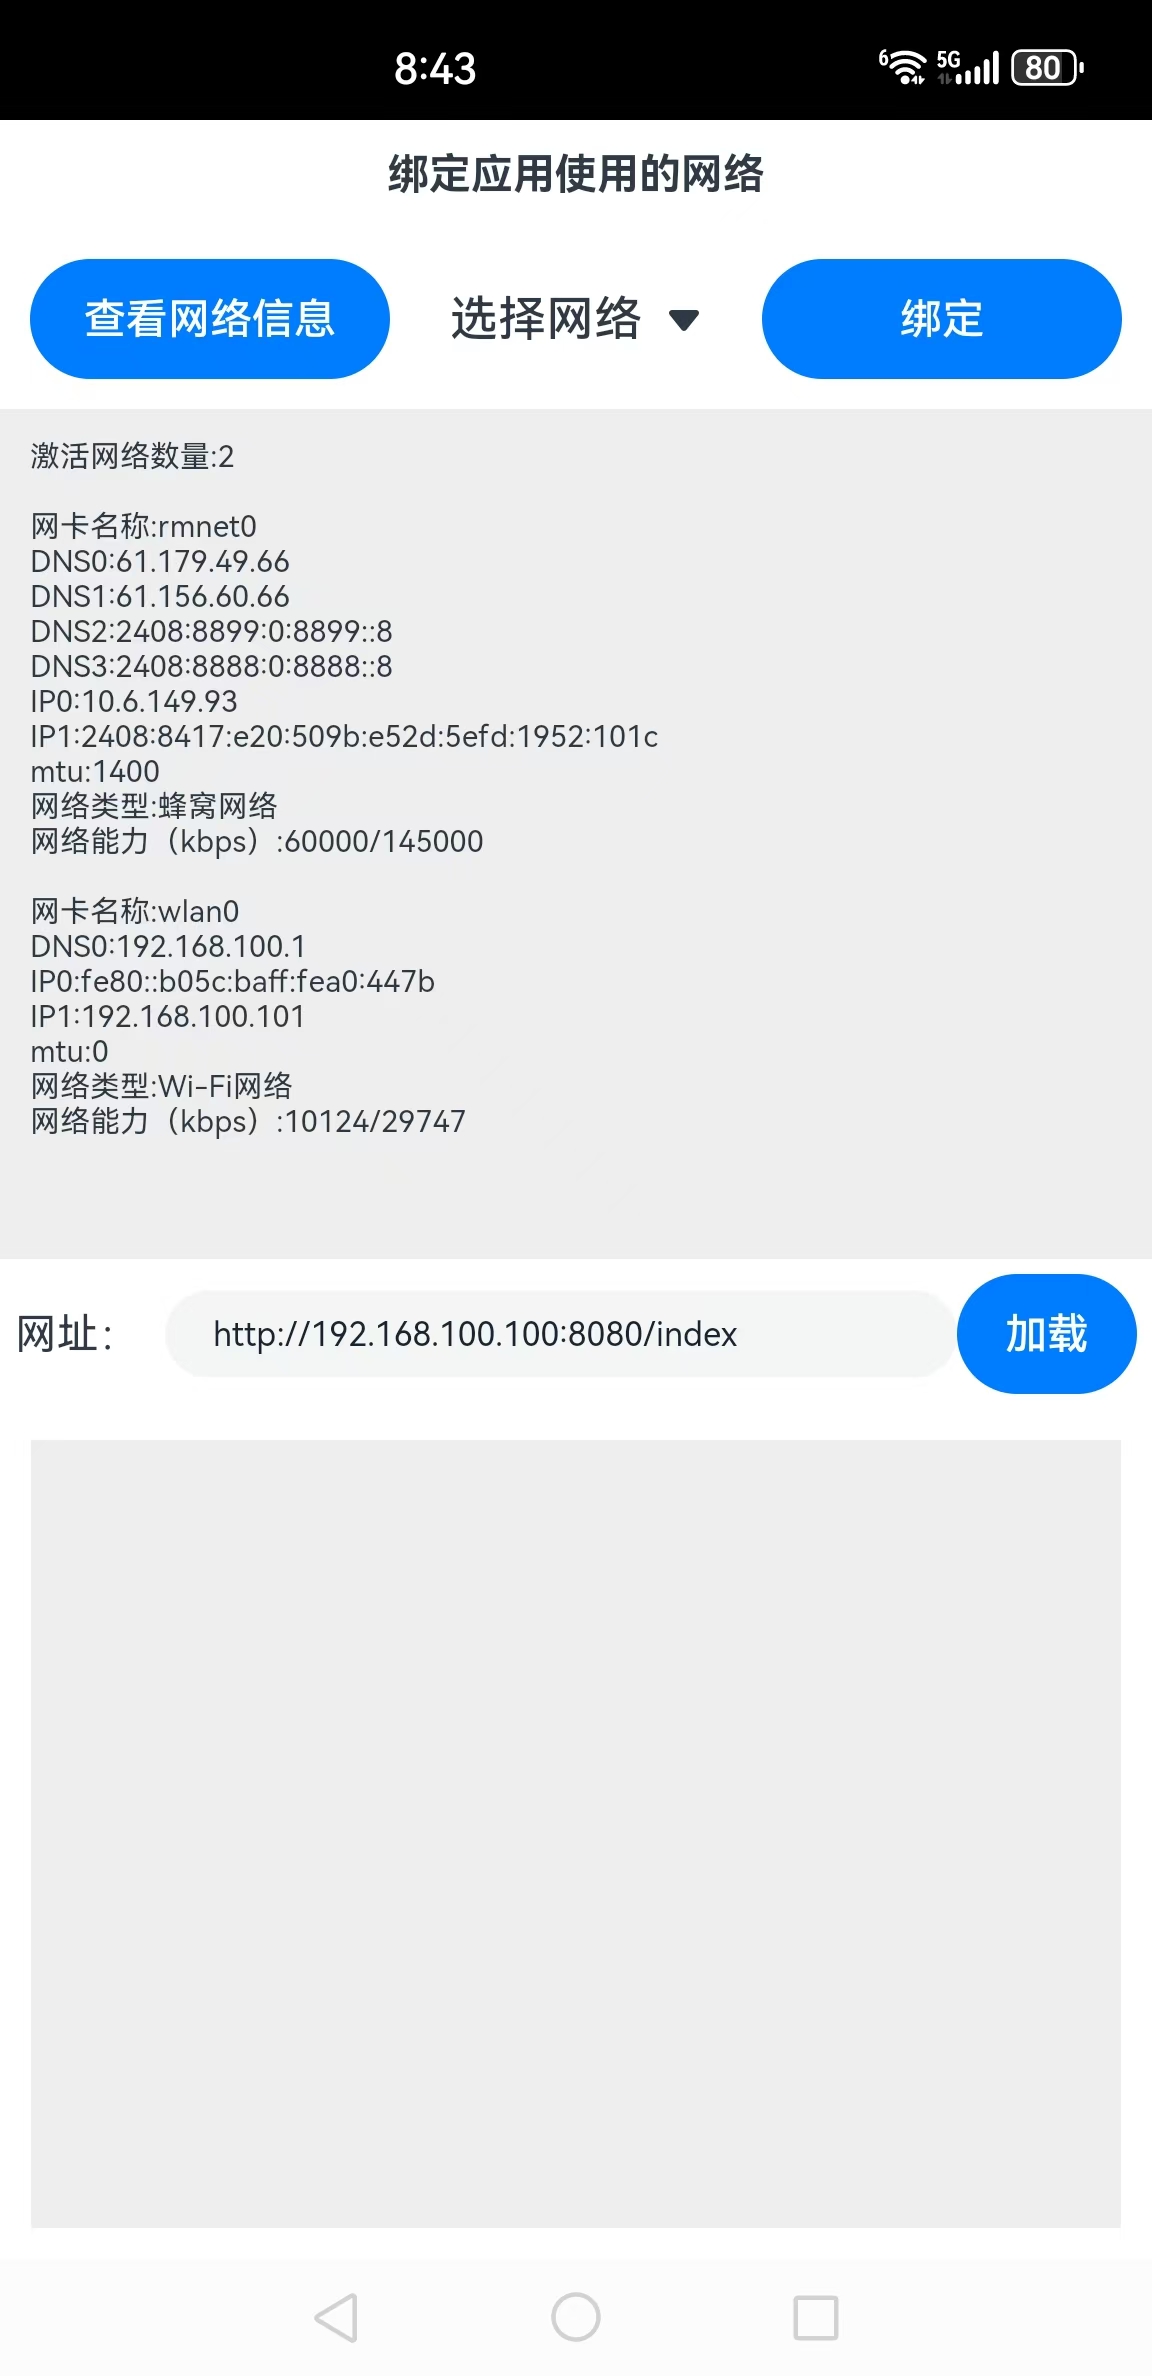
showConnectionPropInfo(connProp: connection.ConnectionProperties) {this.msgHistory += `网卡名称:${connProp.interfaceName}\r\n`for (let i = 0; i < connProp.dnses.length; i++) {this.msgHistory += `DNS${i}:${connProp.dnses[i].address}\r\n`}
for (let i = 0; i < connProp.linkAddresses.length; i++) {this.msgHistory += `IP${i}:${connProp.linkAddresses[i].address.address}\r\n`}
this.msgHistory += `mtu:${connProp.mtu}\r\n`}
showNetCapInfo(connCap: connection.NetCapabilities) {
let netType = ""if (connCap.bearerTypes[0].valueOf() == 0) {netType = "蜂窝网络"} else if (connCap.bearerTypes[0].valueOf() == 1) {netType = "Wi-Fi网络"}else if (connCap.bearerTypes[0].valueOf() == 3) {netType = "以太网网络"}//添加网络类型到下拉列表this.netShowArray.push({ value: netType })this.msgHistory += `网络类型:${netType}\r\n`this.msgHistory += `网络能力(kbps):${connCap.linkUpBandwidthKbps}/${connCap.linkDownBandwidthKbps}\r\n`}
//显示网络信息async ShowNetInfo() {this.netHandleArray = await connection.getAllNets();this.msgHistory += `激活网络数量:${this.netHandleArray.length}\r\n\r\n`
//清空下拉列表元素this.netShowArray.splice(0, this.netShowArray.length);
for (let i = 0; i < this.netHandleArray.length; i++) {let connProp = await connection.getConnectionProperties(this.netHandleArray[i])this.showConnectionPropInfo(connProp)
let connCap = await connection.getNetCapabilities(this.netHandleArray[i])this.showNetCapInfo(connCap)this.msgHistory += "\r\n"}}
}步骤4:编译运行,最好使用真机。
步骤5:单击“查看网络信息”按钮,列出当前网络信息,截图如下所示:
步骤6:在“选择网络”选择网络类型,比如“蜂窝网络”,然后单击“绑定”按钮,如图所示:
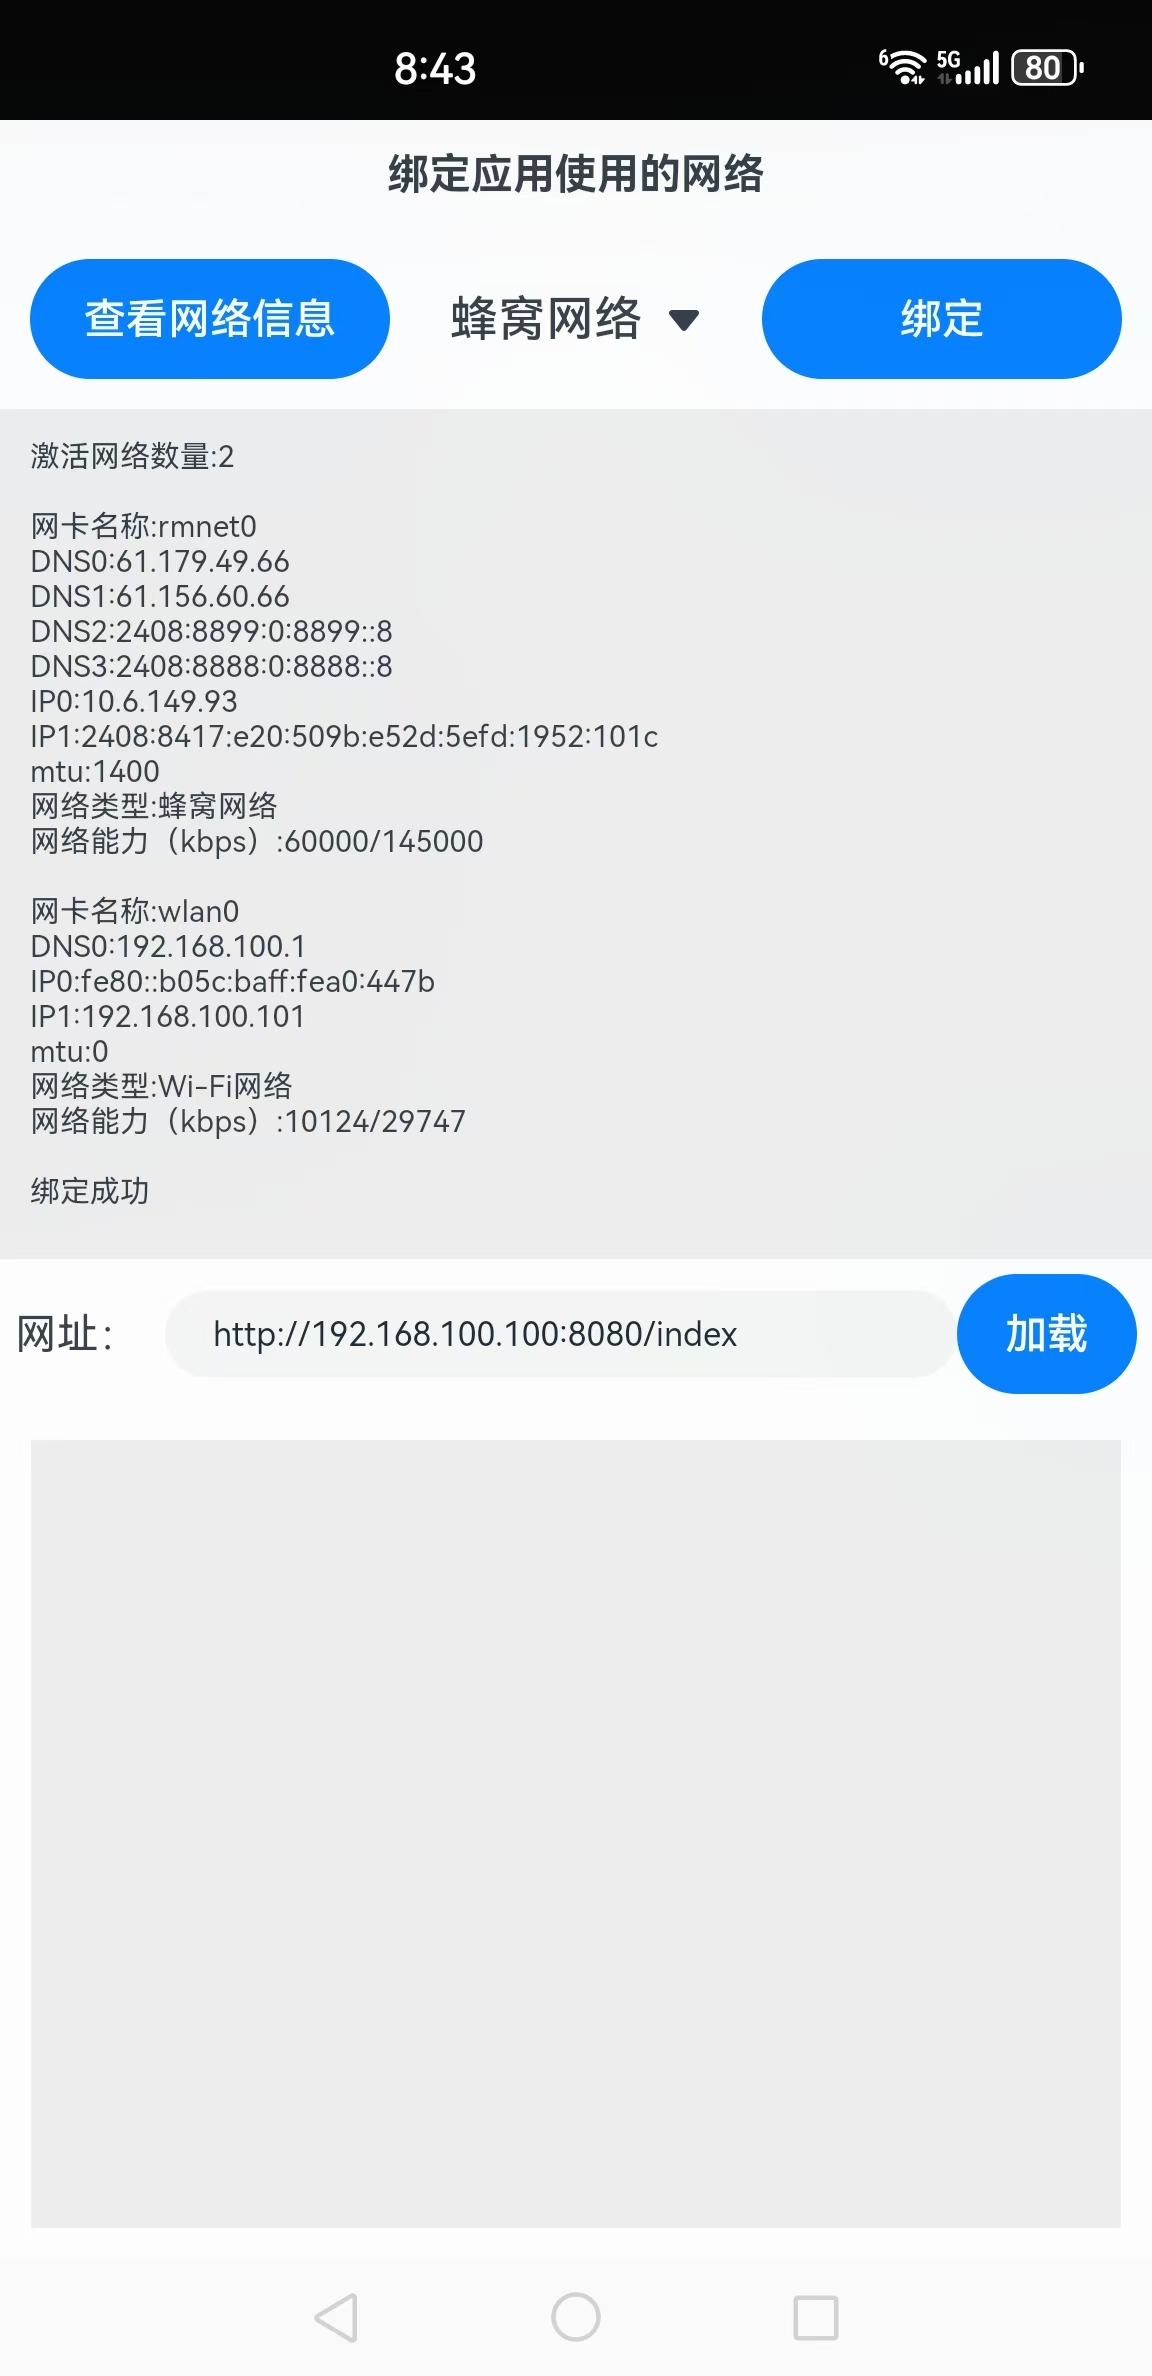
这样就就绑定到了指定的网络。
步骤7:输入特定的网址,然后单击“加载”按钮既可测试当前绑定的网络。
3. 注意事项
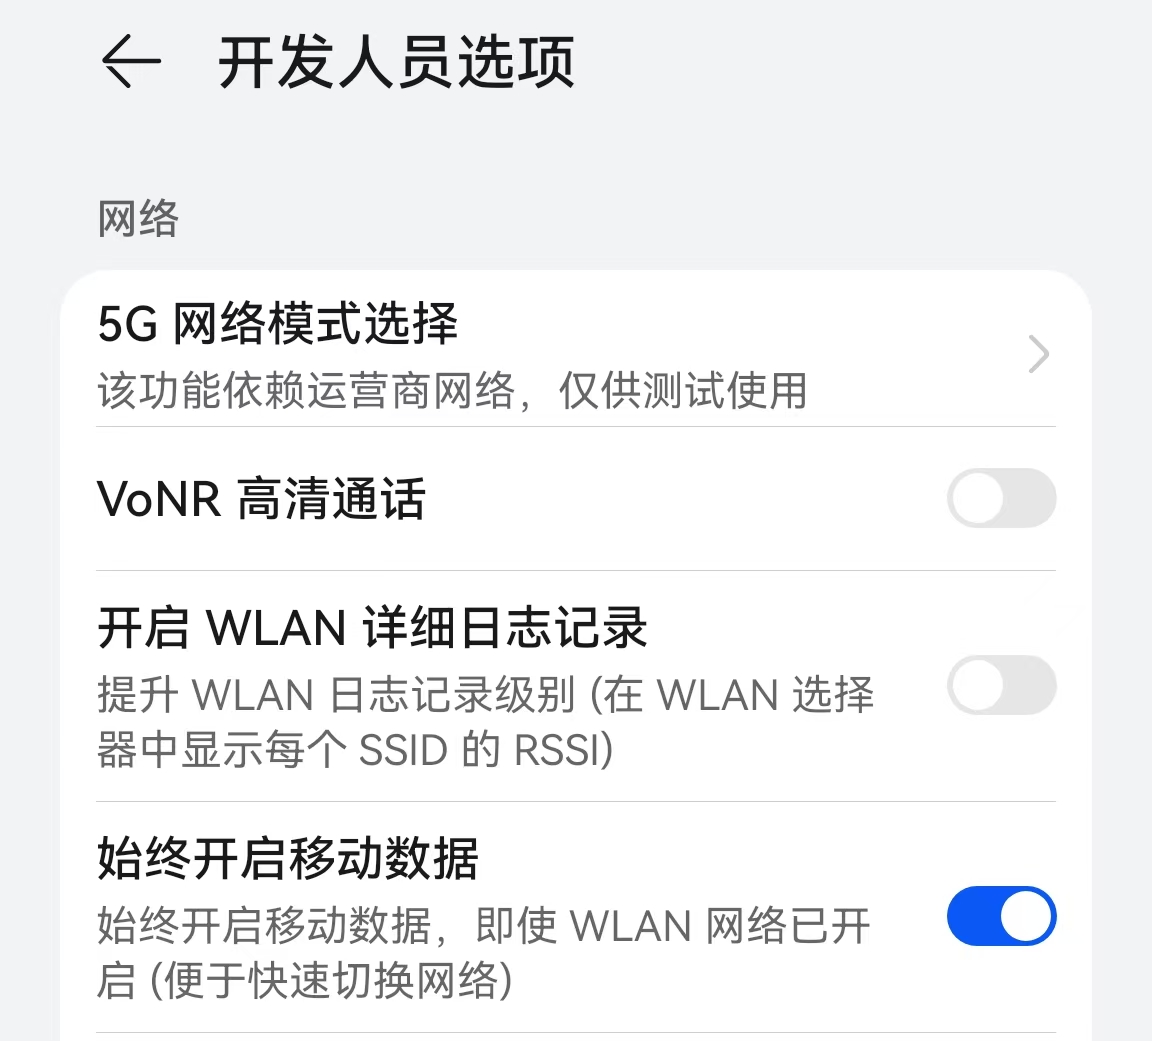
笔者手机默认情况下只有一个激活的网络,可以在开发人员选项下选择“始终开启移动数据”,这样就可以列出多个网络,如图所示:
:
(本文作者原创,除非明确授权禁止转载)
本文源码地址:
https://gitee.com/zl3624/harmonyos_network_samples/tree/master/code/others/SpecifyAppNetworkType
本系列源码地址:
https://gitee.com/zl3624/harmonyos_network_samples


