在实际开发中,经常会定义一些公共组件,提供给各个项目团队使用。而在springboot的项目中,一般会将这些公共组件封装为springboot的starter。
1.命名规范
Spring官方Starter通常命名为 spring-boot-starter-{name}
如:spring-boot-starter-web
Spring官方建议非官方Starter命名应遵循 {name}-spring-boot-starter的格式:
如 mybatis-spring-boot-starter。
2.首先创建一个SpringBoot基础工程
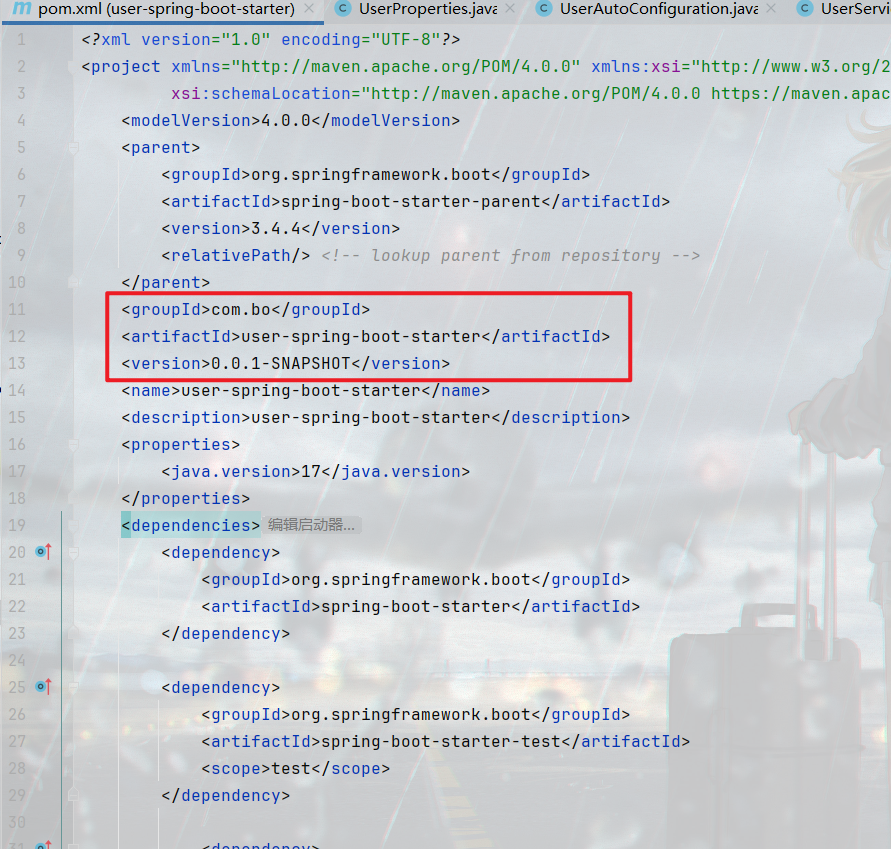
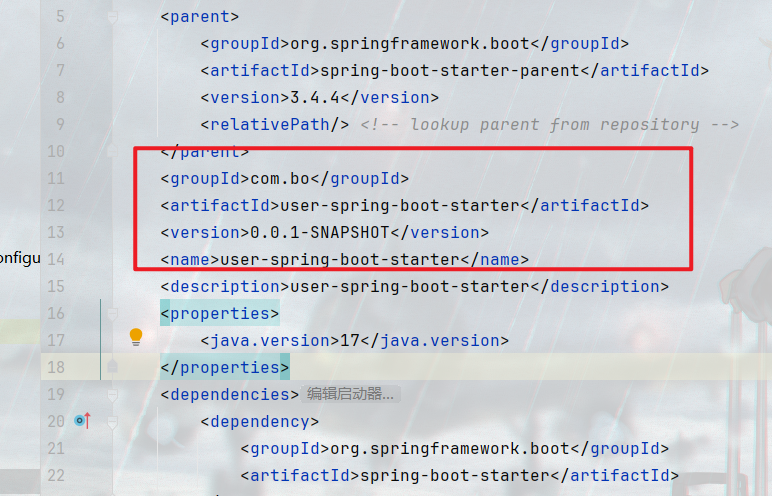
注意生成启动类pom坐标可以如图位置修改
pom文件如下
<dependencies><dependency><groupId>org.springframework.boot</groupId><artifactId>spring-boot-starter</artifactId></dependency><dependency><groupId>org.springframework.boot</groupId><artifactId>spring-boot-starter-test</artifactId><scope>test</scope></dependency><dependency><groupId>org.springframework.boot</groupId><artifactId>spring-boot-starter-web</artifactId></dependency><dependency><groupId>org.projectlombok</groupId><artifactId>lombok</artifactId><optional>true</optional></dependency></dependencies>3.创建自动配置类
工程下创建config包,创建UserAutoConfiguratio类
UserAutoConfiguratio代码:
import org.springframework.beans.factory.annotation.Autowired;
import org.springframework.boot.autoconfigure.condition.ConditionalOnClass;
import org.springframework.boot.autoconfigure.condition.ConditionalOnMissingBean;
import org.springframework.boot.context.properties.EnableConfigurationProperties;
import org.springframework.context.annotation.Bean;
import org.springframework.context.annotation.Configuration;@Configuration
@ConditionalOnClass(UserService.class)
@EnableConfigurationProperties(UserProperties.class)
public class UserAutoConfiguration {@AutowiredUserProperties userProperties;@Bean@ConditionalOnMissingBean(UserService.class)public UserService userService(){//将userService的字段赋值并注入到ioc容器return new UserService(userProperties.getUserName(), userProperties.getHobby());}
}
这个类作用是读取application.yml的配置属性
4.创建配置类:UserProperties
继续在config包下,创建UserAutoConfiguratio类
import lombok.Data;
import org.springframework.boot.context.properties.ConfigurationProperties;
import org.springframework.context.annotation.Configuration;/*** @author qinbo* @version 1.0* @description: TODO* @date 2025/4/17 23:00*/
@Configuration
@ConfigurationProperties(prefix = "user")
@Data
public class UserProperties {String userName;String hobby;
}
这个类作用是接收yml文件的属性,得到映射
注意yml的写法
user:username: adminhobby: 123456
5.业务类:UserService
继续在config包下,创建UserService类
import lombok.AllArgsConstructor;
import lombok.Data;
import lombok.NoArgsConstructor;@Data
@AllArgsConstructor
@NoArgsConstructor
public class UserService {String name;String hobby;public String test(){System.out.println("name"+name+"\t\thobby"+hobby);return "this is test method";}
}
这个类就是处理业务
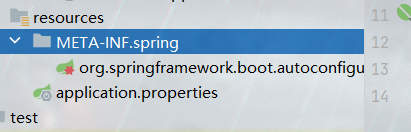
6.创建META-INF/spring/org.springframework.boot.autoconfigure.AutoConfiguration.imports文件
在resources目录下创建
成功后如下图
这个地方博主掉坑里了/(ㄒoㄒ)/~~
里面编写自动配置类的路径(例如)
com.bo.userstatetr.config.UserAutoConfiguration
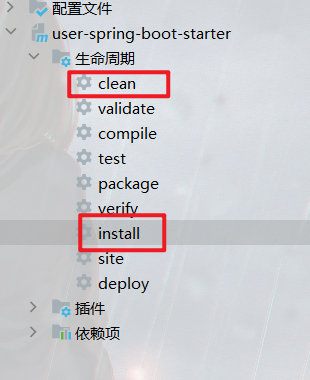
最后就是通过clear install了,把jar包打到本地仓库
现在starter已经打包完成,那么我们如何在另一个boot项目中使用他
(1)导入坐标依赖
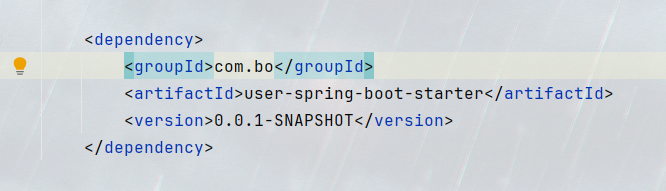
这就是之前项目的pom文件
在另一个项目中yml进行配置属性

最后就是依赖注入进行调用
import com.bo.userstatetr.config.UserService;
import org.junit.jupiter.api.Test;
import org.springframework.beans.factory.annotation.Autowired;
import org.springframework.boot.test.context.SpringBootTest;@SpringBootTest
class ExceldemoApplicationTests {@AutowiredUserService userService;@Testvoid contextLoads() {userService.test();}}
)

)


