简介
在OpenAI推出GPT系列大模型以后,市场上各种类似的大模型也层出不穷,这些大模型也基本都会兼容OpenAI的接口,在开发基于大模型的应用时,选择使用OpenAI接口作为和后端大模型通讯的标准,可以更好的适配不同厂家的模型。本节将开发一个简单的智能助手,可以支持OpenAI兼容的大模型作为后端使用,本示例将演示如何使用RCP模块调用OpenAI兼容接口,如何把一个对象实例转换为Json字符串作为传递的参数,以及在接收到HTTP响应的字符串后,如何转换为对象实例。
1. 智能助手演示
本示例运行后的界面如图所示:
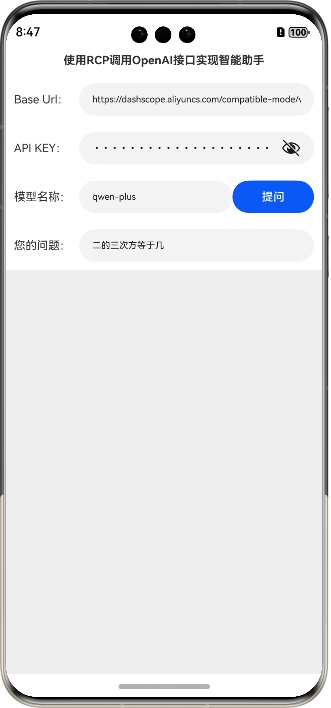
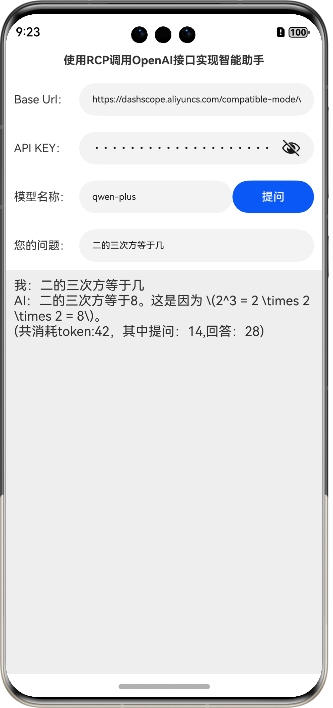
输入使用的模型信息,包括BaseUrl、API-KEY以及模型名称,示例中使用的是阿里的百炼大模型平台,读者可以根据实际需要选择合适的大模型。输入模型信息后,再输入要提问的问题,然后单击“提问”按钮就可以调用大模型的接口了,提问后的响应界面如下所示:
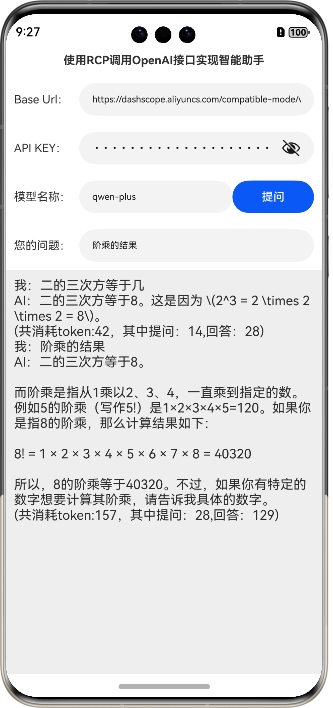
当然,也可以继续提问,助手会继续回答
2. 智能助手示例编写
下面详细介绍创建该示例的步骤。
步骤1:创建Empty Ability项目。
步骤2:在module.json5配置文件加上对权限的声明:
"requestPermissions": [{"name": "ohos.permission.INTERNET"}]
这里添加了访问互联网的权限。
步骤3:添加OpenAI.ets文件定义OpenAI接口需要的类型,代码如下:
//指定角色提供的消息
export class Message {//角色,在OpenAI里一般有system、user、assistant三种,这里只用到了user和assistantpublic role: string = ""public content: string = ""constructor(role: string, content: string) {this.role = rolethis.content = content}
}//提交给AI的问题
export class ChatInfo {public model: string = ""public messages: Array<Message> = new Array()constructor(model: string, messages: Array<Message>) {this.model = modelthis.messages = messages}
}//AI的一个回答
export class Choice {public finish_reason: string = ""public message: Message = new Message("", "")constructor(finish_reason: string, message: Message) {this.finish_reason = finish_reasonthis.message = message}
}//Token消耗情况
export class Usage {public prompt_tokens: number = 0public completion_tokens: number = 0public total_tokens: number = 0constructor(prompt_tokens: number, completion_tokens: number, total_tokens: number) {this.prompt_tokens = prompt_tokensthis.completion_tokens = completion_tokensthis.total_tokens = total_tokens}
}//AI正常返回的信息
export class ChatResponse {public choices: Array<Choice> = new Array()public object: string = ""public usage: Usage = new Usage(0, 0, 0)public created: number = 0public system_fingerprint: string = ""public model: string = ""public id: string = ""constructor(choices: Array<Choice>, object: string, usage: Usage, created: number, system_fingerprint: string, model: string, id: string) {this.choices = choicesthis.object = objectthis.usage = usagethis.created = createdthis.system_fingerprint = system_fingerprintthis.model = modelthis.id = id}
}
步骤4:在Index.ets文件里添加如下的代码:
import { rcp } from '@kit.RemoteCommunicationKit';
import { BusinessError } from '@kit.BasicServicesKit';
import { ChatInfo, ChatResponse, Message } from './OpenAI';
import { ArrayList } from '@kit.ArkTS';@Entry
@Component
struct Index {@State title: string = '使用RCP调用OpenAI接口实现智能助手';//连接、通讯历史记录@State msgHistory: string = ''//提问的问题@State question: string = "二的三次方等于几"//基地址@State baseUrl: string = "https://dashscope.aliyuncs.com/compatible-mode/v1"//API KEY@State apiKey: string = "sk-b7f3f4ec7a1845159de1a1bcf27aad1a"//模型名称@State modelName: string = "qwen-plus"chatHistory: ArrayList<Message> = new ArrayList()chatAPI: string = "/chat/completions"scroller: Scroller = new Scroller()build() {Row() {Column() {Text(this.title).fontSize(14).fontWeight(FontWeight.Bold).width('100%').textAlign(TextAlign.Center).padding(10)Flex({ justifyContent: FlexAlign.Start, alignItems: ItemAlign.Center }) {Text("Base Url:").fontSize(14).width(80)TextInput({ text: this.baseUrl }).onChange((value) => {this.baseUrl = value}).width(110).fontSize(11).flexGrow(1)}.width('100%').padding(10)Flex({ justifyContent: FlexAlign.Start, alignItems: ItemAlign.Center }) {Text("API KEY:").fontSize(14).width(80)TextInput({ text: this.apiKey }).onChange((value) => {this.apiKey = value}).width(110).type(InputType.Password).fontSize(11).flexGrow(1)}.width('100%').padding(10)Flex({ justifyContent: FlexAlign.End, alignItems: ItemAlign.Center }) {Text("模型名称:").fontSize(14).width(80)TextInput({ text: this.modelName }).onChange((value) => {this.modelName = value}).width(110).fontSize(11).flexGrow(1)Button("提问").onClick(() => {this.chat()}).width(100).fontSize(14)}.width('100%').padding(10)Flex({ justifyContent: FlexAlign.Start, alignItems: ItemAlign.Center }) {Text("您的问题:").fontSize(14).width(80)TextInput({ text: this.question }).onChange((value) => {this.question = value}).width(110).fontSize(11).flexGrow(1)}.width('100%').padding(10)Scroll(this.scroller) {Text(this.msgHistory).textAlign(TextAlign.Start).padding(10).width('100%').backgroundColor(0xeeeeee)}.align(Alignment.Top).backgroundColor(0xeeeeee).height(300).flexGrow(1).scrollable(ScrollDirection.Vertical).scrollBar(BarState.On).scrollBarWidth(20)}.width('100%').justifyContent(FlexAlign.Start).height('100%')}.height('100%')}//对话async chat() {let cfg: rcp.SessionConfiguration = {headers: {'Authorization': `Bearer ${this.apiKey}`,'Content-Type': 'application/json'}}let chatInfo = this.getChatInfo()let postInfo = JSON.stringify(chatInfo)const session = rcp.createSession(cfg);session.post(this.baseUrl+this.chatAPI, postInfo).then(resp => {if(resp.statusCode==200){let chatResp =  resp.toJSON() as ChatResponse;this.msgHistory += `我:${this.question}\r\n`this.msgHistory += `AI:${chatResp.choices[0].message.content}\r\n`this.msgHistory += `(共消耗token:${chatResp.usage.total_tokens},其中提问:${chatResp.usage.prompt_tokens},回答:${chatResp.usage.completion_tokens})\r\n`}}).catch((err: BusinessError) => {console.error(`err: err code is ${err.code}, err message is ${JSON.stringify(err)}`);});}//获取提交给AI的问题getChatInfo() {let newMessage = new Message("user", this.question)this.chatHistory.add(newMessage)let chatInfo: ChatInfo = new ChatInfo(this.modelName, this.chatHistory.convertToArray())return chatInfo}
}
步骤5:编译运行,可以使用模拟器或者真机。
步骤6:按照本节第1部分“智能助手演示”操作即可。
3. 代码分析
在OpenAI.ets文件里定义了OpenAI兼容接口需要的类型,理解这一部分代码需要读者仔细研究OpenAI接口的定义,这里就不展开了。在调用大模型HTTP接口提问的时候,需要传递的参数形式如下所示(以通义千问为例):
curl --location 'https://dashscope.aliyuncs.com/compatible-mode/v1/chat/completions' \
--header "Authorization: Bearer $DASHSCOPE_API_KEY" \
--header 'Content-Type: application/json' \
--data '{"model": "qwen-plus","messages": [{"role": "system","content": "You are a helpful assistant."},{"role": "user", "content": "你是谁?"}]
}'
也就是说要传递两个首部,其中一个包含API_KEY信息,另外还需要在body中传递Json格式的提问信息。定义首部的代码如下:
let cfg: rcp.SessionConfiguration = {headers: {'Authorization': `Bearer ${this.apiKey}`,'Content-Type': 'application/json'}}
这里把首部信息放入了创建Session时传递的参数里。传递作为body的提问信息代码如下:
let chatInfo = this.getChatInfo()let postInfo = JSON.stringify(chatInfo)const session = rcp.createSession(cfg);session.post(this.baseUrl+this.chatAPI, postInfo)
这里把提问信息的实例chatInfo通过JSON.stringify函数转为了Json字符串,然后把这个字符串通过session.post函数传递给了大模型。大模型响应问题的时候,返回的也是字符串,为方便后续调用,把它转为了ChatResponse类型的实例,代码如下所示:
session.post(this.baseUrl+this.chatAPI, postInfo).then(resp => {if(resp.statusCode==200){let chatResp = resp.toJSON() as ChatResponse;this.msgHistory += `我:${this.question}\r\n`this.msgHistory += `AI:${chatResp.choices[0].message.content}\r\n`this.msgHistory += `(共消耗token:${chatResp.usage.total_tokens},其中提问:${chatResp.usage.prompt_tokens},回答:${chatResp.usage.completion_tokens})\r\n`}})
(本文作者原创,除非明确授权禁止转载)
本文源码地址:
https://gitee.com/zl3624/harmonyos_network_samples/tree/master/code/rcp/OpenAIWithRCP
本系列源码地址:
https://gitee.com/zl3624/harmonyos_network_samples

)


