热部署
手动启动热部署
使用热部署需要先导入坐标:
<dependency><groupId>org.springframework.boot</groupId><artifactId>spring-boot-devtools</artifactId><optional>true</optional>
</dependency>
重启(Restart):自定义开发代码,包含类、页面、配置文件等,加载位置restart类加载器
重载(ReLoad):jar包,加载位置base类加载器
热部署会将项目重启,不会重新加载jar包。在idea中进行热部署可以使用快捷键Ctrl + F9
自动启动热部署
设置自动构建项目后,当idea失去焦点5秒后自动启动热部署。
在设置中的Compiler勾选Build project automatically并确认

然后点击CTRL + ALT + SHIFT + /键,选择第一项Registry

进去后将compiler.automake.allow.when.app.running的value勾选上(2022版本之后的idea需要在seting里的Advanced Settings里设置)
热部署范围配置
默认不触发重启的目录列表:
/META-INF/maven
/META-INF/resources
/resources
/static
/public
/templates
自定义不参与重启排除项(写在application配置文件中)
devtools: restart: exclude: public/**,static/**关闭热部署
可以按照上述打开方式关闭热部署
还可以使用系统的setProperty方法设置高优先级属性禁用热部署
public static void main(String[] args) { System.setProperty("spring.devtools.restart.enabled", "false"); SpringApplication.run(SSMPApplication.class);
}
配置高级
@ConfigurationProperties
使用@ConfigurationProperties为第三方bean绑定属性
@Bean
@ConfigurationProperties(prefix = "datasource")
public DruidDataSource dataSource() {DruidDataSource ds = new DruidDataSource();return ds;
}使用@ConfigurationProperties注释警告 可能会有注释警告,可以加入下列坐标
<dependency> <groupId>org.springframework.boot</groupId> <artifactId>spring-boot-configuration-processor</artifactId>
</dependency>
@EnableConfigurationProperties
@EnableConfigurationProperties注解可以将使用@ConfigurationProperties注解对应的类加入Spring容器
@S控pringBootApplication
@EnableConfigurationProperties(ServerConfig.class)
public class DemoApplication {
}
//@Component
@Data
@ConfigurationProperties(prefix = "servers")
public class ServerConfig {
}@EnableConfigurationProperties与@Component不能同时使用
宽松绑定
@ConfigurationProperties绑定属性支持属性名宽松绑定
属性可用驼峰模式、下划线模式、中划线模式、常量模式
宽松绑定不支持注解@Value引用单个属性的方式
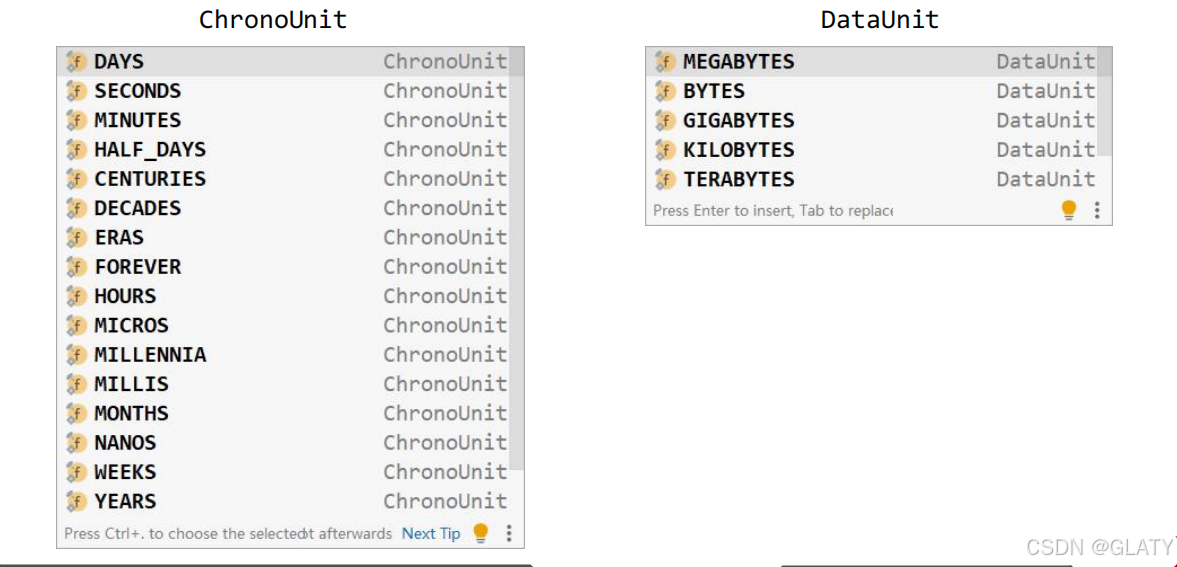
常用计量单位
SpringBoot支持JDK8提供的时间与空间计量单位,时间单位使用@DurationUnit()注解,数据大小单位使用DataSizeUnit()注解
@Component
@Data
@ConfigurationProperties(prefix = "servers")
public class ServerConfig {private String ipAddress;private int port;private long timeout;@DurationUnit(ChronoUnit.MINUTES)private Duration serverTimeOut;@DataSizeUnit(DataUnit.MEGABYTES)private DataSize dataSize;
}
JDK8支持的时间与空间计量单位:
数据校验
开启数据校验有助于系统安全性,J2EE规范中JSR303规范定义了一组有关数据校验相关的API。但不仅要导入JSR303规范坐标还要导入Hibernate校验框架对应坐标,因为JSR303规范只是一个接口。
<!--导入JSR303规范坐标(接口)-->
<dependency><groupId>javax.validation</groupId><artifactId>validation-api</artifactId>
</dependency>
<!--导入JSR303规范的具体实现-->
<dependency><groupId>org.hibernate.validator</groupId><artifactId>hibernate-validator</artifactId>
</dependency>
对Bean开启校验功能
@Component
@Data
@ConfigurationProperties(prefix = "servers")
@Validated
public class ServerConfig {
}
注意yaml文件中对于数字的定义支持进制书写格式,如需使用字符 串请使用引号明确标注
测试
加载测试专用属性
在启动测试环境时可以通过properties参数设置测试环境专用的属性
@SpringBootTest(classes = Application.class, properties = "server.port=1234")
class TestSpringBoot {}
在启动测试环境时还可以通过args参数设置测试环境专用的传入参数
@SpringBootTest(classes = Application.class, args = "--server.port=1234")
class TestSpringBoot {}
后者的优先级高于前者
加载测试专用配置
使用@Import注解加载当前测试类专用的配置
@Import(MsgConfig.class)  //当有多个时写成数组形式
class TestSpringBoot {@Autowiredprivate String msg;
}
下列是为了上边展示书写格式而配置的一个bean:
@Configuration
public class MsgConfig {@Beanpublic String msg(){return "msg";}
}
加载测试范围配置应用于小范围测试环境
Web环境模拟测试
模拟端口
@SpringBootTest(webEnvironment = SpringBootTest.WebEnvironment.RANDOM_PORT)  //RANDOM_PORT为使用随机端口
public class WebTest {@Testvoid testRandomPort() {}
}
虚拟请求测试(各组成部分信息均可匹配)
@Test
void testWeb(@Autowired MockMvc mvc) throws Exception {//创建虚拟请求,当前访问/hero/indexMockHttpServletRequestBuilder builder = MockMvcRequestBuilders.get("/hero/index");//执行请求ResultActions action = mvc.perform(builder);//匹配执行状态(是否预期值)//定义执行状态匹配器StatusResultMatchers status = MockMvcResultMatchers.status();//定义预期执行状态ResultMatcher ok = status.isOk();//使用本次真实执行结果与预期结果进行比对action.andExpect(ok);//匹配执行结果(是否预期值)//定义执行结果匹配器ContentResultMatchers content = MockMvcResultMatchers.content();//定义预期执行结果ResultMatcher result = content.string("index");//使用本次真实执行结果与预期结果进行比对action.andExpect(result);//匹配执行结果(是否预期值(json))//定义预期执行结果result = content.json("{\"id\":1,\"name\":\"SpringBoot2\"}");//使用本次真实执行结果与预期结果进行比对action.andExpect(result);//虚拟请求响应头匹配HeaderResultMatchers header = MockMvcResultMatchers.header();ResultMatcher resultHeader = header.string("Content-Type", "application/json");action.andExpect(resultHeader);
}
数据层测试回滚
为测试用例添加事务,SpringBoot会对测试用例对应的事务提交操作进行回滚。使用@Transactional注解(可以放在类上,也可以放在方法上)
@SpringBootTest()
@Transactional
public class DaoTest {@Testvoid test(@Autowired MockMvc mvc) throws Exception {}
}
如果想在测试用例中提交事务,可以通过@Rollback注解设置(可以放在类上,也可以放在方法上)
@SpringBootTest()
@Transactional
@Rollback(false)
public class DaoTest {@Testvoid test(@Autowired MockMvc mvc) throws Exception {}
}
测试用例数据设定
测试用例数据通常采用随机值进行测试,使用SpringBoot提供的随机数为其赋值
testCast:book:id: ${random.int} # 随机整数id2: ${random.int(10)} # 10以内随机数type: ${random.int(10,20)} # 10到20随机数uuid: ${random.uuid} # 随机uuidname: ${random.value} # 随机字符串,MD5字符串,32位publishTime: ${random.long} #${random.int}表示随机整数
${random.int(10)}表示10以内的随机数
${random.int(10,20)}表示10到20的随机数
其中()可以是任意字符,例如[],!!均可
数据层解决方案
SQL
现有数据层解决方案技术选型
Druid + MyBatis-Plus + MySQL
数据源:DruidDataSource
持久化技术:MyBatis-Plus / MyBatis
数据库:MySQL
数据源配置
SpringBoot提供了3种内嵌的数据源对象供开发者选择
HikariCP:默认内置数据源对象
Tomcat提供DataSource:HikariCP不可用的情况下,且在web环境中,将使用tomcat服务器配置的数据源对象
Commons DBCP:Hikari不可用,tomcat数据源也不可用,将使用dbcp数据源
通用配置无法设置具体的数据源配置信息,仅提供基本的连接相关配置,如需配置,在下一级配置中设置具体设定
内置持久化解决方案
SpringBoot内置JdbcTemplate持久化解决方案
@SpringBootTest
class Springboot15SqlApplicationTests {@Autowiredprivate JdbcTemplate jdbcTemplate;@Testvoid testJdbc() {String sql = "select * from tbl_book where id = 1";List<Book> query = jdbcTemplate.query(sql, new RowMapper<Book>() {@Overridepublic Book mapRow(ResultSet rs, int rowNum) throws SQLException {Book temp = new Book();temp.setId(rs.getInt("id"));temp.setName(rs.getString("name"));temp.setType(rs.getString("type"));temp.setDescription(rs.getString("description"));return temp;}});System.out.println(query);}
}
使用JdbcTemplate需要导入spring-boot-starter-jdbc
<dependency><groupId>org.springframework.boot</groupId><artifactId>spring-boot-starter-jdbc</artifactId>
</dependency>
JdbcTemplate配置:
spring:jdbc:template:query-timeout: -1 # 查询超时时间 max-rows: 500 # 最大行数 fetch-size: -1 # 缓存行数数据库
SpringBoot提供了3种内嵌数据库供开发者选择,提高开发测试效率
H2
HSQL
Derby
导入H2相关坐标
<!--导入H2相关坐标-->
<dependency><groupId>org.springframework.boot</groupId><artifactId>spring-boot-starter-data-jpa</artifactId>
</dependency>
<dependency><groupId>com.h2database</groupId><artifactId>h2</artifactId><scope>runtime</scope>
</dependency>
设置当前项目为web工程,并配置H2管理控制台参数(控制台在浏览器访问,路径为设置的路径访问用户名sa,默认密码123456)
spring:h2:console:path: /h2enabled: true第一次会报错应为有一些初始值未设置,可以配置一下数据源开启
spring:datasource:driver-class-name: org.h2.Driverurl: jdbc:h2:~/testusername: sapassword: 123456h2:console:path: /h2enabled: trueH2数据库控制台仅用于开发阶段,线上项目请务必关闭控制台功能(将enabled的值设置未false)
NoSQL
市面上常见的NoSQL解决方案
Redis
Mongo
ES
Solr
说明:上述技术通常在Linux系统中安装部署,为降低学习者压力,本课程制作基于Windows版安装所有的软件并基 于Windows版安装的软件进行课程制作
Redis(Windows):
下载:https://github.com/tporadowski/redis/releases
服务端启动命令:redis-server.exe redis.windows.conf
客户端启动命令:redis-cli.exe
springboot整合redis:
导入SpringBoot整合Redis坐标
<dependency><groupId>org.springframework.boot</groupId><artifactId>spring-boot-starter-data-redis</artifactId>
</dependency>
配置Redis(采用默认配置)
redis:host: localhost # 127.0.0.1 port: 6379主机:localhost(默认)
端口:6379(默认)
使用redis:
RedisTemplate提供操作各种数据存储类型的接口API(在使用时要启动服务端)

@SpringBootTest
public class RedisTest {@AutowiredRedisTemplate redisTemplate;@Testvoid Test(){ValueOperations ops = redisTemplate.opsForValue();ops.set("id", 12);System.out.println(ops.get("id"));}
}
除了RedisTemplate还有StringRedisTemplate,在cmd上运行的是以StringRedisTemplate操作的
@Testvoid test2(@Autowired StringRedisTemplate redisTemplate) {ValueOperations<String, String> ops = redisTemplate.opsForValue();ops.set("id", "1");System.out.println(ops.get("id"));}客户端选择默认为lettuce,还可以用jedis,使用jedis需要做相应配置
<dependency><groupId>redis.clients</groupId><artifactId>jedis</artifactId>
</dependency>
spring:redis:host: localhost # 127.0.0.1port: 6379client-type: jedisjedis:pool:max-active: 16lettuce:pool:max-active: 16lettcus与jedis区别:
jedis连接Redis服务器是直连模式,当多线程模式下使用jedis会存在线程安全问题,解决方案可以通过配置连接池使每个连 接专用,这样整体性能就大受影响。
lettcus基于Netty框架进行与Redis服务器连接,底层设计中采用StatefulRedisConnection。 StatefulRedisConnection自身 是线程安全的,可以保障并发访问安全问题,所以一个连接可以被多线程复用。当然lettcus也支持多连接实例一起工作。
MongoDB
MongoDB是一个开源、高性能、无模式的文档型数据库。NoSQL数据库产品中的一种,是最像关系型数据库的非关系型数据库
Windows下载:https://www.mongodb.com/try/download
服务端启动:mongod --dbpath=..\data\db
客户端启动:mongo --host=127.0.0.1 --port=27017
Mongodb基础CRUD:
新增:
db.集合名称.insert/save/insertOne(文档)
修改:
db.集合名称.update(条件,{操作种类:{文档}})
删除:
db.集合名称.remove(条件)
基础查询:
查询全部:db.集合.find();
查第一条:db.集合.findOne()
查询指定数量文档:db.集合.find().limit(10) //查10条文档
跳过指定数量文档:db.集合.find().skip(20) //跳过20条文档
统计:db.集合.count() u 排序:db.集合.sort({age:1}) //按age升序排序
投影:db.集合名称.find(条件,{name:1,age:1}) //仅保留name与age域
条件查询:
基本格式:db.集合.find({条件})
模糊查询:db.集合.find({域名:/正则表达式/}) //等同SQL中的like,比like强大,可以执行正则所有规则
条件比较运算:db.集合.find({域名:{$gt:值}}) //等同SQL中的数值比较操作,例如:name>18
包含查询:db.集合.find({域名:{$in:[值1,值2]}}) //等同于SQL中的in
条件连接查询:db.集合.find({$and:[{条件1},{条件2}]}) //等同于SQL中的and、or
springboot整合mongodb:
导入Mongodb驱动
<dependency><groupId>org.springframework.boot</groupId><artifactId>spring-boot-starter-data-mongodb</artifactId>
</dependency>
配置客户端(localhost后跟的是数据库的名称)
spring:data:mongodb:uri: mongodb://localhost/test操作Mongodb:
操作Mongodb接口对象MongoTemplate
public class MongodbTest {@AutowiredMongoTemplate template;@Testvoid testMongodb(){Hero hero = new Hero("ct", 2, "~", 10);template.insert(hero);System.out.println(template.findAll(Hero.class));}
}
ElasticSearch(ES)
Windows版ES下载:https://www.elastic.co/cn/downloads/elasticsearch
Windows版ES启动:elasticsearch.bat
IK分词器(插件,放在ES的plugins目录下):Releases · infinilabs/analysis-ik · GitHub
ElasticSearch基础操作:
遵从restful风格,没有数据库,有索引(可以类比为数据库)
创建索引(以books索引为例)
PUT http://localhost:9200/books
查询索引(以books索引为例)
GET http://localhost:9200/books
删除索引(以books索引为例)
DELETE http://localhost:9200/books
创建索引并指定规则(在put请求的请求体中,以json格式发送)
{"mappings": {"properties": {"id": {"type": "keyword"},"name": {"type": "text","analyzer": "ik_max_word","copy_to": "all"},"type": {"type": "keyword"},"description": {"type": "text","analyzer": "ik_max_word","copy_to": "all"},"all": {"type": "text","analyzer": "ik_max_word"}}}
}
创建文档(内容放在PUT的请求体里)
使用系统生成id :
POST http://localhost:9200/books/_doc
使用指定id:
POST http://localhost:9200/books/_create/1使用指定id,不存在创建,存在更新(版本递增):
POST http://localhost:9200/books/_doc/1
{"name": "springboot","type": "springboot","description": "springboot"
}
查询文档
查询单个文档
GET http://localhost:9200/books/_doc/1
查询全部文档
GET http://localhost:9200/books/_search
条件查询
GET http://localhost:9200/books/_search?q=name:springboot
删除文档
DELETE http://localhost:9200/books/_doc/1
修改文档(全量修改)
PUT http://localhost:9200/books/_doc/1
{"name": "springboot","type": "springboot","description": "springboot"
}
修改文档(部分修改)
POST http://localhost:9200/books/_update/1
{"doc": {"name": "springboot"}
}
springboot整合ElasticSearch
导坐标:
<dependency><groupId>org.springframework.boot</groupId><artifactId>spring-boot-starter-data-elasticsearch</artifactId>
</dependency>
配置(默认为下列设置):
spring:elasticsearch: rest:uris: http://localhost:9200客户端(已被淘汰的):
@SpringBootTest
class Springboot18EsApplicationTests {@Autowiredprivate ElasticsearchRestTemplate template;
}
SpringBoot平台并没有跟随ES的更新速度进行同步更新,ES提供了High Level Client操作ES(高版本的springboot应该会有)
导入坐标(使用高级别的不不能在application里配置)
<dependency><groupId>org.elasticsearch.client</groupId><artifactId>elasticsearch-rest-high-level-client</artifactId>
</dependency>
客户端:
@Test
void test() throws IOException {HttpHost host = HttpHost.create("http://localhost:9200");RestClientBuilder builder = RestClient.builder(host);RestHighLevelClient client = new RestHighLevelClient(builder);//客户端操作 CreateIndexRequest request = new CreateIndexRequest("books");//获取操作索引的客户端对象,调用创建索引操作 client.indices().create(request, RequestOptions.DEFAULT);//关闭客户端 client.close();
}
客户端改进
@SpringBootTest
class TestES{@AutowiredRestHighLevelClient client;@BeforeEachvoid setUp() {this.client = new RestHighLevelClient(RestClient.builder(HttpHost.create("http://localhost:9200")));}@AfterEachvoid tearDown() throws IOException {this.client.close();}@Testpublic void testES() throws IOException {//客户端操作//删除索引client.indices().delete(new DeleteIndexRequest("heroes"), RequestOptions.DEFAULT);//创建索引: 获取操作索引的客户端对象,调用创建索引操作client.indices().create(new CreateIndexRequest("heroes"), RequestOptions.DEFAULT);//添加文档Hero hero1 = new Hero("hero1", 1, "codename1", 10);String json1 = JSON.toJSONString(hero1);IndexRequest indexRequest = new IndexRequest("heroes").id(hero1.getId().toString());indexRequest.source(json1, XContentType.JSON);client.index(indexRequest, RequestOptions.DEFAULT);//批量添加文档List<Hero> bookList = new ArrayList<>();bookList.add(new Hero("hero2", 2, "codename2", 9));bookList.add(new Hero("hero3", 3, "codename2", 8));BulkRequest bulk = new BulkRequest();for (Hero hero : bookList) {indexRequest = new IndexRequest("heroes").id(hero.getId().toString());json1 = JSON.toJSONString(hero);indexRequest.source(json1, XContentType.JSON);bulk.add(indexRequest);}client.bulk(bulk, RequestOptions.DEFAULT);//按id查询文档GetRequest getRequest = new GetRequest("heroes", "1");GetResponse getResponse = client.get(getRequest, RequestOptions.DEFAULT);String json = getResponse.getSourceAsString();System.out.println(json);//按条件查询文档SearchRequest searchRequest = new SearchRequest("heroes");SearchSourceBuilder builder = new SearchSourceBuilder();builder.query(QueryBuilders.termQuery("codeName", "codename2"));searchRequest.source(builder);SearchResponse searchResponse = client.search(searchRequest, RequestOptions.DEFAULT);SearchHits hits = searchResponse.getHits();for (SearchHit hit : hits) {String source = hit.getSourceAsString();Hero hero = JSON.parseObject(source, Hero.class);System.out.println(hero);}}
}
整合第三方技术
缓存
缓存(cache)是一种介于数据永久存储介质与数据应用之间的数据临时存储介质。使用缓存可以有效的减少低速数据读取过程的次数(例如磁盘IO),提高系统性能。
缓存不仅可以用于提高永久性存储介质的数据读取效率,还可以提供临时的数据存储空间
SpringBoot提供了缓存技术,方便缓存使用
缓存使用
导入缓存技术对应的starter
<!--cache-->
<dependency><groupId>org.springframework.boot</groupId><artifactId>spring-boot-starter-cache</artifactId>
</dependency>
启用缓存
@SpringBootApplication
@EnableCaching
public class Application {public static void main(String[] args) {SpringApplication.run(Application.class, args);}
}
使用@Cacheable注解设置当前操作的结果数据进入缓存
@GetMapping("/{id}")
@Cacheable(value = "heroCacheSpace", key = "#id")
public Hero getById(@PathVariable Integer id) {return heroServiceImpl.searchById(id);
}
使用@CachePut注解可以设置为只存不取,可以另写一个方法用@Cacheable来取(调用该方法时要用springboot管理的对象来取,应为使用@Cacheable注解的方法只有归springboot管理时注解才有效,直接调用方法注解不会生效)
@GetMapping("/{id}")
@CachePut(value = "heroCacheSpace", key = "#id")
public Hero getById(@PathVariable Integer id) {return heroServiceImpl.searchById(id);
}
SpringBoot提供的缓存技术除了提供默认的缓存方案,还可以对其他缓存技术进行整合,统一接口,方便缓存技术的开发与管理
Generic
JCache
Ehcache
Hazelcast
Infinispan
Couchbase
Redis
Caffeine
Simple(默认)
常用的还有memcached,但是springboot没有内置整合
除此之外还有jetCache。jetCache对SpringCache进行了封装,在原有功能基础上实现了多级缓存、缓存统计、自动刷新、异步调用、数 据报表等功能
缓存供应商变更(Ehcache)
加入Ehcache坐标(缓存供应商实现)
<!--Ehcache缓存-->
<dependency><groupId>net.sf.ehcache</groupId><artifactId>ehcache</artifactId>
</dependency>
缓存设定为使用Ehcache
spring:cache:type: ehcacheehcache:config: classpath:ehcache.xml提供ehcache配置文件ehcache.xml(使用的缓存空间必须在配置文件里声明)
<?xml version="1.0" encoding="UTF-8"?>
<ehcache xmlns:xsi="http://www.w3.org/2001/XMLSchema-instance"xsi:noNamespaceSchemaLocation="http://ehcache.org/ehcache.xsd" updateCheck="false"><!--默认缓存策略 --><!-- external:是否永久存在,设置为true则不会被清除,此时与timeout冲突,通常设置为false--><!-- diskPersistent:是否启用磁盘持久化--> <!-- maxElementsInMemory:最大缓存数量--><!-- overflowToDisk:超过最大缓存数量是否持久化到磁盘--><!-- timeToIdleSeconds:最大不活动间隔,设置过长缓存容易溢出,设置过短无效果--><!-- timeToLiveSeconds:最大存活时间--><!-- memoryStoreEvictionPolicy:缓存清除策略--><defaultCacheeternal="false"diskPersistent="false"maxElementsInMemory="1000"overflowToDisk="false"timeToIdleSeconds="10"timeToLiveSeconds="10"memoryStoreEvictionPolicy="LRU"/><cachename="heroCacheSpace"eternal="false"diskPersistent="false"maxElementsInMemory="1000"overflowToDisk="false"timeToIdleSeconds="10"timeToLiveSeconds="10"memoryStoreEvictionPolicy="LRU"/>
</ehcache>
缓存供应商变更(redis)
加入redis坐标(缓存供应商实现)
<dependency><groupId>org.springframework.boot</groupId><artifactId>spring-boot-starter-data-redis</artifactId>
</dependency>
设置Redis相关配置
spring:redis:host: localhostport: 6379cache:type: redisredis:use-key-prefix: true # 是否使用前缀名(系统定义前缀名) key-prefix: sms_ # 追加自定义前缀名 time-to-live: 10s # 有效时长 cache-null-values: false # 是否允许存储空值缓存供应商变更(memcached)
下载memcached:https://www.runoob.com/memcached/window-install-memcached.html
安装memcached:使用管理员身份运行cmd指令:memcached.exe -d install
启动服务:memcached.exe -d start
停止服务 :memcached.exe -d stop
memcached客户端选择:
Memcached Client for Java:最早期客户端,稳定可靠,用户群广
SpyMemcached:效率更高
Xmemcached:并发处理更好
SpringBoot未提供对memcached的整合,需要使用硬编码方式实现客户端初始化管理
整合memcached:
加入memcached坐标(缓存供应商实现):
<!--memcached-->
<dependency><groupId>com.googlecode.xmemcached</groupId><artifactId>xmemcached</artifactId><version>2.4.7</version>
</dependency>
配置memcached服务器必要属性:
memcached: # memcached服务器地址servers: localhost:11211 # 连接池的数量poolSize: 10 # 设置默认操作超时opTimeout: 3000创建读取属性配置信息类,加载配置
@Component
@ConfigurationProperties(prefix = "memcached")
@Data
public class XMemcachedProperties {private String servers;private Integer poolSize;private Long opTimeout;
}
创建客户端配置类
@Configuration
public class XMemcachedConfig {@Autowiredprivate XMemcachedProperties xMemcachedProperties;@Beanpublic MemcachedClient getMemcachedClient() throws IOException {MemcachedClientBuilder builder = new XMemcachedClientBuilder(xMemcachedProperties.getServers());builder.setConnectionPoolSize(xMemcachedProperties.getPoolSize());builder.setOpTimeout(xMemcachedProperties.getOpTimeout());return builder.build();}
}
MemcachedClient 的set方法存缓存,get取缓存
@Service
public class HeroServiceImpl implements HeroService {@Autowiredprivate HeroMapper mapper;@Autowiredprivate MemcachedClient memcachedClient;@Overridepublic Hero searchById(Integer id) {Hero hero;try {hero = memcachedClient.get("" + id);} catch (Exception e) {throw new RuntimeException(e);}if (hero != null) {return hero;}hero = mapper.selectById(id);try {memcachedClient.set("" + id, 0, hero);  // key,timeout,value} catch (Exception e) {throw new RuntimeException(e);}return hero;}
}
缓存供应商变更(jetcache)
jetCache设定了本地缓存与远程缓存的多级缓存解决方案
本地缓存(local)
LinkedHashMap
Caffeine
远程缓存(remote)
Redis
Tair
整合jetcache:
加入jetcache坐标(可以不导入cache)
<dependency><groupId>com.alicp.jetcache</groupId><artifactId>jetcache-starter-redis</artifactId><version>2.6.2</version>
</dependency>
配置属性
jetcache:# statIntervalMinutes查看缓存统计报告statIntervalMinutes: 15areaInCacheName: false# 配置本地缓存属性local:default:type: linkedhashmapkeyConvertor: fastjson# 配置远程缓存属性remote:default:type: redishost: localhostport: 6379poolConfig:maxTotal: 50sms:type: redishost: localhostport: 6379poolConfig:maxTotal: 50
使用jetcache缓存:
开启jetcache注解支持
@SpringBootApplication
@EnableCreateCacheAnnotation
public class Application {public static void main(String[] args) {SpringApplication.run(Application.class, args);}
}
使用jetcache
//声明缓存对象
@CreateCache(area = "default",name = "smsCache", expire = 3600,timeUnit = TimeUnit.SECONDS, cacheType = CacheType.REMOTE)
//expire设置时间,默认单位为秒,cacheType指定使用远程缓存或本地缓存
private Cache<String, Hero> jetSMSCache;
public Hero getById(Integer id) {Hero hero;try {//操作缓存,get取hero = jetSMSCache.get("" + id);} catch (Exception e) {throw new RuntimeException(e);}if (hero != null) {return hero;}hero = mapper.selectById(id);try {//操作缓存,put放jetSMSCache.put("" + id, hero);} catch (Exception e) {throw new RuntimeException(e);}return hero;
}
使用方法注解操作缓存:
在使用@EnableCreateCacheAnnotation注解的基础上加上@EnableMethodCache注解
@SpringBootApplication
@EnableCreateCacheAnnotation
@EnableMethodCache(basePackages = "com.glaty.studyspringboot")
//basePackages 可以是一个数组,可以设置多个包
public class Application {public static void main(String[] args) {SpringApplication.run(Application.class, args);}
}
针对查询、更改删除数据有@Cached、@CacheUpdate、@CacheInvalidat三种注解
//查询存入缓存
@Cached(name = "smsCache_", key = "#id", expire = 3600)
@CacheRefresh(refresh = 10,timeUnit = TimeUnit.SECONDS) //隔时刷新缓存数据
public Hero getById(Integer id) {return mapper.selectById(id);
}
//当更新数据时,缓存同步
@Override
@CacheUpdate(name = "smsCache_", key = "#hero.id", value = "#hero")
public boolean update(Hero hero) {return mapper.updateById(hero) > 0;
}
//当删除数据时,缓存同步
@Override
@CacheInvalidate(name = "smsCache_", key = "#id")
public boolean deleteById(Integer id) {return mapper.deleteById(id) > 0;
}
缓存对象必须保障可序列化(让对象实现Serializable接口),且还要添加一些配置(keyConvertor、valueEncoder和valueDecoder)
@Data
@AllArgsConstructor
@NoArgsConstructor
public class Hero implements Serializable {private String name;private Integer id;private String codeName;private Integer ability;
}
jetcache:remote:default:type: redishost: localhostport: 6379valueEncoder: javavalueDecoder: javakeyConvertor: fastjsonpoolConfig:maxTotal: 50j2cache
j2cache是一个缓存整合框架,可以提供缓存的整合方案,使各种缓存搭配使用,自身不提供缓存功能,基于 ehcache + redis 进行整合。
整合j2cache:
加入j2cache坐标,加入整合缓存的坐标
<!--j2cache-->
<dependency><groupId>net.oschina.j2cache</groupId><artifactId>j2cache-spring-boot2-starter</artifactId><version>2.8.0-release</version>
</dependency>
<dependency><groupId>net.oschina.j2cache</groupId><artifactId>j2cache-core</artifactId><version>2.8.4-release</version>
</dependency>
<!--Ehcache缓存-->
<dependency><groupId>net.sf.ehcache</groupId><artifactId>ehcache</artifactId>
</dependency>
配置使用j2cache(application.yml)
j2cache: config-location: j2cache.properties配置一级缓存与二级缓存以及一级缓存数据到二级缓存的发送方式(j2cache.properties)
# 配置1级缓存
j2cache.L1.provider_class=ehcache
ehcache.configXml=ehcache.xml# 配置2级缓存
j2cache.L2.provider_class=net.oschina.j2cache.cache.support.redis.SpringRedisProvider
j2cache.L2.config_section=redis
redis.hosts=localhost:6379# 配置1级缓存数据到2级缓存的广播方式:可以使用redis提供的消息订阅模式,也可以使用jgroups多播实现
j2cache.broadcast=net.oschina.j2cache.cache.support.redis.SpringRedisPubSubPolicy
使用缓存:
@Service
public class HeroServiceImpl implements HeroService {@Autowiredprivate CacheChannel cacheChannel;public Hero getByIdUseCacheChannel(Integer id) {Hero hero;try {//操作缓存,get取hero = JSON.parseObject(cacheChannel.get("sms", String.valueOf(id)).asString(), Hero.class);} catch (Exception e) {throw new RuntimeException(e);}if (hero != null) {return hero;}hero = mapper.selectById(id);try {//操作缓存,set放cacheChannel.set("sms", String.valueOf(id), JSON.toJSONString(hero));} catch (Exception e) {throw new RuntimeException(e);}return hero;}
}
任务
市面上流行的定时任务技术:
Quartz
Spring Task
Quartz
相关概念:
工作(Job):用于定义具体执行的工作
工作明细(JobDetail):用于描述定时工作相关的信息
触发器(Trigger):用于描述触发工作的规则,通常使用cron表达式定义调度规则
调度器(Scheduler):描述了工作明细与触发器的对应关系
导入SpringBoot整合quartz的坐标
<!--quartz任务-->
<dependency><groupId>org.springframework.boot</groupId><artifactId>spring-boot-starter-quartz</artifactId>
</dependency>
定义具体要执行的任务,继承QuartzJobBean
public class TimerTaskCase extends QuartzJobBean {@Overrideprotected void executeInternal(JobExecutionContext context) throws JobExecutionException {System.out.println("Task is running ~~~");}
}
写配置类,定义工作明细(JobDetail)与触发器(Trigger),并绑定对应关系
@Configuration
public class QuartzConfig {@Beanpublic JobDetail printJobDetail() {return JobBuilder.newJob(TimerTaskCase.class)  //指定要运行的任务.storeDurably()  //持久化.build();}@Beanpublic Trigger printJobTrigger() {//创建CronScheduleBuilder,使用cron表达式来描述任务的执行时间CronScheduleBuilder cronScheduleBuilder = CronScheduleBuilder.cronSchedule("0/3 * * * * ?");return TriggerBuilder.newTrigger().forJob(printJobDetail())  //指定工作明细.withSchedule(cronScheduleBuilder)  //指定任务执行时间.build();}
}
Spring Task
开启定时任务功能:
@SpringBootApplication
@EnableScheduling
public class Application {public static void main(String[] args) {SpringApplication.run(Application.class, args);}
}
设置定时执行的任务,并设定执行周期:
@Component
public class SpringTask {@Scheduled(cron = "0/5 * * * * ?")  //设置执行时间,每5秒执行一次public void taskCase() {System.out.println(Thread.currentThread().getName() + ":run...");}
}
定时任务相关配置
spring:# 定时任务配置task:scheduling:# 任务调度线程池大小 默认 1 pool:size: 1# 调度线程名称前缀 默认 scheduling- thread-name-prefix: ssm_shutdown:# 线程池关闭时等待所有任务完成 await-termination: false# 调度线程关闭前最大等待时间,确保最后一定关闭 await-termination-period: 10s邮件
SMTP(Simple Mail Transfer Protocol):简单邮件传输协议,用于发送电子邮件的传输协议
POP3(Post Office Protocol - Version 3):用于接收电子邮件的标准协议
IMAP(Internet Mail Access Protocol):互联网消息协议,是POP3的替代协议
JavaMail:提供给开发人员在应用程序中实现邮件发送和接收功能而提供的一套标准开发类库,支持常用的邮件协议,如SMTP、POP3、IMAP
SpringBoot整合JavaMail:
导入SpringBoot整合JavaMail的坐标:
<!--JavaMail-->
<dependency><groupId>org.springframework.boot</groupId><artifactId>spring-boot-starter-mail</artifactId>
</dependency>
配置JavaMail:
spring:# 配置JavaMailmail:host: smtp.qq.comusername: 2955646748@qq.compassword: Qq1297622137发送邮件
@SpringBootTest
public class TestSendMail {@Autowiredprivate JavaMailSender javaMailSender;//发送简单邮件@Testvoid sendSimpleMailTest() {SimpleMailMessage mailMessage = new SimpleMailMessage();//设置发件人mailMessage.setFrom("2955646748@qq.com");//设置收件人mailMessage.setTo("3055334874@qq.com");//设置邮件标题mailMessage.setSubject("标题");//设置邮件正文mailMessage.setText("正文");//发送文件javaMailSender.send(mailMessage);}//发送复杂邮件@Testvoid sendComplexMailTest() throws Exception{MimeMessage mimeMessage = javaMailSender.createMimeMessage();//开启附件,默认为false关闭MimeMessageHelper mimeMessageHelper = new MimeMessageHelper(mimeMessage, true);//设置发件人mimeMessageHelper.setFrom("2955646748@qq.com");//设置收件人mimeMessageHelper.setTo("3055334874@qq.com");//设置邮件标题mimeMessageHelper.setSubject("标题");//设置邮件正文。开启是否解析HTML,默认为false不解析mimeMessageHelper.setText("正文", true);File file = new File("logo.png");mimeMessageHelper.addAttachment("美图.png", file);javaMailSender.send(mimeMessage);}
}
消息
简介
企业级应用中广泛使用的三种异步消息传递技术:JMS、AMQP、MQTT
JSM:
JMS(Java Message Service):一个规范,等同于JDBC规范,提供了与消息服务相关的API接口
JMS消息模型:
peer-2-peer:点对点模型,消息发送到一个队列中,队列保存消息。队列的消息只能被一个消费者消费,或超时
publish-subscribe:发布订阅模型,消息可以被多个消费者消费,生产者和消费者完全独立,不需要感知对方的存在
JMS消息种类:
TextMessage
MapMessage
BytesMessage
StreamMessage
ObjectMessage
Message (只有消息头和属性)
JMS实现:ActiveMQ、Redis、HornetMQ、RabbitMQ、RocketMQ(没有完全遵守JMS规范)
AMQP:
AMQP(advanced message queuing protocol):一种协议(高级消息队列协议,也是消息代理规范),规范了网 络交换的数据格式,兼容JMS
优点:具有跨平台性,服务器供应商,生产者,消费者可以使用不同的语言来实现
AMQP消息模型:
direct exchange
fanout exchange
topic exchange
headers exchange
system exchange
AMQP消息种类:byte[]
AMQP实现:RabbitMQ、StormMQ、RocketMQ
MQTT(Message Queueing Telemetry Transport):
消息队列遥测传输,专为小设备设计,是物联网(IOT)生态系 统中主要成分之一
Kafka:一种高吞吐量的分布式发布订阅消息系统,提供实时消息功能。
ActiveMQ
启动服务:activemq.bat
访问服务器:http://127.0.0.1:8161/
服务端口:61616,管理后台端口:8161
用户名&密码:admin
SpringBoot整合ActiveMQ:
导入SpringBoot整合ActiveMQ坐标
<!--ActiveMQ消息-->
<dependency><groupId>org.springframework.boot</groupId><artifactId>spring-boot-starter-activemq</artifactId>
</dependency>
配置ActiveMQ(采用默认配置)
spring:activemq:broker-url: tcp://localhost:61616jms:pub-sub-domain: falsetemplate:# 默认的保存位置default-destination: glaty生产与消费消息(使用默认消息存储队列)
@Service
public class MessageServiceActivemqImpl {@Autowiredprivate JmsMessagingTemplate jmsMessagingTemplate;//使用默认消息存储队列public void sendMessage(String id) {System.out.println("send id:" + id);jmsMessagingTemplate.convertAndSend(id);}public String doMessage() {return jmsMessagingTemplate.receiveAndConvert(String.class);}//使用指定消息存储队列public void sendMessageTo(String id) {System.out.println("send id:" + id);jmsMessagingTemplate.convertAndSend("order.sm.queue.id", id);}public String doMessageTo() {jmsMessagingTemplate.receiveAndConvert("order.sm.queue.id", String.class);return "over";}
}
流程性业务消息消费完转入下一个消息队列
@Component
public class MessageListener {//指定监听的区域@JmsListener(destination = "order.sm.queue.id")//指定消息放入到哪里@SendTo("order.other.queue.id")public String receive(String id) {System.out.println("已完成短信发送业务,id:" + id);return "new:" + id;}
}
RabbitMQ
RabbitMQ基于Erlang语言编写,需要安装Erlang
Erlang下载地址:https://www.erlang.org/downloads
Erlang安装完后需要配置环境变量(配置ERLANG_HOME和PATH)
RabbitMQ下载地址:https://rabbitmq.com/install-windows.html
RabbitMQ启动服务:rabbitmq-service.bat start
RabbitMQ关闭服务:rabbitmq-service.bat stop
RabbitMQ查看服务状态:rabbitmqctl status
服务管理可视化(插件形式)
查看已安装的插件列表:rabbitmq-plugins.bat list
开启服务管理插件:rabbitmq-plugins.bat enable rabbitmq_management
访问服务器:http://localhost:15672
服务端口:5672,管理后台端口:15672 用户名&密码:guest
SpringBoot整合RabbitMQ(direct模式)
导坐标
<!--RabbitMQ消息-->
<dependency><groupId>org.springframework.boot</groupId><artifactId>spring-boot-starter-amqp</artifactId>
</dependency>
配置RabbitMQ (采用默认配置)
spring:rabbitmq:host: localhostport: 5672定义消息队列(direct)
@Configuration
public class RabbitDirectConfig {@Beanpublic Queue directQueue() {//Queue导org.springframework.amqp.core.Queue下的//消息队列return new Queue("direct_queue", true, false, false);// durable:是否持久化,默认true// exclusive:是否当前连接专用,默认false,连接关闭后队列即被删除// autoDelete:是否自动删除,默认false,当生产者或消费者不再使用此队列,自动删除}@Beanpublic DirectExchange directExchange() {//交换机return new DirectExchange("directExchange");}@Beanpublic Binding bindingDirect() {//Binding导org.springframework.amqp.core.Binding下的//绑定消息队列与交换机return BindingBuilder.bind(directQueue()).to(directExchange()).with("direct");}
}
生产与消费消息(direct)
@Service
public class MessageServiceRabbitmqDirectImpl {@Autowiredprivate AmqpTemplate amqpTemplate;public void sendMessage(String id) {System.out.println("send id:" + id);amqpTemplate.convertAndSend("directExchange", "direct", id);}
}
使用消息监听器对消息队列监听(direct)
@Component
public class RabbitMessageListener {@RabbitListener(queues = "direct_queue")public void receive(String id) {System.out.println("get id:" + id);}
}
SpringBoot整合RabbitMQ(topic模式):
定义消息队列(topic):
@Configuration
public class RabbitTopicConfig {@Beanpublic Queue topicQueue() {return new Queue("topic_queue", true, false, false);}@Beanpublic TopicExchange topicExchange() {return new TopicExchange("topicExchange");}@Beanpublic Binding bindingTopic() {return BindingBuilder.bind(topicQueue()).to(topicExchange()).with("topic");}
}
绑定键匹配规则:
* (星号): 用来表示一个单词 ,且该单词是必须出现的
# (井号): 用来表示任意数量
生产与消费消息(topic):
@Service
public class MessageServiceRabbitmqTopicImpl {@Autowiredprivate AmqpTemplate amqpTemplate;@Overridepublic void sendMessage(String id) {System.out.println("send id:" + id);amqpTemplate.convertAndSend("topicExchange", "topic", id);}@Overridepublic String doMessage() {return null;}
}
使用消息监听器对消息队列监听(topic)
@Component
public class RabbitMessageListener {@RabbitListener(queues = "topic_queue")public void receive(String id) {System.out.println("get id:" + id);}
}
RocketMQ
下载地址:https://rocketmq.apache.org/
默认服务端口:9876
环境变量配置
ROCKETMQ_HOME
PATH
NAMESRV_ADDR (建议): 127.0.0.1:9876
启动命名服务器:mqnamesrv
启动broker:mqbroker
服务器功能测试:
生产者:tools org.apache.rocketmq.example.quickstart.Producer
消费者:tools org.apache.rocketmq.example.quickstart.Consumer
入SpringBoot整合RocketMQ:
导入RocketMQ坐标
<!--RocketMQ消息-->
<dependency><groupId>org.apache.rocketmq</groupId><artifactId>rocketmq-spring-boot-starter</artifactId><version>2.2.0</version>
</dependency>
配置RocketMQ (采用默认配置)
rocketmq:name-server: localhost:9876producer:group: group_rocketmq生产消息:
@Service
public class MessageServiceRocketmqImpl {@Autowiredprivate RocketMQTemplate rocketMQTemplate;public void sendMessage(String id) {rocketMQTemplate.convertAndSend("order_sm_id", id);System.out.println("send id:" + id);}
}
生产异步消息:
@Service
public class MessageServiceRocketmqImpl {@Autowiredprivate RocketMQTemplate rocketMQTemplate;@Overridepublic void sendMessage(String id) {SendCallback callback = new SendCallback() {@Overridepublic void onSuccess(SendResult sendResult) {System.out.println("消息发送成功");}@Overridepublic void onException(Throwable throwable) {System.out.println("消息发送失败!!!!!!!!!!!");}};System.out.println("send id:" + id);rocketMQTemplate.asyncSend("order_sm_id", id, callback);}
}
使用消息监听器对消息队列监听:
@Component
@RocketMQMessageListener(topic = "order_sm_id", consumerGroup = "group_rocketmq")
public class RocketmqMessageListener implements RocketMQListener<String> {@Overridepublic void onMessage(String id) {System.out.println("success id:" + id);}
}
Kafka
下载地址:https://kafka.apache.org/downloads
windows 系统下3.0.0版本存在BUG,建议使用2.X版本
启动zookeeper:zookeeper-server-start.bat ..\..\config\zookeeper.properties
默认端口:2181
启动kafka:kafka-server-start.bat ..\..\config\server.properties
默认端口:9092
创建topic:kafka-topics.bat --create --zookeeper localhost:2181 --replication-factor 1 --partitions 1 --topic glaty
查看topic:kafka-topics.bat --zookeeper 127.0.0.1:2181 --list
删除topic:kafka-topics.bat --delete --zookeeper localhost:2181 --topic glaty
生产者功能测试:kafka-console-producer.bat --broker-list localhost:9092 --topic glaty
消费者功能测试:kafka-console-consumer.bat --bootstrap-server localhost:9092 --topic glaty --from-beginning
SpringBoot整合Kafka:
导入Kafka坐标:
<!--Kafka消息-->
<dependency><groupId>org.springframework.kafka</groupId><artifactId>spring-kafka</artifactId>
</dependency>
配置Kafka (采用默认配置):
spring:kafka:bootstrap-servers: localhost:9092consumer:group-id: order生产消息:
@Service
public class MessageServiceKafkaImpl {@Autowiredprivate KafkaTemplate<String, String> kafkaTemplate;@Overridepublic void sendMessage(String id) {System.out.println("send id:" + id);kafkaTemplate.send("kafka_topic", id);}
}
使用消息监听器对消息队列监听:
@Component
public class KafkaMessageListener {@KafkaListener(topics = {"kafka_topic"})public void onMessage(ConsumerRecord<?, ?> record) {System.out.println(" success id:" + record.value());}
}
监控
监控的意义
监控意义:
监控服务状态是否宕机
监控服务运行指标(内存、虚拟机、线程、请求等)
监控日志
管理服务(服务下线)
监控的实施方式:
显示监控信息的服务器:用于获取服务信息,并显示对应的信息
运行的服务:启动时主动上报,告知监控服务器自己需要受到监控
可视化监控平台
Spring Boot Admin,开源社区项目,用于管理和监控SpringBoot应用程序。客户端注册到服务端后,通过HTTP请求方式,服务端定期从客户端获取对应的信息,并通过UI界面展示对应信息。
Admin服务端(监控者):
导坐标
<!--Admin监控服务端-->
<dependency><groupId>de.codecentric</groupId><artifactId>spring-boot-admin-starter-server</artifactId><version>2.5.4</version>
</dependency>
设置启用Spring-Admin
@SpringBootApplication
@EnableAdminServer
public class Application {public static void main(String[] args) {SpringApplication.run(Application.class, args);}
}
Admin客户端(被监控者):
导坐标
<!--Admin监控客户端-->
<dependency><groupId>de.codecentric</groupId><artifactId>spring-boot-admin-starter-client</artifactId><version>2.5.4</version>
</dependency>
配置
spring:boot:admin:client:# 设置可以被哪个服务器监控url: http://localhost:8080
management:endpoint:health:# 设置什么时候上传,默认为nevershow-details: always
endpoints:web:exposure:# 设置可以被监控的内容 *为全部,默认为healthinclude: "*"
监控原理
Actuator提供了SpringBoot生产就绪功能,通过端点的配置与访问,获取端点信息
端点描述了一组监控信息,SpringBoot提供了多个内置端点,也可以根据需要自定义端点信息
访问当前应用所有端点信息:/actuator
访问端点详细信息:/actuator/端点名称
| ID | 描述 | 默认启用 |
| auditevents | 暴露当前应用程序的审计事件信息 | 是 |
| beans | 显示应用程序中所有 Spring bean 的完整列表。 | 是 |
| caches | 暴露可用的缓存 | 是 |
| conditions | 显示在配置和自动配置类上评估的条件以及它们 匹配或不匹配的原因 | 是 |
| configprops | 显示所有 @ConfigurationProperties 的校对清单 | 是 |
| env | 暴露 Spring ConfigurableEnvironment 中的属性 | 是 |
| flyway | 显示已应用的 Flyway 数据库迁移 | 是 |
| health | 显示应用程序健康信息 | 是 |
| httptrace | 显示 HTTP 追踪信息(默认情况下,最后 100 个 HTTP 请求/响应交换) | 是 |
| info | 显示应用程序信息 | 是 |
| integrationgraph | 显示 Spring Integration 图 | 是 |
| loggers | 显示和修改应用程序中日志记录器的配置。 | 是 |
| liquibase | 显示已应用的 Liquibase 数据库迁移。 | 是 |
| metrice | 显示当前应用程序的指标度量信息。 | 是 |
| mappings | 显示所有 @RequestMapping 路径的整理清单。 | 是 |
| scheduledtasks | 显示应用程序中的调度任务。 | 是 |
| sessions | 允许从 Spring Session 支持的会话存储中检索和删除用户会话。当使用 Spring Session 的响应式 Web应用程序支持时不可用。 | 是 |
| shutdown | 正常关闭应用程序。 | 否 |
| threaddump | 执行线程 dump。 | 是 |
Web程序专用端点:
| ID | 描述 | 默认启用 |
| heapdump | 返回一个 hprof 堆 dump 文件。 | 是 |
| jolokia | 通过 HTTP 暴露JMX bean(当Jolokia 在 classpath上时,不适用于WebFlux) | 是 |
| logfile | 返回日志文件的内容(如果已设置logging.file或 logging.path 属性)。支持使用 HTTP Range 头来检索部分日志文件的内容。 | 是 |
| prometheus | 以可以由 Prometheus 服务器抓取的格式暴露指标。 | 是 |
启用指定端点
management:endpoint:health: # 端点名称enabled: trueshow-details: alwaysbeans: # 端点名称enabled: true启用所有端点
management:endpoints:enabled-by-default: true暴露端点功能:
端点中包含的信息存在敏感信息,需要对外暴露端点功能时手动设定指定端点信息
| 属性 | 默认 |
| management.endpoints.jmx.exposure.exclude | |
| management.endpoints.jmx.exposure.include | * |
| management.endpoints.web.exposure.exclude | |
| management.endpoints.web.exposure.include | info, health |
| ID | JMX | Web |
| auditevents | 是 | 否 |
| beans | 是 | 否 |
| caches | 是 | 否 |
| conditions | 是 | 否 |
| configprops | 是 | 否 |
| env | 是 | 否 |
| flyway | 是 | 否 |
| health | 是 | 是 |
| heapdump | N/B | 否 |
| httptrace | 是 | 否 |
| info | 是 | 是 |
| integrationgraph | 是 | 否 |
| jolokia | N/B | 否 |
| logfile | N/B | 否 |
| loggers | 是 | 否 |
| liquibase | 是 | 否 |
| metrics | 是 | 否 |
| mappings | 是 | 否 |
| prometheus | N/B | 否 |
| scheduledtasks | 是 | 否 |
| sessions | 是 | 否 |
| shutdown | 是 | 否 |
| threaddump | 是 | 否 |
自定义监控指标
为info端点添加自定义指标:
management:info:appName: @project.artifactId@version: @project.version@author: glaty@Component
public class AppInfoContributor implements InfoContributor {@Overridepublic void contribute(Info.Builder builder) {Map<String, Object> infoMap = new HashMap<>();infoMap.put("buildTime", "2024");builder.withDetail("runTime", System.currentTimeMillis()).withDetail("group", "glaty");builder.withDetails(infoMap);}
}为Health端点添加自定义指标:
@Component
public class AppHealthContributor extends AbstractHealthIndicator {@Overrideprotected void doHealthCheck(Health.Builder builder) throws Exception {Map<String, Object> infoMap = new HashMap<>();infoMap.put("buildTime", "2024");builder.withDetail("runTime", System.currentTimeMillis()).withDetail("group", "glaty");builder.withDetails(infoMap);builder.status(Status.UP);}
}
为Metrics端点添加自定义指标:
@Service
public class BookServiceImpl extends ServiceImpl<BookDao, Book> implements IBookService {private Counter counter;public BookServiceImpl(MeterRegistry meterRegistry) {counter = meterRegistry.counter("用户付费操作次数:");}@Overridepublic boolean delete(Integer id) {counter.increment();return bookDao.deleteById(id) > 0;}
}
自定义端点:
@Component
@Endpoint(id = "pay")
public class PayEndPoint {@ReadOperationpublic Object getPay() {//调用业务操作,获取支付相关信息结果,最终return出去Map<String, Integer> payMap = new HashMap<>();payMap.put("level 1", 103);payMap.put("level 2", 315);payMap.put("level 3", 666);return payMap;}
}


)
