目录
一、前言
二、插槽类型
三、示例
四、插槽的分类实现
1. 基本插槽
2. 命名插槽
3. 默认插槽内容
4. 作用域插槽(Scoped Slots)
5. 多插槽与具名插槽组合
一、前言
在 Vue 3 中,插槽(Slot)用于实现组件的内容分发机制,它允许你将父组件的内容传递给子组件,从而实现组件的灵活组合和重用。Vue 3 插槽的基本使用和 Vue 2 有些相似,但也引入了一些新的特性。下面是一些常见的插槽使用方式。
二、插槽类型
Vue 3 插槽的使用方式非常灵活,允许你根据需求选择最适合的插槽类型:
- 默认插槽:用于简单的内容传递。
- 命名插槽:用于多个插槽,帮助你分配不同内容到不同的位置。
- 作用域插槽:允许子组件传递数据给父组件,以便父组件动态渲染插槽内容。
- 具名插槽组合:可以在一个组件中使用多个具名插槽,灵活分配父组件的内容。
三、示例

分析:
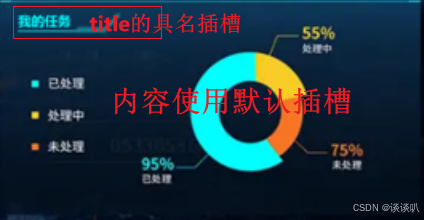
当你需要实现该页面的的布局时,是否会想到使用插槽来优化代码?以上页面中,我的任务、检测反馈、监控区域、人脸设别告警、设备总览六个模块中,框架的模板使用的是同一个框架,所以在这时就可以像以下图中进行组件优化。
代码示例:
首先,你需要在src/components/目录下创建一个子组件TaskFeedback.vue,并添加如下代码:
<template><div class="task-feedback"><!-- 使用具名插槽 --><slot name="header"></slot><!-- 默认插槽 --><slot></slot><!-- 其他插槽 --><slot name="footer"></slot></div>
</template><script>
export default {name: 'TaskFeedback',
};
</script><style scoped>
.task-feedback {/* 添加样式 */
}
</style>然后,在父组件中引入并使用TaskFeedback组件,并通过插槽传递内容:
<!-- 在父组件中使用 TaskFeedback 组件 -->
<template><div><TaskFeedback><!-- 插入头部内容到 header 插槽 --><template v-slot:header><h1>我的任务检测反馈</h1></template><!-- 插入主要内容到默认插槽 --><table><thead><tr><th>类型</th><th>告警时间</th><th>位置</th></tr></thead><tbody><tr v-for="(item, index) in feedbackItems" :key="index"><td>{{ item.type }}</td><td>{{ item.time }}</td><td>{{ item.location }}</td></tr></tbody></table><!-- 插入底部内容到 footer 插槽 --><template v-slot:footer><p>总数据量: {{ totalDataCount }}</p></template></TaskFeedback></div>
</template><script>
import TaskFeedback from './components/TaskFeedback.vue';export default {components: {TaskFeedback,},data() {return {feedbackItems: [{ type: '温度异常', time: '2023-08-20 16:21:29', location: '园区A区' },// 更多数据...],totalDataCount: 50,};},
};
</script>
我们使用了三个插槽:
v-slot:header用于插入头部内容。- 默认插槽用于插入主要的内容。
v-slot:footer用于插入底部内容。
可以根据实际需要自定义每个插槽的内容,使界面更具灵活性和可扩展性。
四、插槽的分类实现
1. 基本插槽
基本插槽允许父组件传递内容到子组件中的指定位置。父组件内容会替换子组件中指定 <slot> 标签的位置
<!-- Parent.vue -->
<template><Child><p>This is some content from the parent</p></Child>
</template><script>
import Child from './Child.vue';
export default {components: { Child }
};
</script><!-- Child.vue -->
<template><div><slot></slot>  <!-- 插槽的位置 --></div>
</template>
在这个例子中,父组件 Parent 向子组件 Child 传递了 <p> 标签内容,这些内容会替换子组件中的 <slot></slot> 部分。
2. 命名插槽
如果你需要多个插槽,可以为每个插槽指定一个名称。父组件可以将内容插入到指定的命名插槽中。
<!-- Parent.vue -->
<template><Child><template #header><h1>Header Content</h1></template><template #footer><p>Footer Content</p></template></Child>
</template><script>
import Child from './Child.vue';
export default {components: { Child }
};
</script><!-- Child.vue -->
<template><div><header><slot name="header"></slot>  <!-- 命名插槽 --></header><footer><slot name="footer"></slot>  <!-- 命名插槽 --></footer></div>
</template>
在这个例子中,父组件为 header 和 footer 插槽分别传递了内容。子组件通过 <slot name="header"> 和 <slot name="footer"> 分别插入不同的内容。
3. 默认插槽内容
如果父组件没有传递内容给某个插槽,可以为插槽指定默认内容。
<!-- Parent.vue -->
<template><Child><!-- 没有传递给插槽内容,使用默认插槽内容 --></Child>
</template><script>
import Child from './Child.vue';
export default {components: { Child }
};
</script><!-- Child.vue -->
<template><div><slot>默认内容</slot>  <!-- 如果父组件没有传递内容,将使用默认内容 --></div>
</template>
当父组件没有传递任何内容时,子组件中的 <slot> 会显示默认内容“默认内容”。
4. 作用域插槽(Scoped Slots)
有时你需要在插槽中传递一些数据给父组件,这时候就需要使用作用域插槽。作用域插槽允许子组件将数据传递给父组件,让父组件能动态渲染插槽内容。
<!-- Parent.vue -->
<template><Child v-slot:default="slotProps"><p>接收到的 message: {{ slotProps.message }}</p></Child>
</template><script>
import Child from './Child.vue';
export default {components: { Child }
};
</script><!-- Child.vue -->
<template><div><slot :message="message"></slot>  <!-- 通过作用域插槽将数据传递给父组件 --></div>
</template><script>
export default {data() {return {message: 'Hello from Child!'};}
};
</script>
在这个例子中,子组件通过 v-slot 绑定了一个作用域插槽,传递了一个 message 给父组件。父组件通过 slotProps 获取到这个数据并显示。
5. 多插槽与具名插槽组合
你可以在一个组件中使用多个具名插槽,这允许父组件根据不同的插槽名称传递不同的内容。
<!-- Parent.vue -->
<template><Child><template #header><h1>This is the header</h1></template><template #main><p>This is the main content</p></template><template #footer><p>This is the footer</p></template></Child>
</template><script>
import Child from './Child.vue';
export default {components: { Child }
};
</script><!-- Child.vue -->
<template><div><header><slot name="header"></slot></header><main><slot name="main"></slot></main><footer><slot name="footer"></slot></footer></div>
</template>
这里,父组件为 header、main 和 footer 提供了不同的内容,子组件会根据插槽名称进行插入。


)


