关键词:STM32N6、调试代码、开发者模式、外部Flash模式
文章目录
- 前言
- 一、开发者模式调试
- 1.1 CubeIDE调试
- 1.2 IAR调试
- 二、如何下载代码(外部FLASH模式)
- 2.1 准备工作
- 2.2 编译下载
- 2.2.1 Appli编译头文件下载
- 2.2.2 FSBL编译头文件下载
- 2.3 运行
- 总结
前言
在这里记录一下STM32N6开发者模式下如何进行调试,如何下载程序到STM32N6有不懂的友友可以在评论里边问哦。
硬件环境:
- STM32N6750-DK CR1
软件环境:
- STM32CubeIDE 1.17.0
- IAR EW for Arm 9.60.3
使用工程目录:
- STM32Cube\Repository\STM32Cube_FW_N6_V1.1.1\Projects\STM32N6570-DK\Templates\Template_FSBL_LRUN
哈哈,对FSBL Load&Run执行流程不太清楚的小伙伴,请去浅析STM32N6的三种启动方式补课
一、开发者模式调试
在开发者模式下调试与下载程序比较简单。开发者模式是在内部 SRAM 中对程序进行调试,可快速验证代码逻辑和功能。
需要注意的是,断电或者复位后,程序会丢失。
开发者模式调试过程中,不需要签名。
1.1 CubeIDE调试
下面以CubeIDE为例,简单介绍一下。
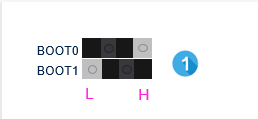
- 将DK板拨到开发者模式下。

- 打开CubeIDE工程(工程主要功能是在APP中实现小灯翻转)
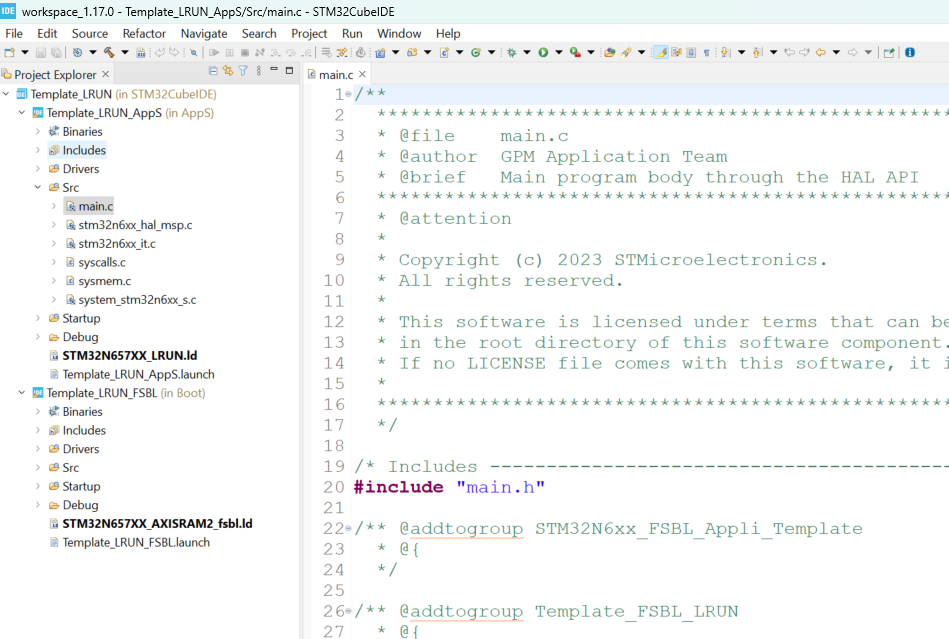
在这里我们会发现,工程中包含FSBL和APP两个工程。下面来展示一下如何在开发者模式里面调试代码,
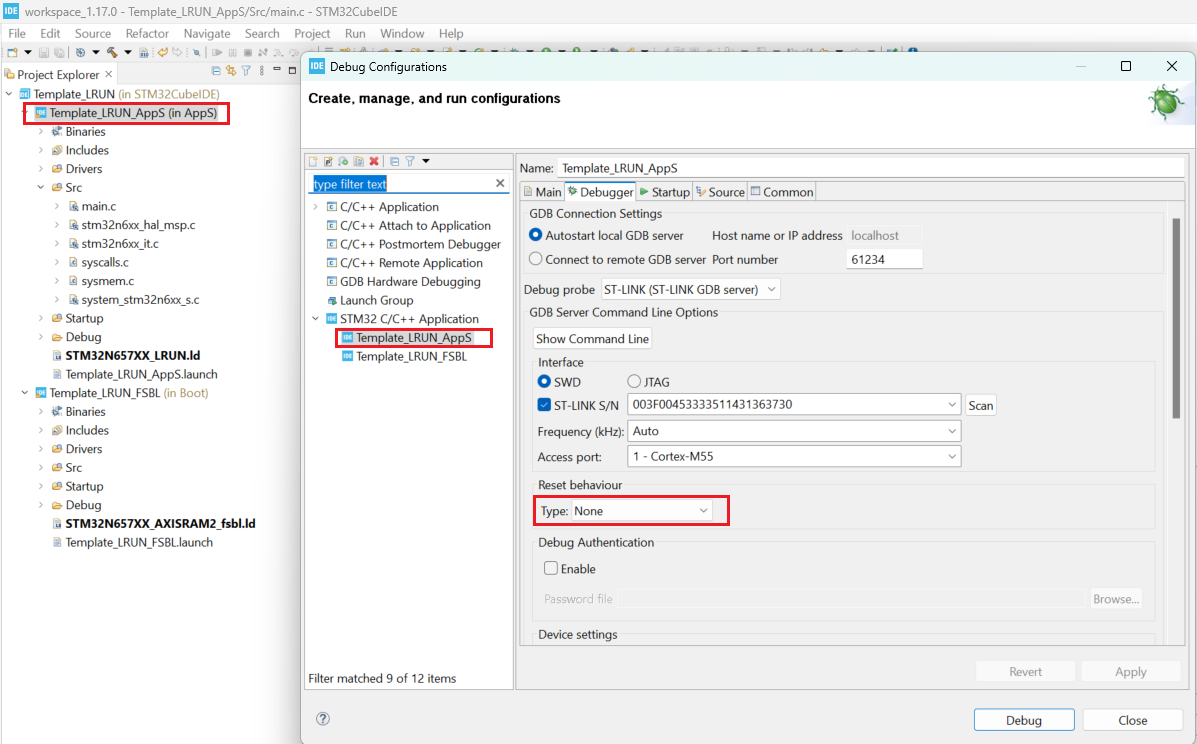
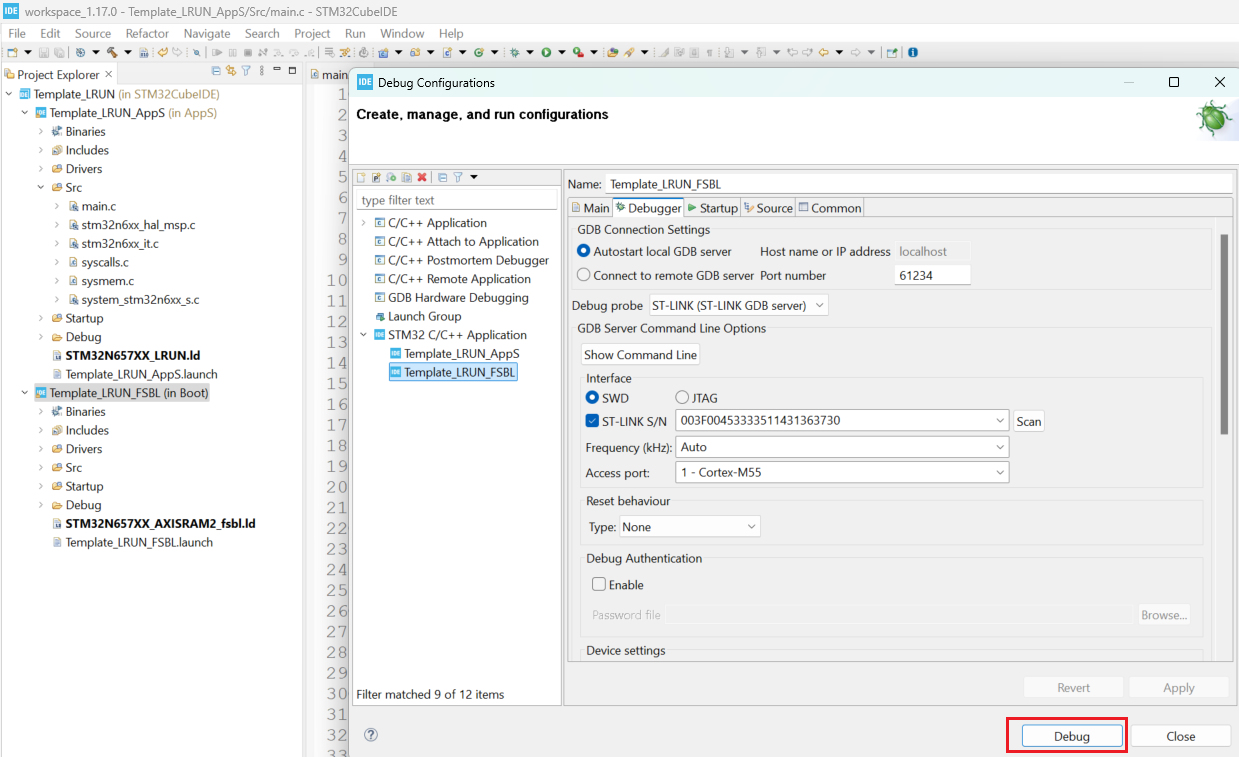
调试代码前,需要首先将两个工程的复位行为都改为None。参照下图,注意两个工程都要改哦!
先进入Debug 配置界面
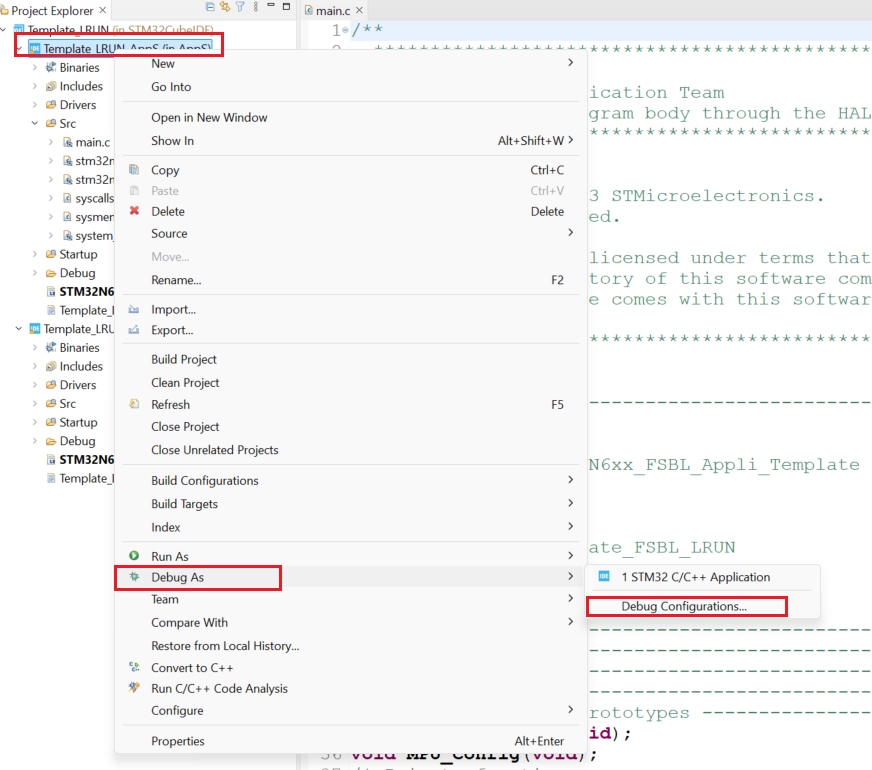
修改复位类型为None
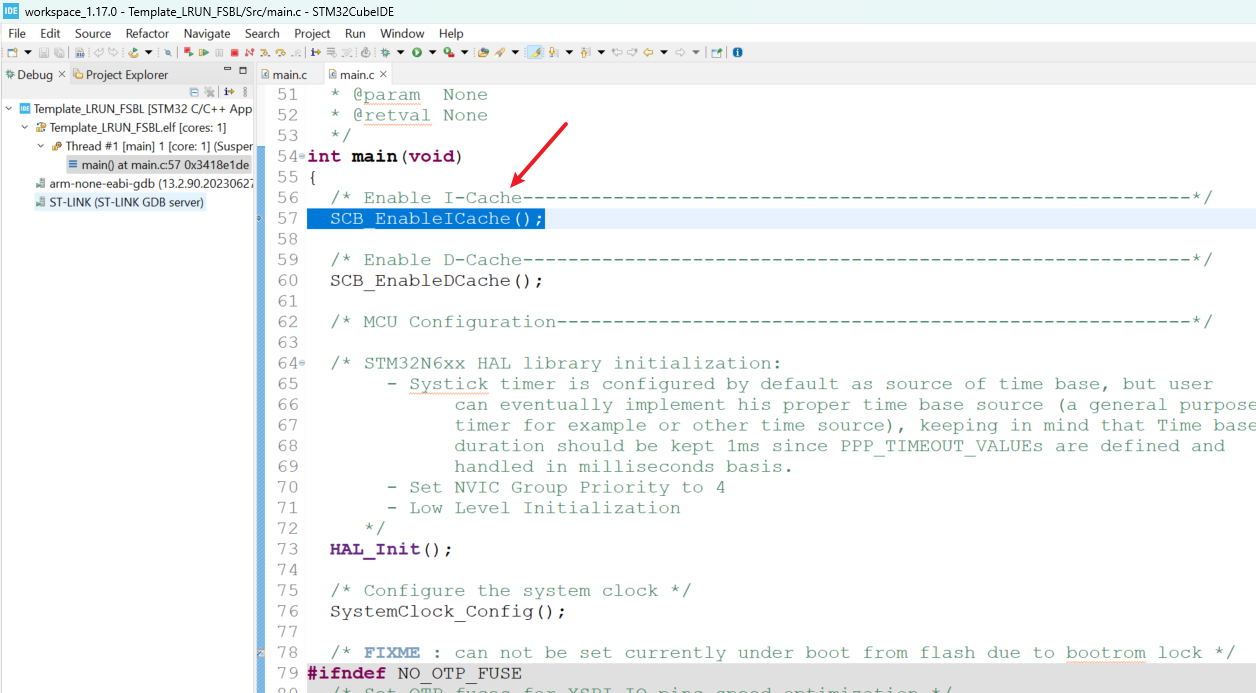
- 两个都修改好了之后,先调试一下FSBL工程
进入Debug模式。可以看到箭头在57行。
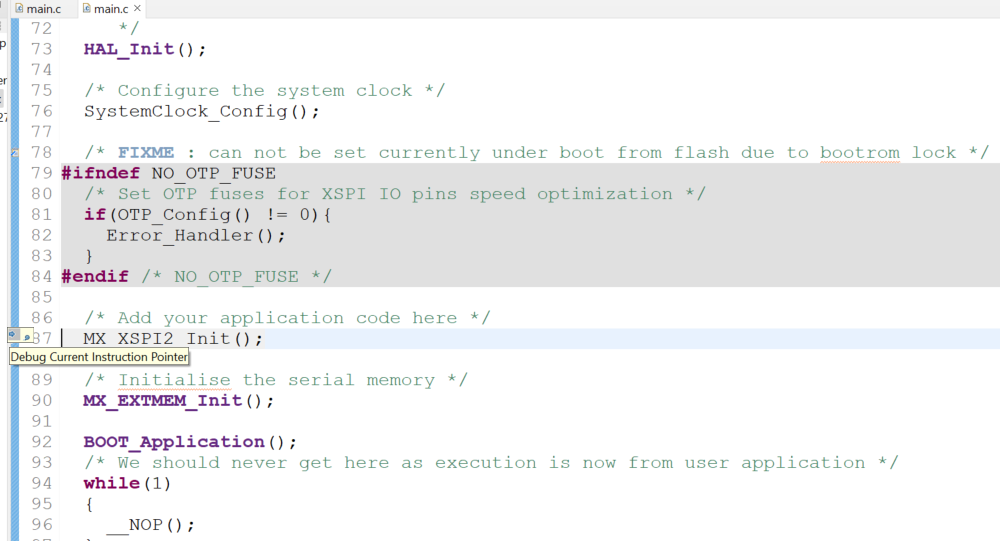
在87行打上端点,然后点击运行。可以看到程序运行到了87行。
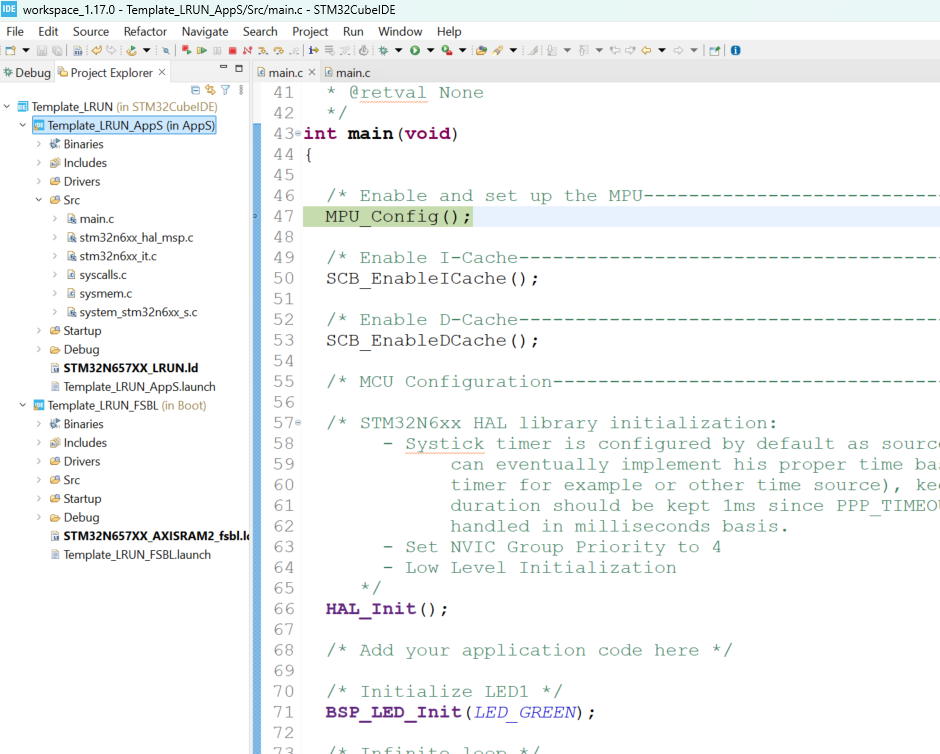
- 调试一下APP工程,同理。APP进入Debug模式,可以看到箭头来到了47行。
在小灯翻转处打上端点,全速运行,端点来到了77行。
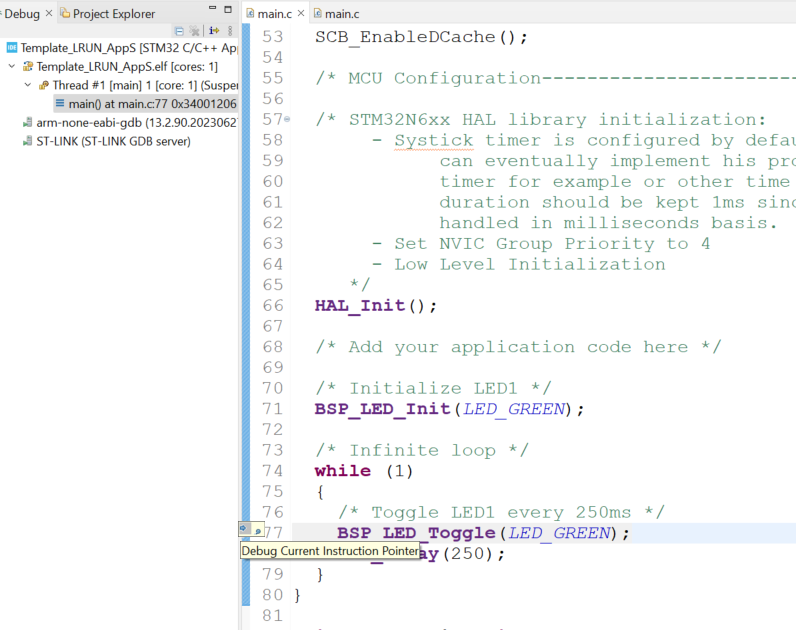
取消断点,全速运行。此时可以看到开发板上的小灯闪烁。
1.2 IAR调试
IAR调试过程中与CubeIDE类似,需要注意的是,IAR需要将复位方式改为软件复位(两个工程都需要修改)。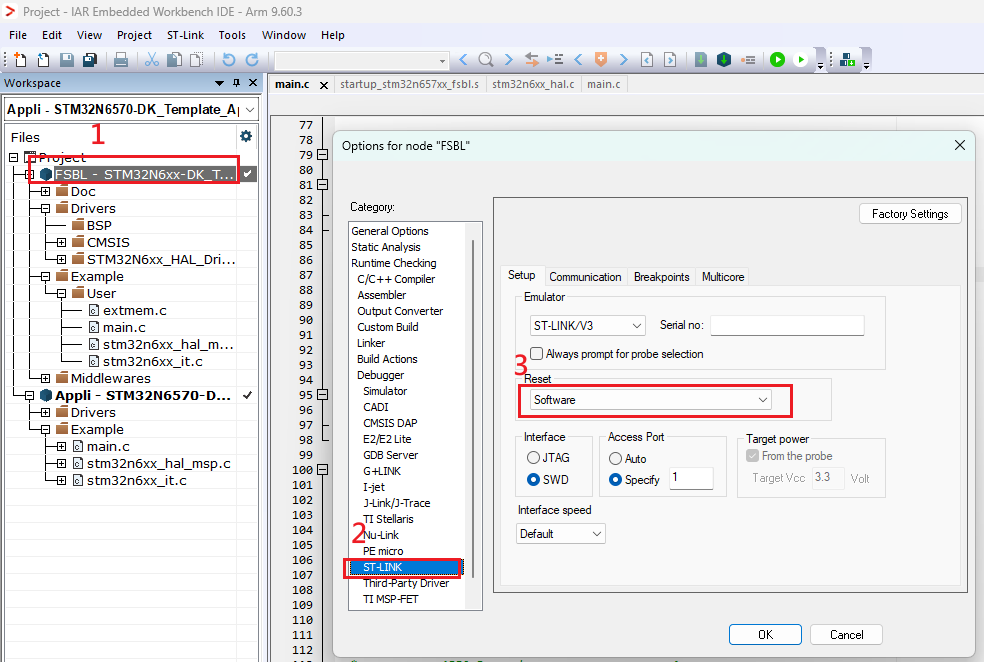
二、如何下载代码(外部FLASH模式)
烧录到外部Flash需要利用External loader,STM32N6 DK和Nucleo板自带了External loader程序,如果是自己的开发板,需要先开发External loader应用。
2.1 准备工作
- 将开发板调到开发者模式
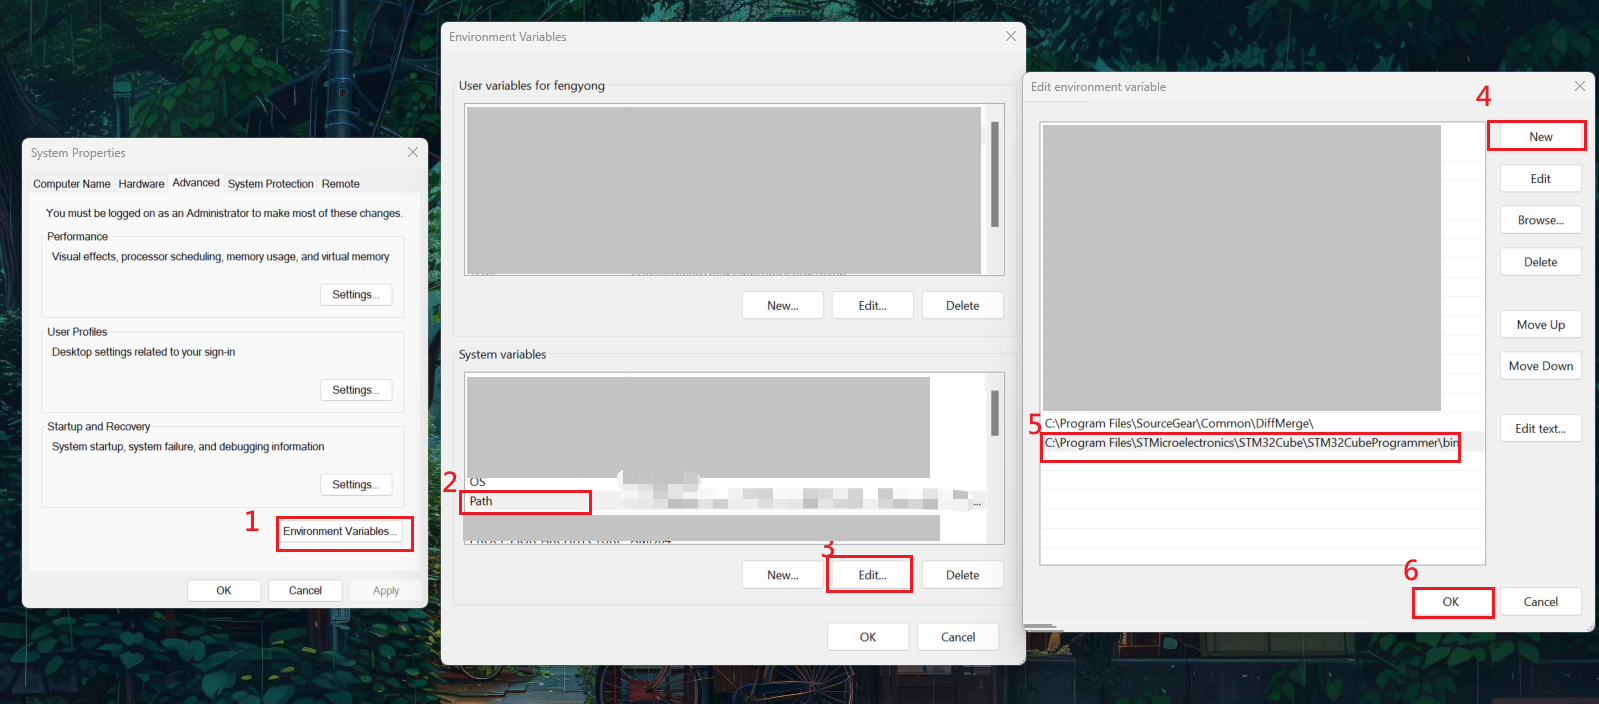
- 设置环境变量。将STM32CubeProgrammer路径加到环境变量的path里面
- 烧录程序步骤可以参考例程的readme。在这先读一下,下面带着一步一步做。
### <b>How to use it In order to make the program work, you must do the following :- Set the boot mode in development mode (BOOT1 switch position is 1-3, BOOT0 switch position doesn't matter).- Open your preferred toolchain- Select first the FSBL workspace- Rebuild all files from sub-project FSBL (if no modification is done on FSBL project, this step can be done only once)- Select the Appli workspace- Rebuild all files from sub-project Appli- Resort to CubeProgrammer to add a header to the generated Appli binary Project.bin with the following command- *STM32_SigningTool_CLI.exe -bin Project.bin -nk -of 0x80000000 -t fsbl -o Project-trusted.bin -hv 2.3 -dump Project-trusted.bin*- The resulting binary is Project-trusted.bin.- Next, in resorting again to CubeProgrammer, load the Appli binary and its header (Project-trusted.bin) in DK board external Flash at address 0x7010'0000.- Load the FSBL binary in internal RAM using the IDE- Run the exampleNext, this program can be run in boot from flash mode. This is done by following the instructions below:- Resort to CubeProgrammer to add a header to the generated binary FSBL.bin with the following command- *STM32_SigningTool_CLI.exe -bin FSBL.bin -nk -of 0x80000000 -t fsbl -o FSBL-trusted.bin -hv 2.3 -dump FSBL-trusted.bin*- The resulting binary is FSBL-trusted.bin. - In resorting again to CubeProgrammer, load the FSBL binary and its header (FSBL-trusted.bin) in DK board external Flash at address 0x7000'0000.- Set the boot mode in boot from external Flash (BOOT0 switch position is 1-2 and BOOT1 switch position is 1-2).- Press the reset button. The code then executes in boot from external Flash mode.2.2 编译下载
以IAR工程为例
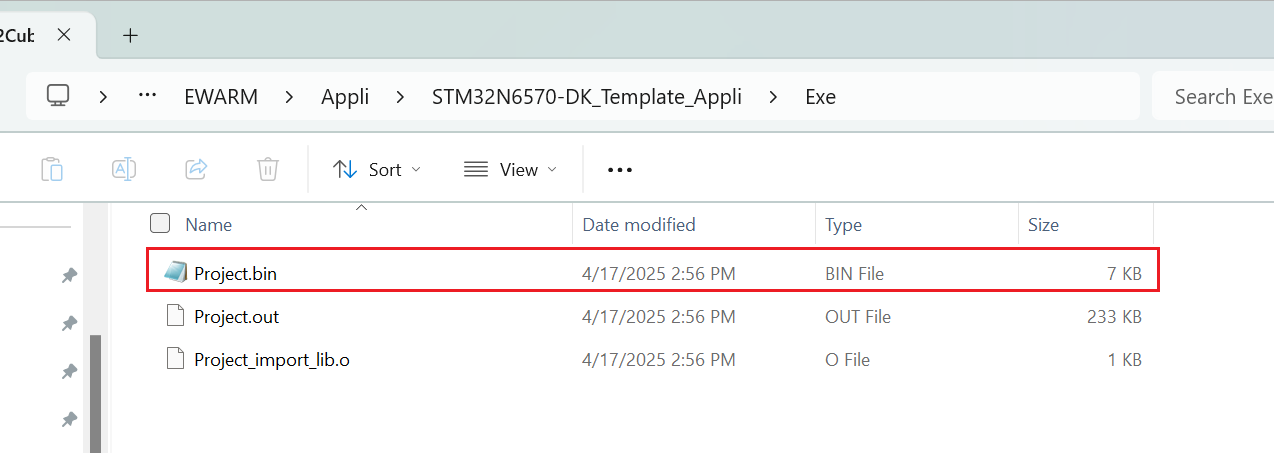
对FSBL和APP工程进行编译,编译会生成Bin文件。
2.2.1 Appli编译头文件下载
- 打开Appli生成目录,可以看到生成的bin文件
- 接下来,要对App的bin文件,利用CubeProgram, 生成Project-trusted.bin签名文件。
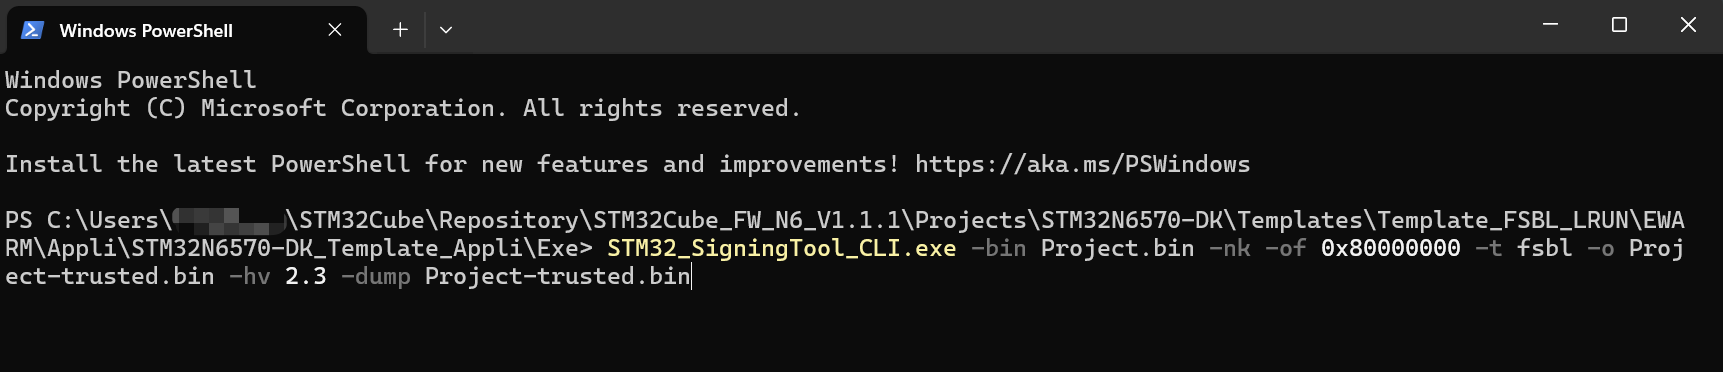
进入EWARM\Appli\STM32N6570-DK_Template_Appli\Exe目录,调用Powershell窗口
输入STM32_SigningTool_CLI.exe -bin Project.bin -nk -of 0x80000000 -t fsbl -o Project-trusted.bin -hv 2.3 -dump Project-trusted.bin,点击运行。
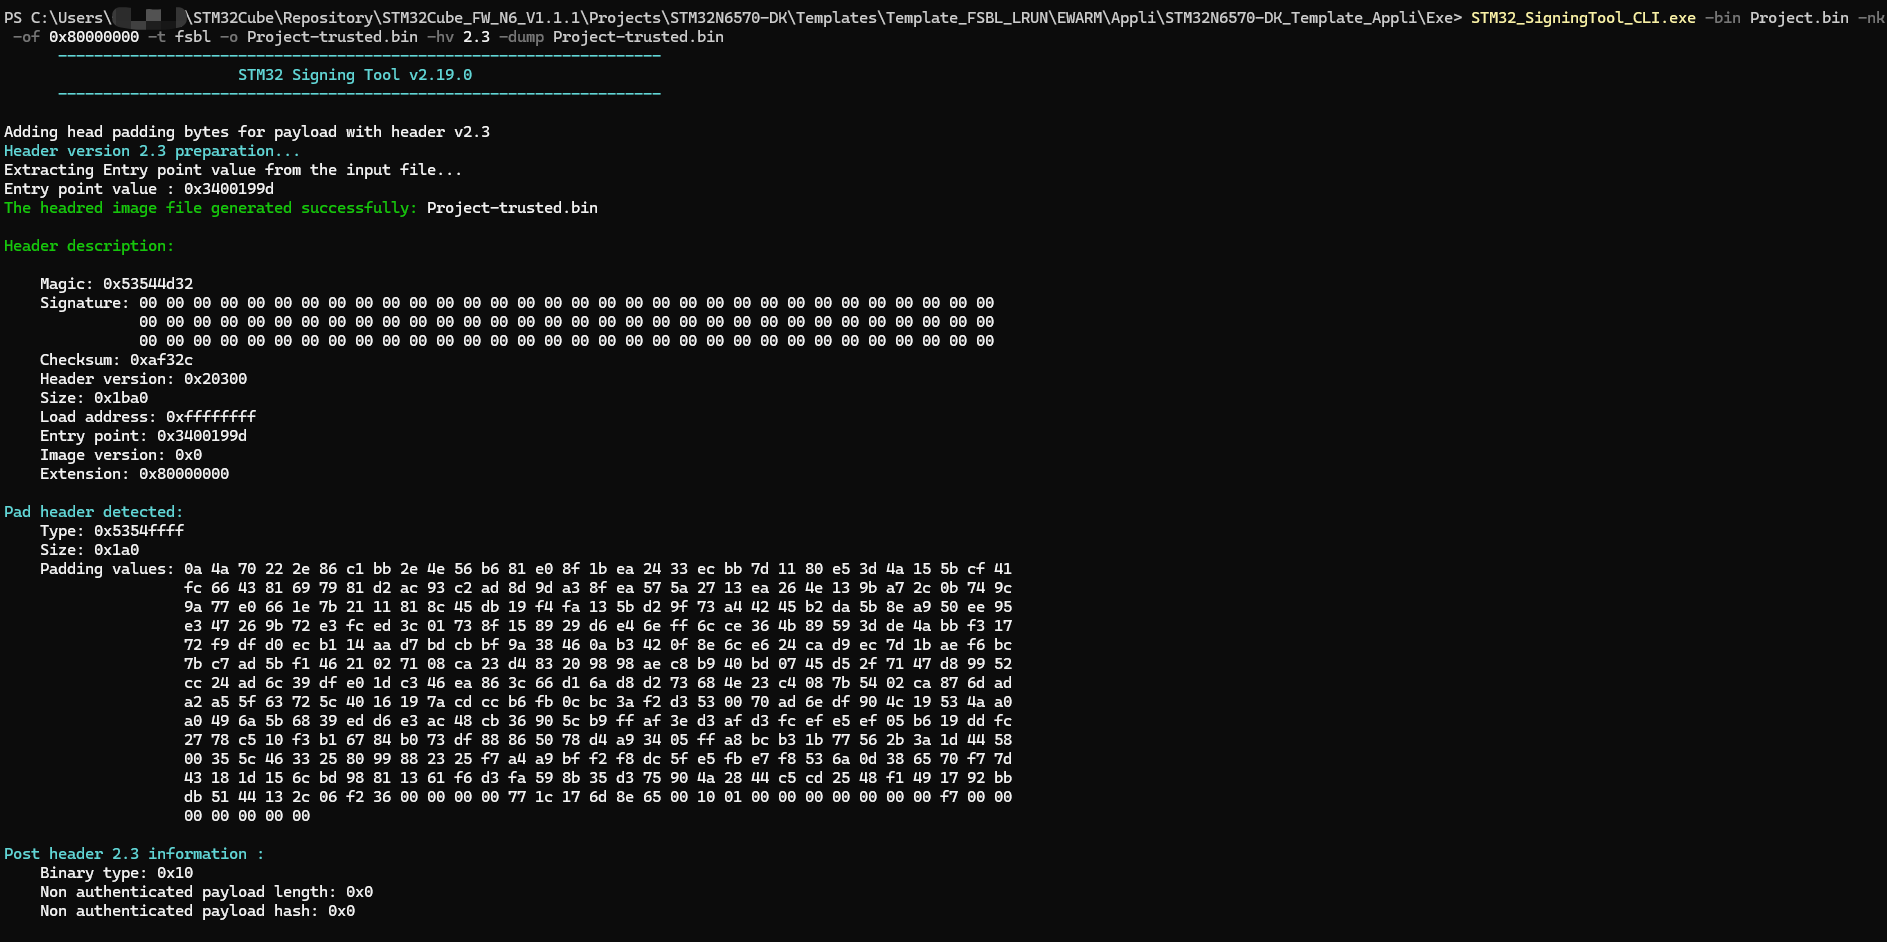
运行后,出现如下提示,即头文件Project-trusted.bin被成功创建。
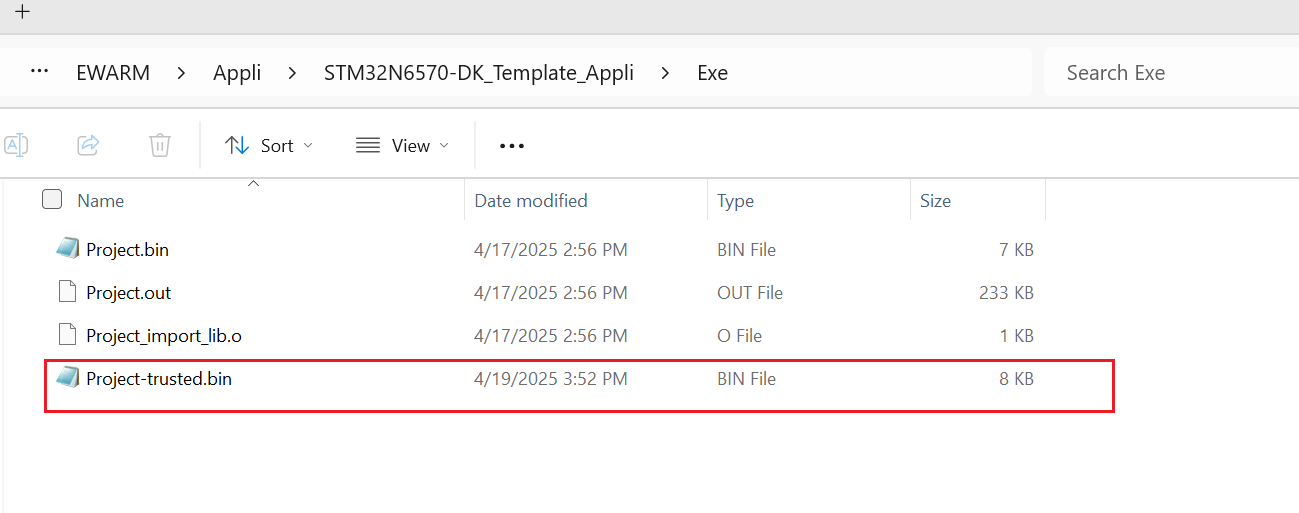
然后看一下目录,头文件已经被成功创建啦
3. 将生成的Project-trusted.bin下载到N6开发板
注意,要记得勾选先外部loaders
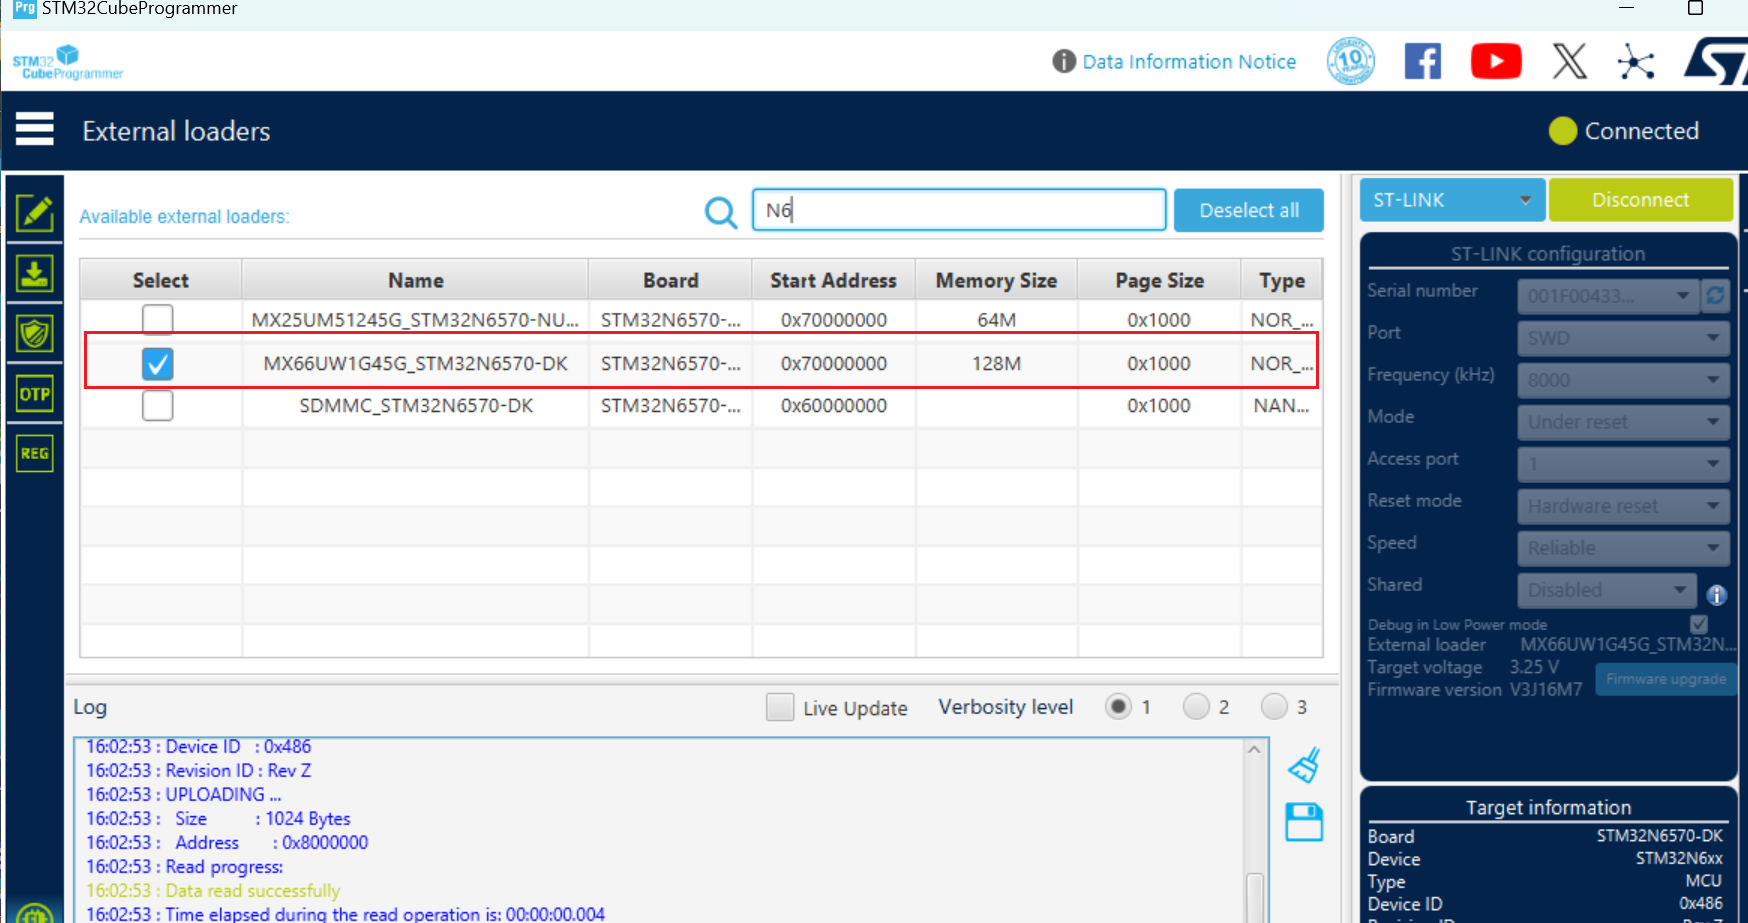
进入到下载界面,找到Project-trusted.bin文件,输入地址0x7010’0000
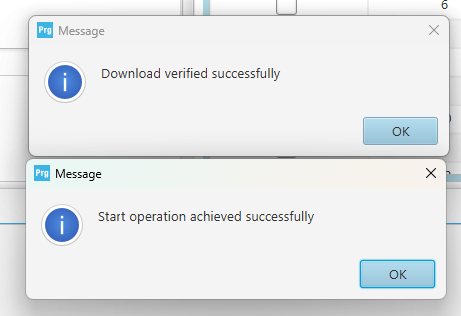
出现下载成功提示
2.2.2 FSBL编译头文件下载
- 要对FSBL的bin文件,利用CubeProgram, 生成FSBL-trusted.bin签名文件。方法与前面步骤类似。
找到FSBL文件目录,打开PowerShell窗口,输入STM32_SigningTool_CLI.exe -bin FSBL.bin -nk -of 0x80000000 -t fsbl -o FSBL-trusted.bin -hv 2.3 -dump FSBL-trusted.bin。成功后,如下图所示。
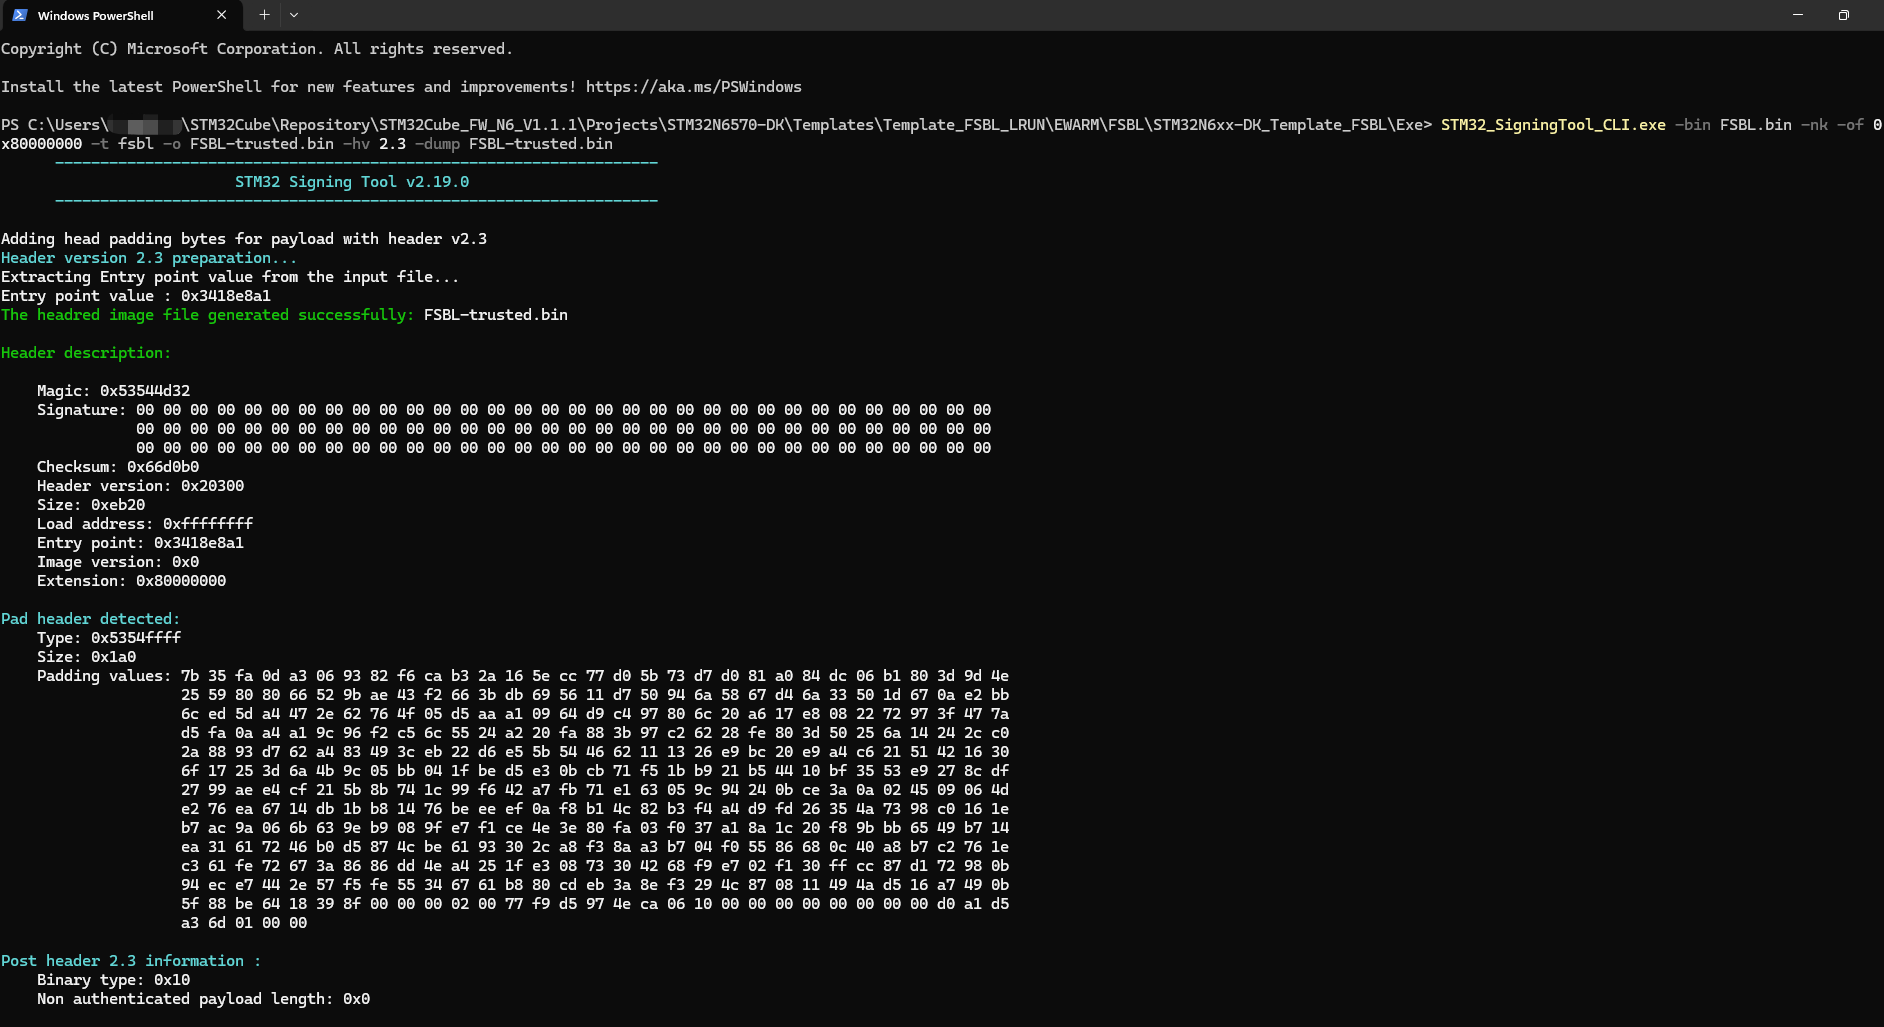
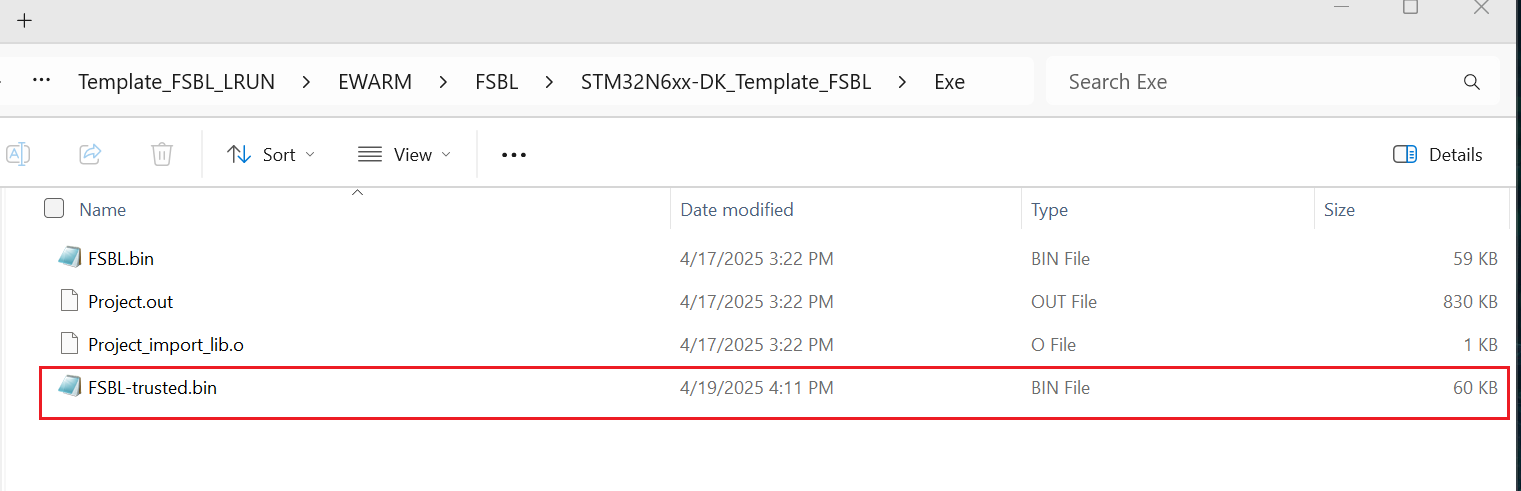
现在文件夹中已经有生成后的文件啦
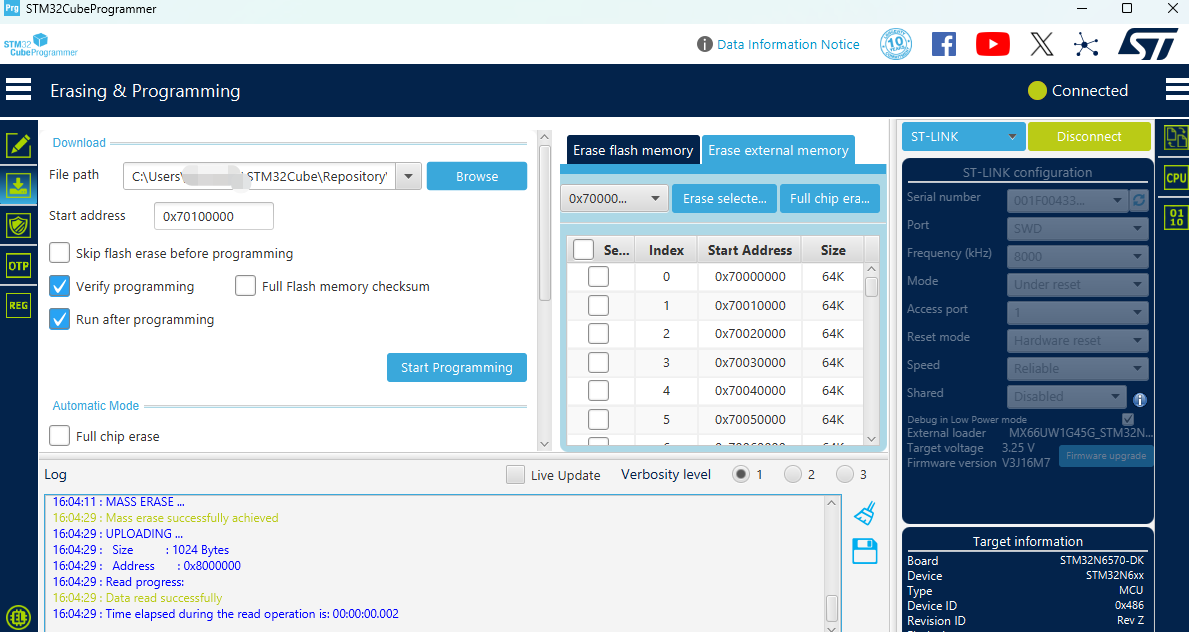
2. 利用CubeProgrammer,将生成的文件下载到外部Flash中。注意修改地址,下载完成后,出现如下提示。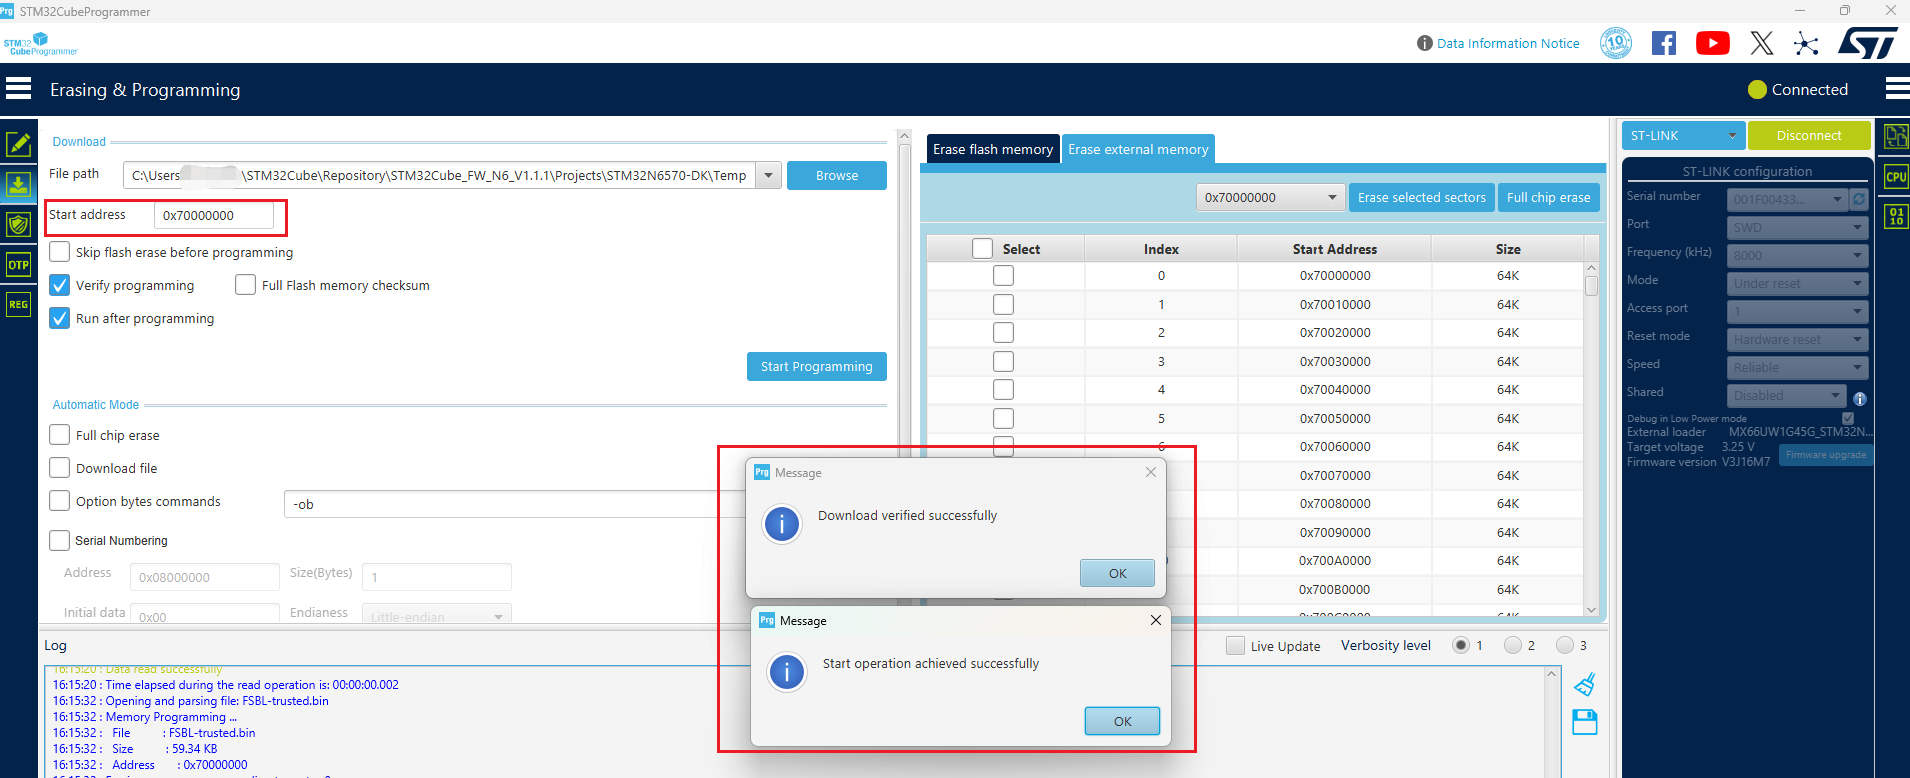
2.3 运行
此时,就已经完成了下载工作啦。将N6开发板拨到外部FALSH模式。
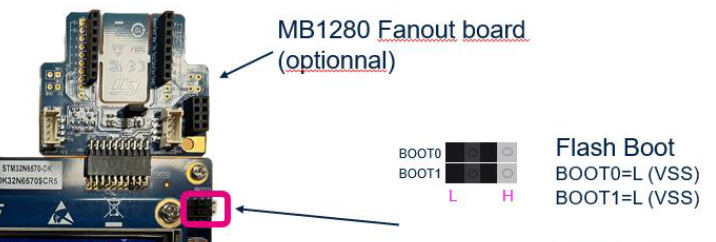
按一下复位键。可以看到,我们的小灯已经愉快的开始闪烁啦。
总结
简单记录一下STM32N6如何调试,有什么不足之处欢迎友友们指出。