一、背景:
Jenkins是一款开源 CI&CD 系统,用于自动化各种任务,包括构建、测试和部署。
Jenkins官方提供了镜像:https://hub.docker.com/r/jenkins/jenkins
使用Deployment来部署这个镜像,会暴露两个端口:8080 Web访问端口,50000 Slave通
信端口,容器启动后Jenkins数据存储在/var/jenkins_home目录,所以需要将该目录使用
PV持久化存储。
二、配置PV持久化存储
1、部署NFS共享服务器
在所有节点安装NFS软件包:
yum install nfs-utils -y
2、找一个节点作为NFS共享存储服务器
# 选一个集群节点,创建pv目录
mkdir -p /ifs/kubernetes/jenkins-data
#修改配置
vi /etc/exports
/ifs/kubernetes 192.168.1.0/24(rw,no_root_squash)# 启动并设置开机自启
systemctl start nfs
systemctl enable nfs
三、部署Jenkins
3.1 Jenkins部署yaml文件(jenkins.yaml)
apiVersion: apps/v1
kind: Deployment
metadata:name: jenkinslabels:name: jenkins
spec:replicas: 1selector:matchLabels:name: jenkins template:metadata:name: jenkinslabels:name: jenkinsspec:terminationGracePeriodSeconds: 10serviceAccountName: jenkinscontainers:- name: jenkinsimage: jenkins/jenkins:ltsimagePullPolicy: Alwaysports:- containerPort: 8080- containerPort: 50000resources:limits:cpu: 1memory: 1Girequests:cpu: 0.2memory: 200Mienv:- name: JAVA_OPTSvalue: -Xmx1g volumeMounts:- name: jenkins-homemountPath: /var/jenkins_homesecurityContext:fsGroup: 1000runAsUser: 0volumes:- name: jenkins-homepersistentVolumeClaim:claimName: jenkins-home
---
apiVersion: v1
kind: PersistentVolumeClaim
metadata:name: jenkins-home
spec:accessModes: ["ReadWriteOnce"]resources:requests:storage: 5Gi
---
apiVersion: v1
kind: Service
metadata:name: jenkins
spec:selector:name: jenkinstype: NodePortports:- name: httpport: 80targetPort: 8080protocol: TCPnodePort: 30006- name: agentport: 50000protocol: TCP
---
apiVersion: v1
kind: ServiceAccount
metadata:name: jenkins---
kind: Role
apiVersion: rbac.authorization.k8s.io/v1
metadata:name: jenkins
rules:
- apiGroups: [""]resources: ["pods","events"]verbs: ["create","delete","get","list","patch","update","watch"]
- apiGroups: [""]resources: ["pods/exec"]verbs: ["create","delete","get","list","patch","update","watch"]
- apiGroups: [""]resources: ["pods/log"]verbs: ["get","list","watch"]
- apiGroups: [""]resources: ["secrets","events"]verbs: ["get","list","watch"]---
apiVersion: rbac.authorization.k8s.io/v1
kind: RoleBinding
metadata:name: jenkins
roleRef:apiGroup: rbac.authorization.k8s.iokind: Rolename: jenkins
subjects:
- kind: ServiceAccountname: jenkins---
apiVersion: v1
kind: PersistentVolume
metadata:name: pv0001
spec:capacity:storage: 5GiaccessModes: ["ReadWriteOnce"]nfs:path: /ifs/kubernetes/jenkins-data # 前面步骤选择的pv存储节点目录server: 192.168.1.20 # 前面步骤选择的pv存储节点ip
3.2 执行部署Jenkins
kubectl apply -f jenkins.yaml
3.3 验证部署效果
. 查看pod创建情况
kubectl get pods
状态为Running则表示成功

登录地址:
http://nodeIp:30006
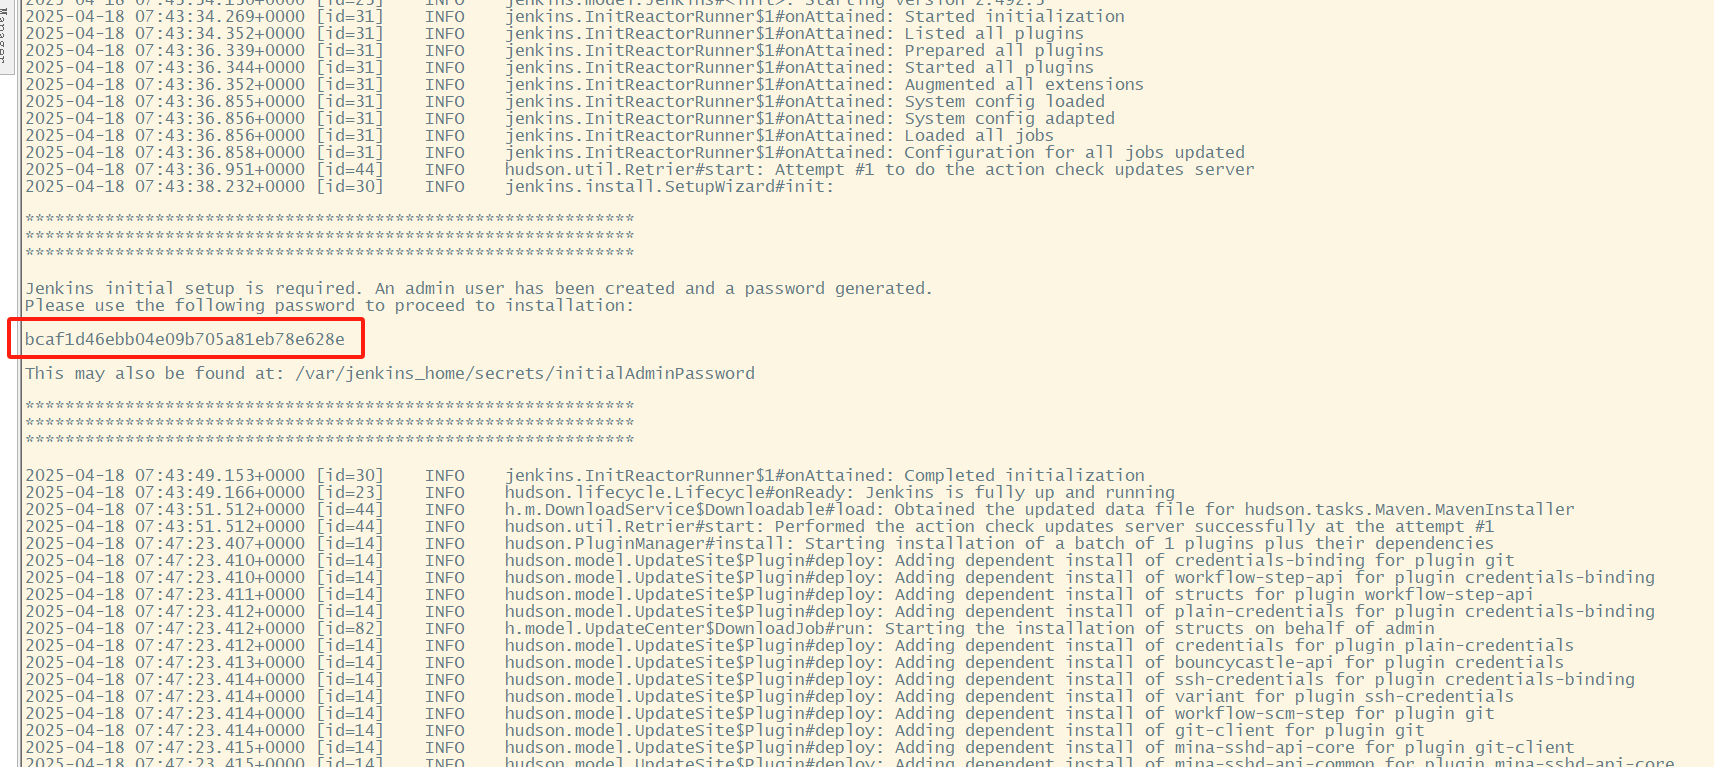
. 从日志中找到初始登录token
# podId 通过 kubectl get pods 命令查询
kubectl logs -f <podId>
四、在Jenkins安装cicd相关插件
管理Jenkins->系统配置–>管理插件–>分别搜索Git Parameter/Git/Pipeline/kubernetes/Config File Provider,
选中点击安装。
• Git:拉取代码
• Git Parameter:Git参数化构建
• Pipeline:流水线
• kubernetes:连接Kubernetes动态创建Slave代理
• Config File Provider:存储配置文件
• Extended Choice Parameter:扩展选择框参数,支持多选


