这里写自定义目录标题
- 下载MySQL ZIP压缩包
- 安装主库
- 1、创建配置文件
- 2、安装服务
- 3、初始化数据库
- 4、启动服务
- 5、配置主库
- 安装从库
- 1、配置`ini`文件
- 2、安装服务
- 3、初始化数据库
- 4、启动服务
- 5、配置从库
- 6、验证从库状态
- 操作主库验证
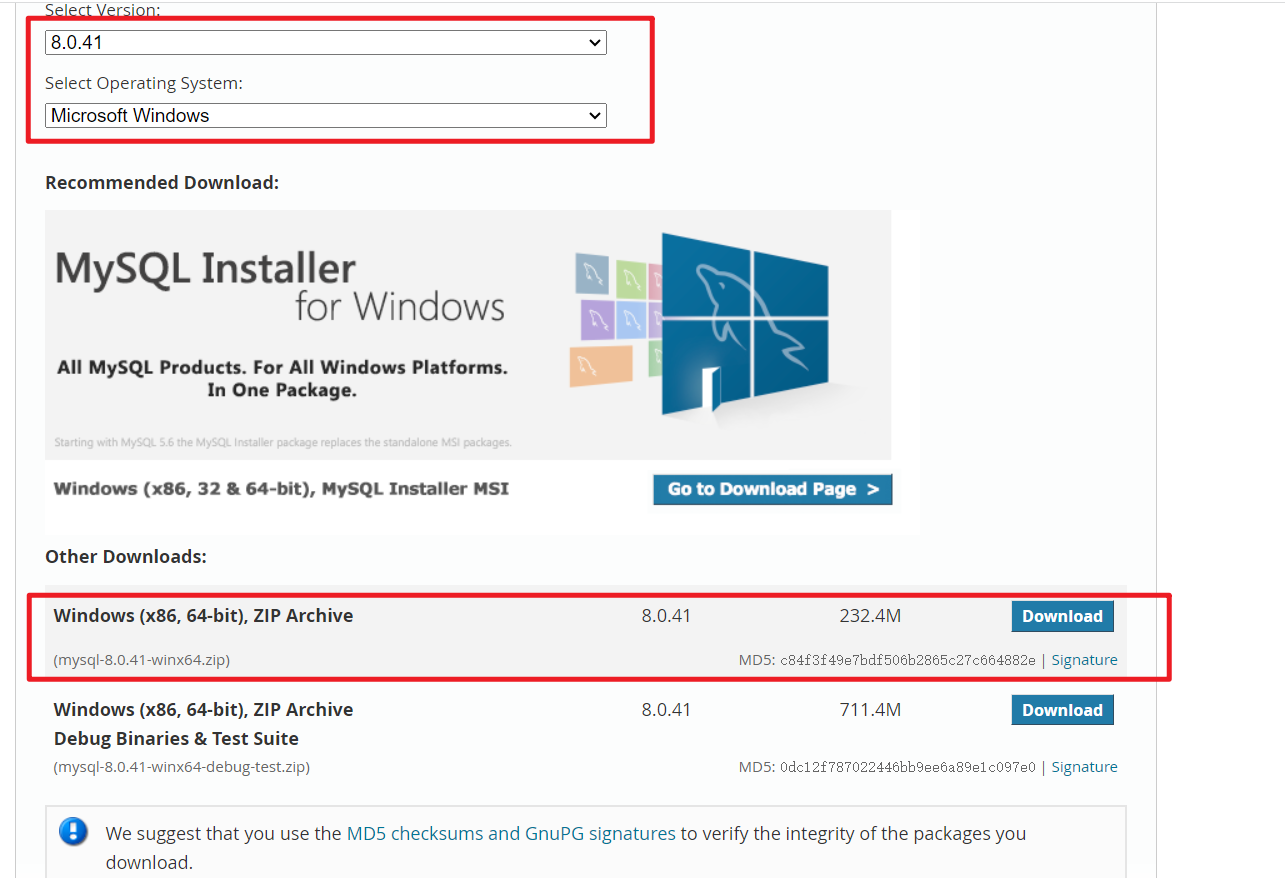
下载MySQL ZIP压缩包
https://dev.mysql.com/downloads/mysql/
安装主库
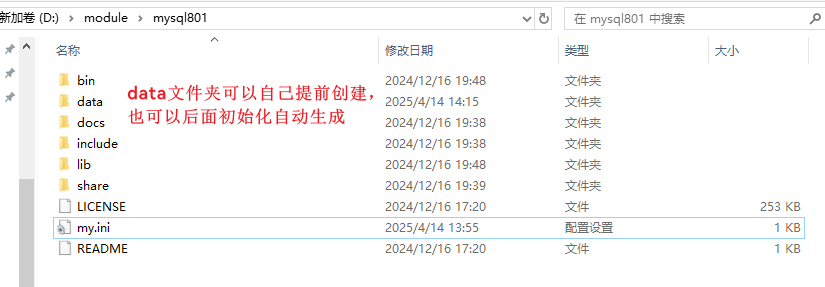
直接解压就行,我的安装位置是 D:\module\mysql801,
1、创建配置文件
在解压根路径创建my.ini配置文件
[mysqld]
port=18001    # 主库端口
basedir=D:\module\mysql801     		# 安装路径
datadir=D:\module\mysql801\data      # 数据文件夹
server-id=1 			# id,与从库不同
log-bin=mysql-bin 		# 开启binlog
binlog_format=ROW
max_connections=200
default_authentication_plugin=mysql_native_password
2、安装服务
在根目录(my.ini所在的目录)使用管理员权限打开cmd或者powershell
# 注意mysqld是主库安装目录下bin文件里的程序: "D:\module\mysql801\bin\mysqld.exe"
.\bin\mysqld.exe --install MySQL8_Master --defaults-file="D:\module\mysql801\my.ini"
3、初始化数据库
# --initialize-insecure 是不设置root密码,mysql -u root -P 18001 进入MySQL命令行
.\bin\mysqld.exe --initialize-insecure --user=mysql
4、启动服务
net start MySQL8_Master
5、配置主库
-- 创建一个用于从库复制的账户
CREATE USER 'repl'@'%' IDENTIFIED WITH mysql_native_password BY '123456';
GRANT REPLICATION SLAVE ON *.* TO 'repl'@'%';
FLUSH PRIVILEGES;-- 锁定表并记录binlog位置 ,锁定后主库不可修改数据
FLUSH TABLES WITH READ LOCK;
查看主库binlog信息,从库需要使用
mysql> SHOW MASTER STATUS;+------------------+----------+--------------+------------------+-------------------+
| File             | Position | Binlog_Do_DB | Binlog_Ignore_DB | Executed_Gtid_Set |
+------------------+----------+--------------+------------------+-------------------+
| mysql-bin.000002 |      827 |              |                  |                   |
+------------------+----------+--------------+------------------+-------------------+
1 row in set (0.00 sec)
安装从库
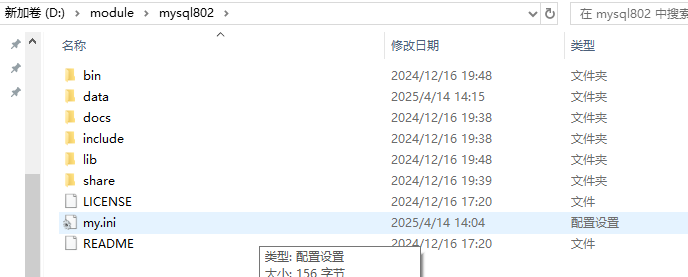
我的安装位置是 D:\module\mysql802
1、配置ini文件
因为在一条电脑上,端口要与主库不同,server-id 与主库不同
[mysqld]
port=18002
basedir=D:\module\mysql802
datadir=D:\module\mysql802\data
server-id=2
relay-log=mysql-relay-bin
read_only=1
skip_slave_start=OFF
2、安装服务
在根目录(my.ini所在的目录)使用管理员权限打开cmd或者powershell
.\bin\mysqld.exe --install MySQL8_Slave --defaults-file="D:\module\mysql802\my.ini"
3、初始化数据库
.\bin\mysqld.exe --initialize-insecure --user=mysql
4、启动服务
net start MySQL8_Slave
5、配置从库
登录 MySQL .\bin\mysql.exe -u root -P 18002
-- 连接主库
mysql> CHANGE MASTER TO-> MASTER_HOST='127.0.0.1',-> MASTER_PORT=18001,-> MASTER_USER='repl',-> MASTER_PASSWORD='123456',-> MASTER_LOG_FILE='mysql-bin.000002',-> MASTER_LOG_POS=827;
Query OK, 0 rows affected, 8 warnings (0.07 sec)
-> MASTER_LOG_FILE=‘mysql-bin.000002’,
-> MASTER_LOG_POS=827;
这两个参数是从主库 SHOW MASTER STATUS 查询到的
6、验证从库状态
SHOW SLAVE STATUS\G -- 注意三个参数:
-- Slave_IO_Running: Yes
-- Slave_SQL_Running: Yes
-- Seconds_Behind_Master: 0
操作主库验证
主库:
-- 先解锁UNLOCK TABLES;-- 创建一个数据库
mysql> create database demo01;
Query OK, 1 row affected (0.01 sec)mysql>
从库:出现 demo01数据库,配置成功
mysql> show databases;
+--------------------+
| Database           |
+--------------------+
| demo01             |
| information_schema |
| mysql              |
| performance_schema |
| sys                |
+--------------------+
5 rows in set (0.00 sec)
主库创建表,插入数据:
mysql> use demo01;
Database changed
mysql> show tables;
Empty set (0.01 sec)mysql> create table employee (-> id int primary key auto_increment,-> name varchar(100),-> age int,-> salary decimal(10,2)-> );
Query OK, 0 rows affected (0.02 sec)mysql> insert into employee (name,age,salary) values ('zhangsan',30,5000.00);
Query OK, 1 row affected (0.01 sec)mysql> select * from employee;
+----+----------+------+---------+
| id | name     | age  | salary  |
+----+----------+------+---------+
|  1 | zhangsan |   30 | 5000.00 |
+----+----------+------+---------+
1 row in set (0.00 sec)
查询从库:
mysql> use demo01;
Database changed
mysql> select * from employee;
+----+----------+------+---------+
| id | name     | age  | salary  |
+----+----------+------+---------+
|  1 | zhangsan |   30 | 5000.00 |
+----+----------+------+---------+
1 row in set (0.00 sec)mysql>


?)
![[C#] Winform - 进程间通信(SendMessage篇)](http://pic.xiahunao.cn/nshx/[C#] Winform - 进程间通信(SendMessage篇))

