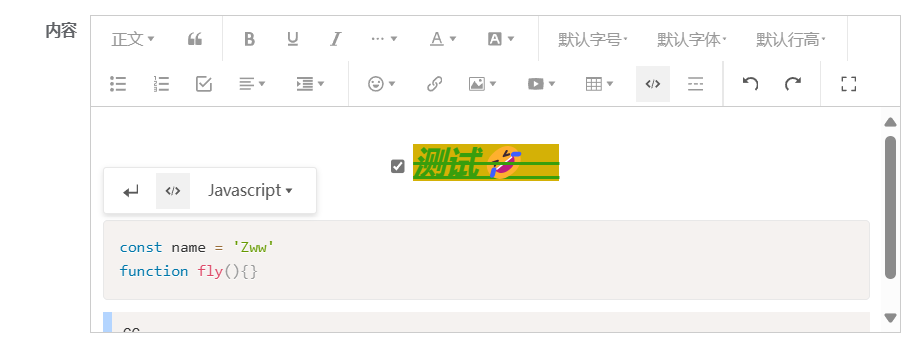
效果展示
使用步骤
安装
npm install @wangeditor/editor-for-vue --save
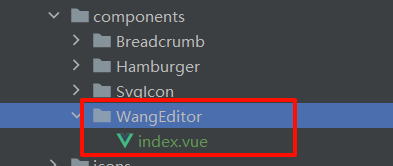
创建自定义组件
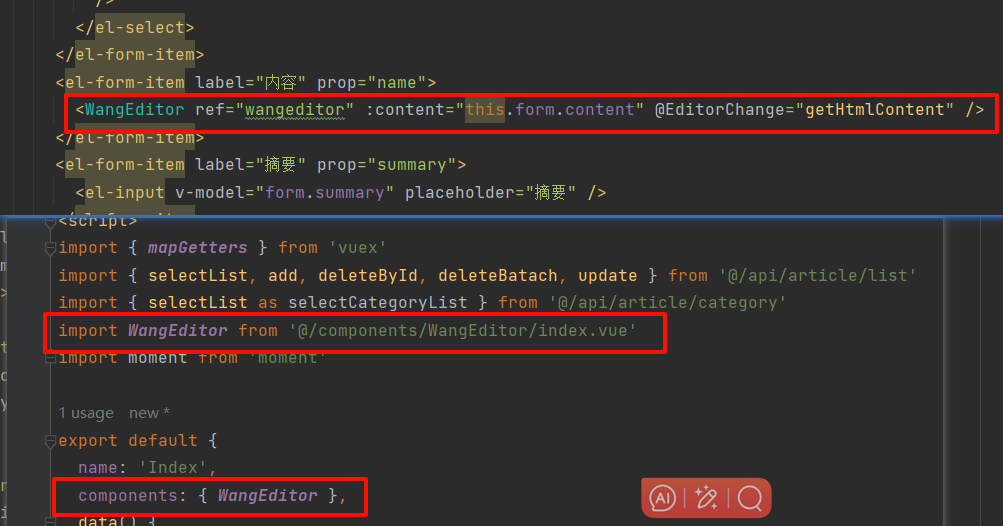
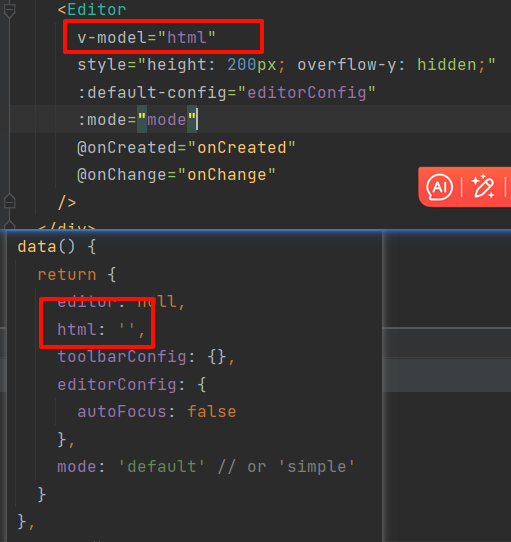
引入组件并注册,使用组件
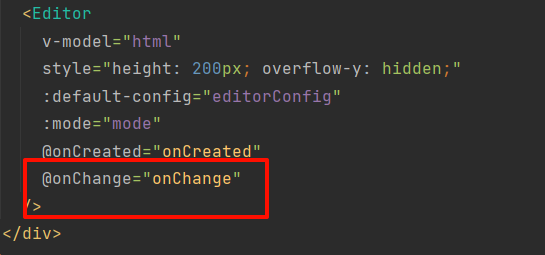
<template><div style="border: 1px solid #ccc;"><Toolbarstyle="border-bottom: 1px solid #ccc":editor="editor":default-config="toolbarConfig":mode="mode"/><Editorv-model="html"style="height: 200px; overflow-y: hidden;":default-config="editorConfig":mode="mode"@onCreated="onCreated"@onChange="onChange"/></div>
</template>
<script>
import { Editor, Toolbar } from '@wangeditor/editor-for-vue'export default {components: { Editor, Toolbar },data() {return {editor: null,html: '',toolbarConfig: {},editorConfig: {autoFocus: false},mode: 'default' // or 'simple'}},created() {this.html = this.content},beforeDestroy() {const editor = this.editorif (editor == null) returneditor.destroy() // 组件销毁时,及时销毁编辑器console.log('wangEditor销毁了')},methods: {onCreated(editor) {console.log(editor)this.editor = Object.seal(editor) // 一定要用 Object.seal() ,否则会报错},onChange(e) {console.log(e)this.$emit('EditorChange', this.html)}}
}
</script>
<style src="@wangeditor/editor/dist/css/style.css"></style>
需要富文本的组件里引入
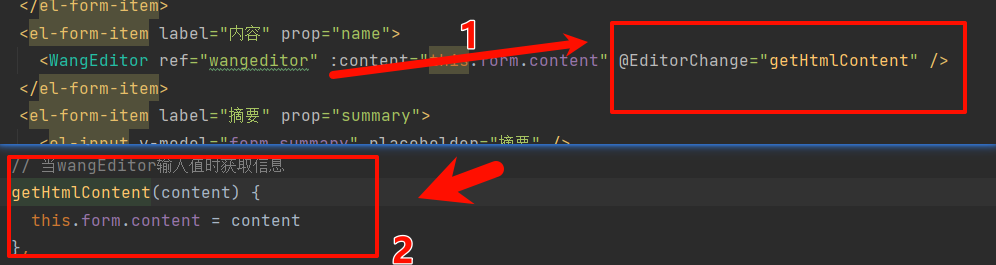
新增内容获取富文本框里的值
- 监听输入框
- 回调触发事件,传递输入框的值 html
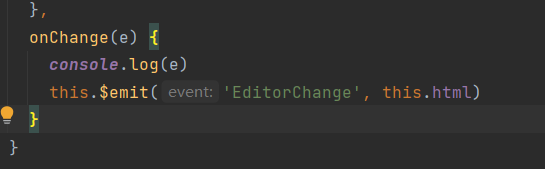
- 父组件监听,获取值,并设置到表单,后续请求携带该值 新增文章
- 当然,我们在新增时要清空富文本框的值。设置ref然后删除
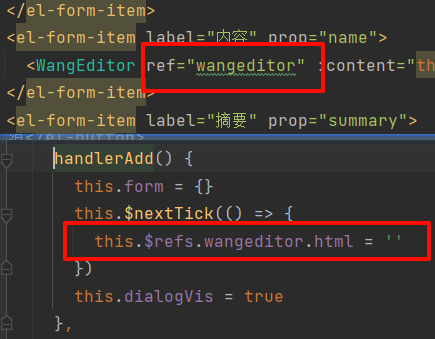
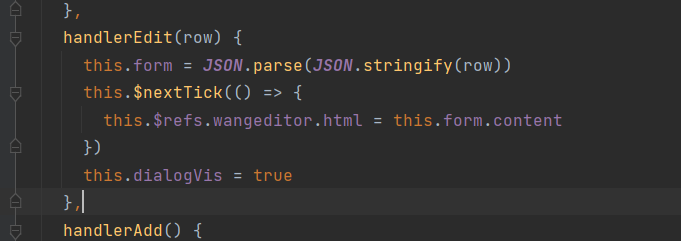
这里用nextTick是为了等待所有dom挂载完毕,否则会出现找不到wangeditor组件问题
更新回显富文本框里的值

点击按钮,获取table组件默认插槽里传递来的所有值:scope=data也就是v-slot=scope。里面的row字段scope.row,也就是一行文章的数据,内部大概是这样

然后还是通过ref回显设置值


:容器存储接口 CSI)


