一、背景
我之前关于DeepSeek使用ollama部署的文章大家可以把DeepSeek大模型部署起来。那么ollama还提供了可以调用对应部署模型的API接口。我们可以基于这些接口,做自己的二次开发。使用python+flask+ollama就可以进行模型对话调用。并且前端采用SSE的技术,后端向前端推送推理结果进行展示,可以实现属于自己的大模型对话产品。
二、代码实现
1、ollama运行deepseek-r1:1.5b模型
docker run -d -v ollama:/root/.ollama -p 11434:11434 --name ollama ollama/ollamadocker exec -it ollama ollama run deepseek-r1:1.5b2、python+flask代码
import jsonfrom flask import Flask, request, Response
from ollama import Clientapp = Flask(__name__)# ollama客户端
ollma_url = "http://localhost:11434"   # localhost可以换成你部署ollama主机的ip、远程ip
ollama_client = Client(host=ollma_url )
# 模型名称
model_name = "deepseek-r1:1.5b"@app.route('/stream', methods=['POST', 'GET'])
def post_example():def generate():try:# 调用ollama客户端,传入模型名称、提问信息response_generator = ollama_client.generate(model_name, prompt=question, stream=True)for part in response_generator:response_text = part.response# 按照 SSE 规范格式化数据data = f"data: {json.dumps({'response': response_text})}\n\n"print(data)yield dataexcept Exception as e:error_data = f"data: {json.dumps({'error': str(e)})}\n\n"yield error_data# 接收问题, 调用模型, 使用SSE推送推理结果给前端question = request.args.get('question')resp = Response(generate(), mimetype='text/event-stream')# 设置响应头resp.headers['Cache-Control'] = 'no-cache'resp.headers['Connection'] = 'keep-alive'resp.headers['Access-Control-Allow-Origin'] = '*'return respif __name__ == '__main__':app.run(debug=True, port=8080)
3、前端代码
<!DOCTYPE html>
<html lang="en"><head><meta charset="UTF-8"><meta name="viewport" content="width=device-width, initial-scale=1.0"><title>Ask Ollama via SSE</title>
</head><body><input type="text" id="questionInput" placeholder="请输入你的问题"><button id="askButton">提问</button><pre id="answerContainer"></p><script>const questionInput = document.getElementById('questionInput');const askButton = document.getElementById('askButton');const answerContainer = document.getElementById('answerContainer');askButton.addEventListener('click', async () => {const question = questionInput.value;if (!question) {alert('请输入问题');return;}const eventSource = new EventSource(`http://localhost:8080/stream?question=${encodeURIComponent(question)}`);eventSource.onmessage = function (event) {const data = JSON.parse(event.data);const response = data.response;if (response) {const p = document.createElement('span');p.textContent = response;answerContainer.appendChild(p);}};eventSource.onerror = function (error) {console.error('EventSource failed:', error);eventSource.close();};});</script>
</body></html>
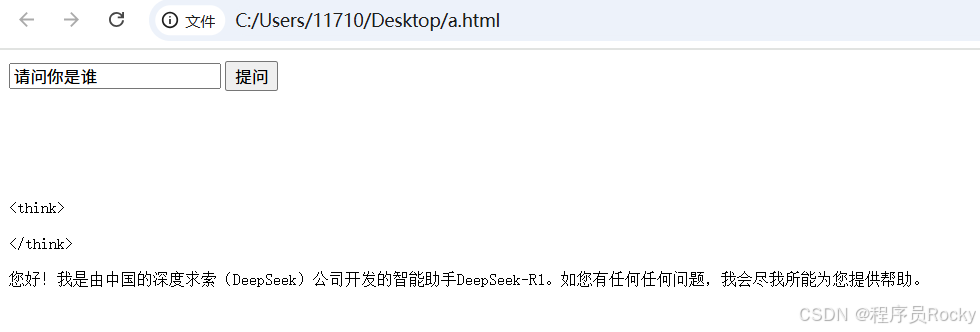
4、运行结果
页面虽然不是很美观,但是一个基本原理的demo已经搞定。剩下的就是优化界面、优化链接异常等相关逻辑。

5、SSE默认不支持POST请求
SSE默认不支持POST请求,可以找前端的一些npm包有人进行了封装,可以发送POST请求。以上的实例为了方便采用了GET请求
三、总结
有了ollama就行docker服务一样,提供了API接口,部署的模型就是类似docker已经运行的容器。 通过ollama接口,可以调用运行的模型的各种能力!


)


