1、基本改动
基本改动:去掉了cc.,改成在顶部添加导入
项目升级时候直接将cc.去掉,根据提示添加引用
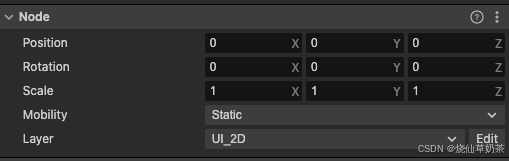
node只保留position,scale,rotation,layer
其余属性如opacity,如果需要使用需要在节点手动添加UIOpacity组件
3d层和ui层分开展示,ui层必须在Canvas下,如果需要在3d层显示ui参考:https://blog.csdn.net/K86338236/article/details/146573306
粒子和3d方面完善了很多,建议有相应需求的项目升级
注意3.5.5以上shader格式和以下3.0.0-3.5.5版本格式不同,需要重写
2、部分属性获取方式改变:
rotation:
编辑器内显示的rotation其实是eulerAngles
代码赋值用:
this.node.setRotationFromEuler(v3(0, 0, 0))
position:
this.node.setPosition(v3(0, 0, 0))
坐标转换:convertToNodeSpaceAR,convertToWorldSpaceAR
目前可以直接赋值和获取世界坐标:
this.node.getWorldPosition()
this.node.setWorldPosition(v3(0, 0, 0))
width,height,anchorX,anchorY:
node.getComponent(UITransform).width
node.getComponent(UITransform).height
node.getComponent(UITransform).anchorX
node.getComponent(UITransform).anchorY
opacity:
node.getComponent(UIOpacity).opacity
color:
node.parent.getComponent(Sprite).color
node.parent.getComponent(Label).color
node.parent.getComponent(RichText).fontColor
3、方法变化:
- 计算两点距离
p1.sub(p2).mag() -> Vec3.distance(p1,p2)
- 浅拷贝:
直接加.clone()
this.node.getWorldPosition().clone()
加载模块:基本没变
assetManager.resources?.load(path, AudioClip, (err, clip) => {//路径,类型,回调if (err) {console.warn(err)return}//处理加载的资源})
- tween:官方文档
使用例子:
支持各种带数值的属性,包括string,fillRange等
    let tweenDuration: number = 1.0;// 缓动的时长let action = tween(this.node).to(tweenDuration, { position: v3(0, 10, 0) })// 这里以node的位置信息坐标缓动的目标 .to(tweenDuration, { position: v3(0, 10, 0) },{onUpdate: (target, ratio) => { },//当前缓动的进度,值可能为空progress: easing.sineOutIn//缓动速度变化函数})// 这里以node的位置信息坐标缓动的目标 .call(() => {//插入函数}).delay(1)//延时1秒.start();//移除节点所有动画
Tween.stopAllByTarget(this.node);
-
简易全局事件系统:
director.on(“attack”, this.onAttack, this);
director.off(“attack”, this.onAttack, this);
director.emit(“attack”); -
音频:官方文档
改动较大,使用audioEngine的需要重写了
Cocos Creator 3.x 移除了 v2.x 中的 audioEngine API,统一使用 AudioSource 组件播放音频。
4、常见问题:
- 粒子层会被ui层遮挡:
给粒子节点添加UIMeshRenderer和UITransform,scale设置为0.01
或者新建一个相机,层级比主相机高,只渲染粒子层,相机ClearFlags需要改为DEPTH_ONLY


