一、安装数据库驱动
在后端安装 MySQL 数据库驱动,比如在 Node.js 环境中可以使用 mysql2 包来连接 MySQL 数据库。在项目目录下运行以下命令安装:
npm install mysql2
或者使用 yarn:
yarn add mysql2
二、创建数据库连接模块
创建一个专门用于连接数据库的模块,例如 db.js:
const mysql = require('mysql2');const connection = mysql.createConnection({host: 'your_database_host',user: 'your_username',password: 'your_password',database: 'your_database_name',
});module.exports = connection;
将 your_database_host、your_username、your_password 和 your_database_name 替换为你的实际数据库配置信息。
三、在 Vue 组件中使用数据库连接
-
创建 API 模块来封装数据库操作:
创建一个文件,比如
api/user.js,用于处理与用户相关的数据库操作:
const connection = require('../db');const getUserInfo = (username) => {return new Promise((resolve, reject) => {const sql = `select * from userinfo where username =?`;connection.query(sql, [username], (err, results) => {if (err) {reject(err);} else {resolve({ data: results });}});});};module.exports = {getUserInfo,};
-
在 Vue 组件中调用 API:
在 Vue 组件的脚本部分,可以使用刚才创建的 API 来获取数据库中的数据:
import { reactive } from 'vue';import { getUserInfo } from '../../api/user';export default {setup() {const userInfo = reactive({nickname: '',gender: '',age: 0,});const getUser = () => {getUserInfo('your_username').then((res) => {userInfo.nickname = res.data[0].nickname;userInfo.gender = res.data[0].gender;userInfo.age = res.data[0].age;}).catch((err) => {console.log(err);});};return {userInfo,getUser,};},};
需要注意的是,直接在前端 Vue 项目中连接数据库并不是最佳实践,因为这可能会暴露数据库的连接信息和带来安全风险。通常的做法是在后端创建 API 服务,由后端服务来连接数据库并处理数据,前端通过调用后端 API 来获取和操作数据。
编写vue窗口代码
home.vue
<template><div>账 号:<input type="text" v-model="form.username"><br>密 码:<input type="text" v-model="form.password"></div><button @click="login">登录</button>
</template><script setup lang='ts'>
import { reactive } from 'vue'
import { useRouter } from "vue-router"
import { userLogin } from '../../api/user'const router = useRouter()const form = reactive({username: '',password: ''
})
const login = () => {userLogin(form).then((res: any) => {alert(res.data.msg)router.push('/about')}).catch((err: any) => {alert(err.response.data.msg)})
}
</script><style scoped></style>
about.vue
<template><div>用户名:<input type="text" v-model="form.username"><br>新密码:<input type="text" v-model="form.newPassword"><br>新密码:<input type="text" v-model="form.rePassword"><br></div><button @click="update">确认修改</button><button @click="getUser">查询</button><div>用户信息:<br>昵称:{{ userInfo.nickname }}<br>性别:{{ userInfo.gender }}<br>年龄:{{ userInfo.age }}</div>
</template><script setup lang='ts'>
import { reactive } from 'vue'
import { useRouter } from "vue-router"
import { updatePassword, getUserInfo } from '../../api/user'const router = useRouter()
const form = reactive({username: '',newPassword: '',rePassword: '',
})
const userInfo: any = reactive({nickname: '',gender: '',age: 0,
})
const update = () => {if (form.newPassword !== form.rePassword) returnupdatePassword(form).then((res: any) => {alert(res.data.msg)router.push('/')alert('修改密码后请重新登录')}).catch((err: any) => {alert(err.response.data.msg)})
}
const getUser = () => {getUserInfo(form.username).then((res: any) => {for (const key in userInfo) {userInfo[key] = res.data.data[0][key]}}).catch((err) => {console.log(err)})
}
</script>
对应效果


编写服务器代码
app.js
// 导入
const express = require('express')
const bodyParser = require('body-parser')
const multiparty = require('connect-multiparty')
let { conMysql } = require('./mysql')// 创建统一的返回报文对象
class Response {constructor(isSucceed, msg, code, data) {this.isSucceed = isSucceedthis.msg = msgthis.code = codethis.data = data}
}// 创建
const app = express()// 处理 x-www-form-urlencoded
app.use(bodyParser.urlencoded({extended:true
}));// 处理 application/json
app.use(bodyParser.json())// 处理 mutipart/form-data
app.use(multiparty())// 设置跨域访问
const cors = require('cors')
app.use(cors())// 测试接口能否正常调用
app.get('/info',(req, res) => {res.send('Hello shaoyahu !')
})// 测试数据库连接的上不上
app.get('/getUser', (req, res) => {let sql = 'select * from userinfo'conMysql(sql).then(result => {res.send(result)})
})// 登录
app.post('/login', (req, res) => {let sql = `select * from userinfo where username = '${req.body.username}'`conMysql(sql).then(result => {if (result[0]?.password === req.body.password) {let response = new Response(true, '登录成功', 200, result)res.send(response)} else {let response = new Response(false, '用户名或密码错误', 400)res.status(400).send(response)}}).catch(err => {res.status(500).send('数据库连接出错!')})
})// 修改密码
app.post('/updatePassword', (req, res) => {let sql = `update userinfo set password = '${req.body.newPassword}' where username = '${req.body.username}'`conMysql(sql).then(result => {if (result.affectedRows == 1) {let response = new Response(true, '修改成功', 200, result)res.send(response)} else {let response = new Response(false, '修改失败,请稍后重试', 400)res.status(400).send(response)}}).catch(err => {res.status(500).send('数据库连接出错!')})
})// 获取当前用户信息
app.get('/getUserInfo', (req, res) => {let sql = `select * from userinfo where username = '${req.query.username}'`conMysql(sql).then(result => {let response = new Response(true, '获取成功', 200, result)res.send(response)}).catch(err => {res.status(500).send('数据库连接出错!')})
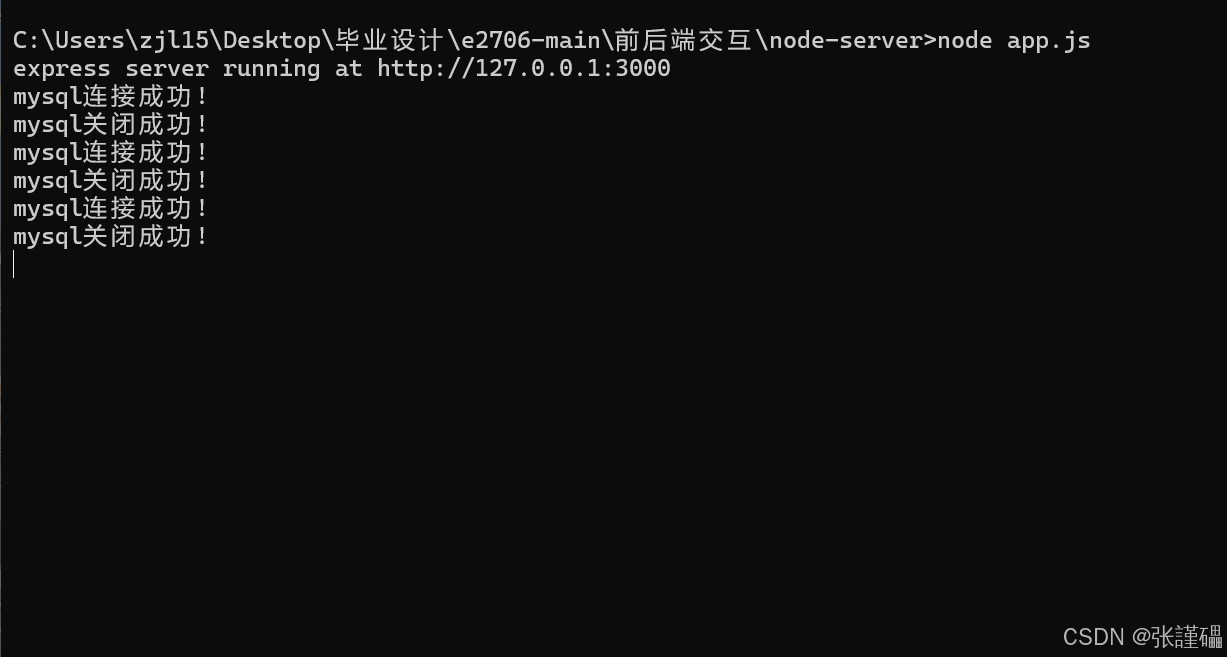
})// 启动
app.listen(3000, () => {console.log('express server running at http://127.0.0.1:' + 3000)
})
mysql.js
let mysql = require('mysql')
const db_config = {host: 'localhost',user: 'root',password: 'mysql',port: '3306',database: 'db1'
}function conMysql(sql) {let connect = mysql.createConnection(db_config)// 开始连接数据库connect.connect(function (err) {if (err) {console.log(`mysql连接失败: ${err}!`)} else {console.log('mysql连接成功!')}})return new Promise((resolve, reject) => {connect.query(sql, (err, result) => {if (err) {reject(err)} else {let res = JSON.parse(JSON.stringify(result))closeMysql(connect)resolve(res)}})})
}
// 查询成功后关闭mysql
function closeMysql(connect) {connect.end((err) => {if (err) {console.log(`mysql关闭失败:${err}!`)} else {console.log('mysql关闭成功!')}})
}
exports.conMysql = conMysql
效果展示

报错信息
mysql连接失败: Error: ER_NOT_SUPPORTED_AUTH_MODE: Client does not support authentication protocol requested by server; consider upgrading MySQL client! mysql连接失败: Error: ER_NOT_SUPPORTED_AUTH_MODE: Client does not support authentication protocol requested by server; consider upgrading MySQL client! mysql连接失败: Error: ER_NOT_SUPPORTED_AUTH_MODE: Client does not support authentication protocol requested by server; consider upgrading MySQL client!
这个错误通常是由于 MySQL 服务器的认证方式与客户端不兼容导致的。以下是一些可能的解决方法:
一、使用命令行工具修改用户认证方式
- 打开命令提示符或终端,使用以下命令以管理员身份登录到 MySQL:
mysql -u root -p
输入你的 MySQL 管理员密码。
- 执行以下 SQL 语句来更改用户的认证方式:
ALTER USER 'your_username'@'localhost' IDENTIFIED WITH mysql_native_password BY 'your_password';
将 your_username 和 your_password 替换为你的实际用户名和密码。
- 刷新权限:
FLUSH PRIVILEGES;
- 退出 MySQL:
exit;
二、更新数据库驱动或客户端
如果上述方法不起作用,可以考虑更新你的 MySQL 客户端或数据库驱动程序,以确保其支持服务器所使用的认证方式。
三、检查连接配置
- 确认你的连接配置中的用户名、密码、主机名和端口号是否正确。
- 检查你的应用程序所使用的数据库驱动版本是否与 MySQL 服务器版本兼容。


)

