继上篇:iOS swift 后台运行应用尝试失败-CSDN博客
为什么想到画中画,起初是看到后台模式里有一个picture in picture,去了解了后发现这个就是小窗口视频播放,方便用户执行多任务。看小窗口视频的同时,可以作其他的事情。
画中画功能在20世纪80年代开始在电视机中应用,使得用户可以在一个屏幕上同时观看两个频道的内容。
这个技术在安卓里已经非常普遍了。各种视频内容网站都有类似功能。
而苹果支持画中画是在ios14已经开始支持。目前在使用的大多数机型,比如iphone 8p,升级系统后可到ios16.7,都能支持画中画技术。
后台任务苹果管理太严格,不好搞,那么使用画中画这种技术,直接做成多任务,这样也是另一条可以尝试的路径。
1、标准PIP使用
首先,标准写法是采用AVPlayer,输入url需要是MP4等视频文件,如果是加密后的网址,无法播放,比如b站的网址。
创建AVPlayer,使用AVPlayerLayer来初始化AVPictureInPictrueController。
// 创建 AVPlayer 对象let videoURL = URL(string: "https://media.w3.org/2010/05/sintel/trailer.mp4")!player = AVPlayer(url: videoURL)// 创建 AVPlayerLayer 并添加到视图层上playerLayer = AVPlayerLayer(player: player)playerLayer.frame = view.boundsview.layer.addSublayer(playerLayer)// 设置画中画控制器pipController = AVPictureInPictureController(playerLayer: playerLayer)pipController.delegate = selfplayer.play() // 直接播放按home键退出,就会自动启动小窗口继续播放视频。
这里有一个坑,需要初始化音频,否则播放mp4无声音,且画中画也不会触发。
do {// 设置AVAudioSession为后台模式try AVAudioSession.sharedInstance().setCategory(.playback, mode: .default)try AVAudioSession.sharedInstance().setActive(true)} catch {print("无法设置AVAudioSession: \(error)")}视频画中画,iphone 8p
2、摄像头预览
摄像头捕捉并预览,这个算法也很容易找到,使用AVCaptureSession
func setupCamera(forgroundFlag: Bool, view: UIView) {farView = viewflag = forgroundFlagcaptureSession = AVCaptureSession()captureSession?.beginConfiguration()captureSession?.sessionPreset = .highguard let captureDevice = AVCaptureDevice.default(.builtInWideAngleCamera, for: .video, position: .front) else {print("No front camera available")return}guard let input = try? AVCaptureDeviceInput(device: captureDevice) else {print("Unable to access front camera")return}captureSession!.addInput(input)videoOutput = AVCaptureVideoDataOutput()videoOutput?.automaticallyConfiguresOutputBufferDimensions = truevideoOutput!.setSampleBufferDelegate(self, queue: DispatchQueue(label: "videoQueue"))captureSession!.addOutput(videoOutput!)if (forgroundFlag) {videoPreviewLayer = AVCaptureVideoPreviewLayer(session: captureSession!)guard let preLayer = videoPreviewLayer else { return }preLayer.frame = view.frameview.layer.addSublayer(preLayer)// 设置 UILabel 的属性label = UILabel()label!.text = "Hello, Swift!" // 设置文本内容label!.textColor = UIColor.systemBlue // 设置文本颜色label!.font = UIFont.systemFont(ofSize: 20) // 设置字体和大小label!.textAlignment = .left // 设置文本对齐方式label!.numberOfLines = 0 // 设置行数,0表示自动换行// 设置 UILabel 的位置和大小label!.frame = CGRect(x: 8, y: 20, width: 200, height: 30)}captureSession?.commitConfiguration()}AVCaptureSession输出的是AVCaptureVideoPreviewLayer,这个layer无法直接用来初始化AVPictureInPictrueController。
3、摄像头输出PIP
swift代码在标准案例上实现都很简洁,但要自定义实现一些功能时,就会发现材料很难找。
比如怎样把摄像头预览与PIP结合。
深度搜索AI给出了一个结果,看上去好像可以,实践下来编辑都不能通过。但是它给出了一个提示,就是AVSampleBufferDisplayLayer。
这里吐槽下AI,最喜欢把不可用的东西包装成很好看的样子,在技术搜索方面,某些时候还不如原始的搜索引擎来得方便。
搜索AVCaptureVideoPreviewLayer转为AVSampleBufferDisplayLayer,也有方法,但是算法看上去稍显复杂。
官方文档Adopting Picture in Picture in a Custom Player | Apple Developer Documentation里也提到了可以使用AVSampleBufferDisplayLayer来初始化PIPController。
网上另一篇文章,说在捕获处理接口里,还有一个视频数据
func captureOutput(_ output: AVCaptureOutput, didOutput sampleBuffer: CMSampleBuffer, from connection: AVCaptureConnection)
CMSampleBuffer可以直接转为AVSampleBufferDisplayLayer,使用enqueu接口,如下:
    func setupSampleBufferDisplayLayer() {sampleBufferDisplayLayer = AVSampleBufferDisplayLayer()sampleBufferDisplayLayer.frame = view.boundssampleBufferDisplayLayer.videoGravity = .resizeAspectview.layer.addSublayer(sampleBufferDisplayLayer)}func captureOutput(_ output: AVCaptureOutput, didOutput sampleBuffer: CMSampleBuffer, from connection: AVCaptureConnection) {
。。。。。。        if (sampleBufferDisplayLayer.status == AVQueuedSampleBufferRenderingStatus.failed) {sampleBufferDisplayLayer.flush() // 异常处理}sampleBufferDisplayLayer.enqueue(sampleBuffer)
。。。。。。
这样整个流程就能打通了。
通过AVSampleBufferDisplayLayer,可以用任何视频流来初始化AVPictureInPictureController。
private func setupPiPController() {guard AVPictureInPictureController.isPictureInPictureSupported() else {print("Picture in Picture is not supported on this device")return}print("support pip!!!")if pipController == nil {pipController = AVPictureInPictureController(contentSource: .init(sampleBufferDisplayLayer: sampleBufferDisplayLayer, playbackDelegate: self))}if let pipController = pipController {pipController.delegate = selfif pipController.isPictureInPicturePossible {pipController.startPictureInPicture()}}}4、摄像头多任务需要硬件支持
前面生成的工程,在iphone 8p上测试效果如下,进入画中画模式时,在1s以内视频捕获就停止了。
摄像头画中画,iphone 8p
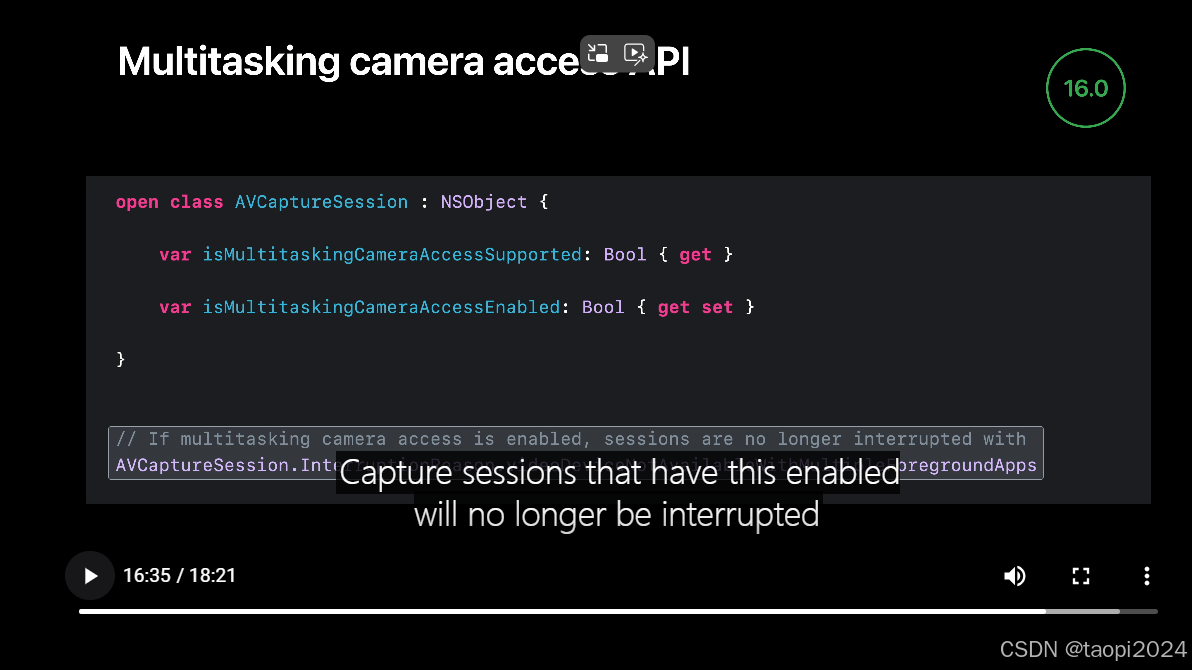
原因在于苹果对摄像头硬件管理非常严格,摄像头开小窗口,那么用户就可能用摄像头打开另一个任务,意味着摄像头需要支持多任务。
参考官方说明:
增加代码检查如下:
func setupCamera(forgroundFlag: Bool, view: UIView) {
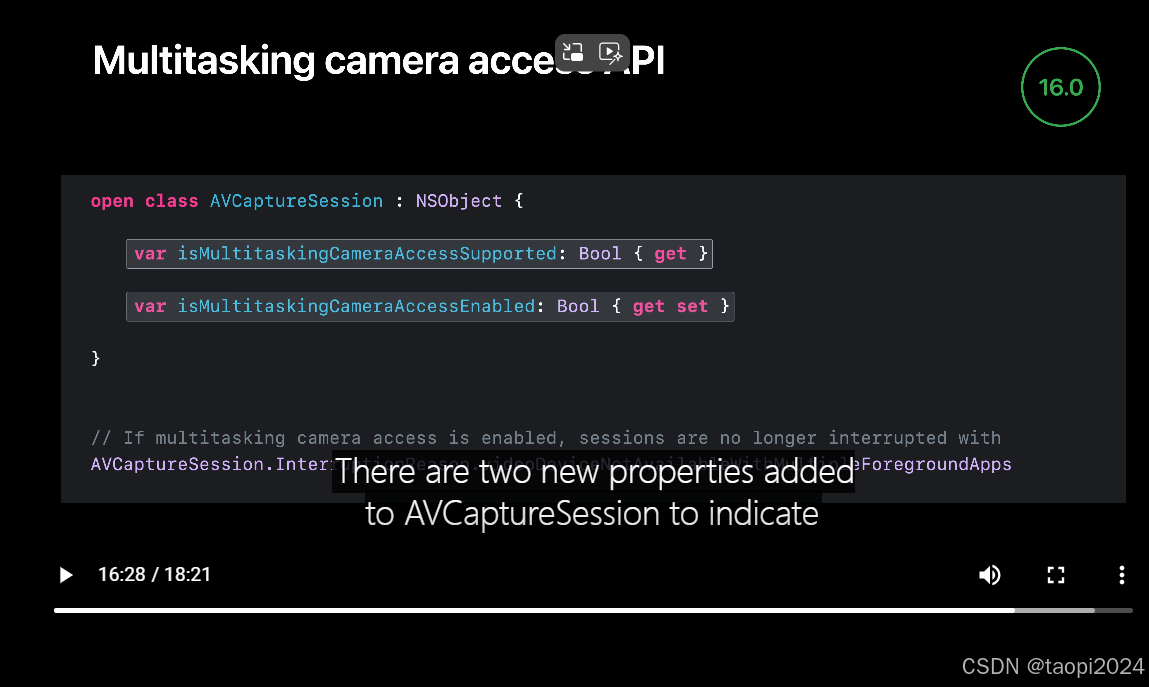
。。。。。。 guard let tempcap = captureSession else { return }if (tempcap.isMultitaskingCameraAccessSupported) {print("camera supp multitask")// Enable use of the camera in multitasking modes.captureSession?.isMultitaskingCameraAccessEnabled = true} else {print("camera not supp multitask")}captureSession?.commitConfiguration()}从调试打印来看,iphone 8p的摄像头不支持多任务。
根据AI查询结果,可能需要iphone 12以上的机型才能支持摄像头多任务。
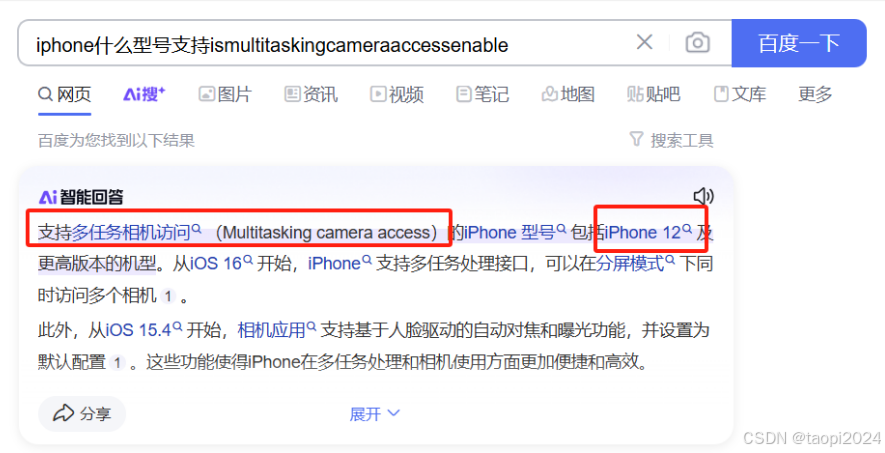
对于AI返回结果比较存疑,因为多次返回的结果可能会不一样。比如iphone XR,有的说支持,有的说不支持。
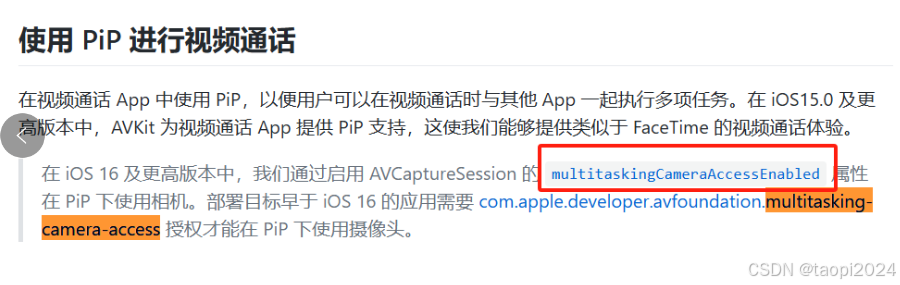
参考另外的官方文章,视频通话、直播画中画都是一样的。
Adopting Picture in Picture for video calls | Apple Developer Documentation
因为本人手上只有iphone 8p,没有其他新机型,所以后面的调试验证没法继续下去了。在没有订单推动情况下,也不会投入了。
如果有相关项目需求的,可以找我咨询合作。


常用API、Lambda、常见算法)

老版本手绘PDF,包含页码、水印、图片、复选框、复杂行列合并等。)
