WebView的用法
新建一个WebView项目
修改activity_main中的代码:
<?xml version="1.0" encoding="utf-8"?>
<LinearLayout xmlns:android="http://schemas.android.com/apk/res/android"android:id="@+id/main"android:orientation="vertical"android:layout_width="match_parent"android:layout_height="match_parent"><WebViewandroid:id="@+id/web_view"android:layout_width="match_parent"android:layout_height="match_parent"/>
</LinearLayout>
我们在布局文件中用到了新的控件:WebView,用来显示网页
下来修改MainActivity中的代码:
public class MainActivity extends AppCompatActivity {@Overrideprotected void onCreate(Bundle savedInstanceState) {super.onCreate(savedInstanceState);setContentView(R.layout.activity_main);WebView webView = (WebView) findViewById(R.id.web_view);webView.getSettings().setJavaScriptEnabled(true);webView.setWebChromeClient(new WebChromeClient());webView.loadUrl("https://www.csdn.net/");}
}
最后加入网络申请权限就可以了:
<uses-permission android:name="android.permission.INTERNET"/>
使用http协议:
新建NetworkTest项目
修改activity_main中的代码:
<?xml version="1.0" encoding="utf-8"?>
<LinearLayout xmlns:android="http://schemas.android.com/apk/res/android"android:id="@+id/main"android:orientation="vertical"android:layout_width="match_parent"android:layout_height="match_parent"><Buttonandroid:id="@+id/send_request"android:layout_width="match_parent"android:layout_height="wrap_content"android:text="Send Request"/><ScrollViewandroid:layout_width="match_parent"android:layout_height="match_parent"><TextViewandroid:id="@+id/request_text"android:layout_width="match_parent"android:layout_height="wrap_content"/></ScrollView>
</LinearLayout>
修改MainActivity中的代码:
public class MainActivity extends AppCompatActivity implements View.OnClickListener {// 用于显示HTTP请求结果的TextViewTextView responseText;@Overrideprotected void onCreate(Bundle savedInstanceState) {super.onCreate(savedInstanceState);setContentView(R.layout.activity_main);// 获取发送请求按钮的引用Button sendRequest = (Button) findViewById(R.id.send_request);// 获取显示响应结果的TextView的引用responseText = (TextView) findViewById(R.id.request_text);// 为按钮设置点击监听器sendRequest.setOnClickListener(this);}@Overridepublic void onClick(View v) {// 检查点击事件是否来自发送请求按钮if (v.getId() == R.id.send_request) {// 发送HTTP请求sendRequestWithHttpURLConnection();}}// 使用HttpURLConnection发送HTTP请求private void sendRequestWithHttpURLConnection() {new Thread(new Runnable() {@Overridepublic void run() {HttpURLConnection connection = null;BufferedReader reader = null;try {// 创建URL对象URL url = new URL("https://www.csdn.net/");// 打开HttpURLConnectionconnection = (HttpURLConnection) url.openConnection();// 设置请求方法为GETconnection.setRequestMethod("GET");// 设置连接超时时间和读取超时时间connection.setConnectTimeout(8000);connection.setReadTimeout(8000);// 获取服务器响应的输入流InputStream in = connection.getInputStream();// 使用BufferedReader读取输入流reader = new BufferedReader(new InputStreamReader(in));StringBuilder response = new StringBuilder();String line;while ((line = reader.readLine()) != null) {response.append(line);}// 显示服务器响应showResponse(response.toString());} catch (Exception e) {e.printStackTrace();} finally {// 关闭BufferedReaderif (reader != null) {try {reader.close();} catch (IOException e) {e.printStackTrace();}}// 断开HttpURLConnection连接if (connection != null) {connection.disconnect();}}}}).start();}// 在UI线程上显示服务器响应private void showResponse(final String response) {runOnUiThread(new Runnable() {@Overridepublic void run() {responseText.setText(response);}});}
}
最后还需要申请一下网络权限:
<uses-permission android:name="android.permission.INTERNET"/>
如果想要提交数据给服务器可以进行如下修改:
connection.setRequestMethod("POST");
DataOutputStream out = new DataOutputStream(connection.getOutputStream());
out.writeBytes("username=admin&password=123456");
注意每条数据都要以键值对的形式存在,数据与数据之间用 & 分隔开
使用OKHttp
修改MainActivity中的代码:
public class MainActivity extends AppCompatActivity implements View.OnClickListener {// 用于显示网络请求响应的TextViewTextView responseText;@Overrideprotected void onCreate(Bundle savedInstanceState) {super.onCreate(savedInstanceState);setContentView(R.layout.activity_main);// 绑定按钮和TextViewButton sendRequest = (Button) findViewById(R.id.send_request);responseText = (TextView) findViewById(R.id.request_text);// 为按钮设置点击监听器sendRequest.setOnClickListener(this);}@Overridepublic void onClick(View v) {if (v.getId() == R.id.send_request) {// 使用OkHttp发送网络请求sendRequestWithOkHttp();}}// 使用OkHttp发送网络请求的方法private void sendRequestWithOkHttp() {new Thread(new Runnable() {@Overridepublic void run() {try {OkHttpClient client = new OkHttpClient();Request request = new Request.Builder().url("https://www.csdn.net/").build();Response response = client.newCall(request).execute();String responseData = response.body().string();showResponse(responseData);} catch (Exception e) {e.printStackTrace();}}}).start();}// 使用HttpURLConnection发送网络请求的方法private void sendRequestWithHttpURLConnection() {new Thread(new Runnable() {@Overridepublic void run() {HttpURLConnection connection = null;BufferedReader reader = null;try {URL url = new URL("https://www.csdn.net/");connection = (HttpURLConnection) url.openConnection();connection.setRequestMethod("GET");connection.setConnectTimeout(8000);connection.setReadTimeout(8000);InputStream in = connection.getInputStream();reader = new BufferedReader(new InputStreamReader(in));StringBuilder response = new StringBuilder();String line;while ((line = reader.readLine()) != null) {response.append(line);}showResponse(response.toString());} catch (Exception e) {e.printStackTrace();} finally {// 关闭资源if (reader != null) {try {reader.close();} catch (IOException e) {e.printStackTrace();}}if (connection != null) {connection.disconnect();}}}}).start();}// 在UI线程中显示网络请求的响应数据private void showResponse(final String response) {runOnUiThread(new Runnable() {@Overridepublic void run() {responseText.setText(response);}});}
}
解析XML格式数据
先下载Apache服务器Welcome! - The Apache HTTP Server Project
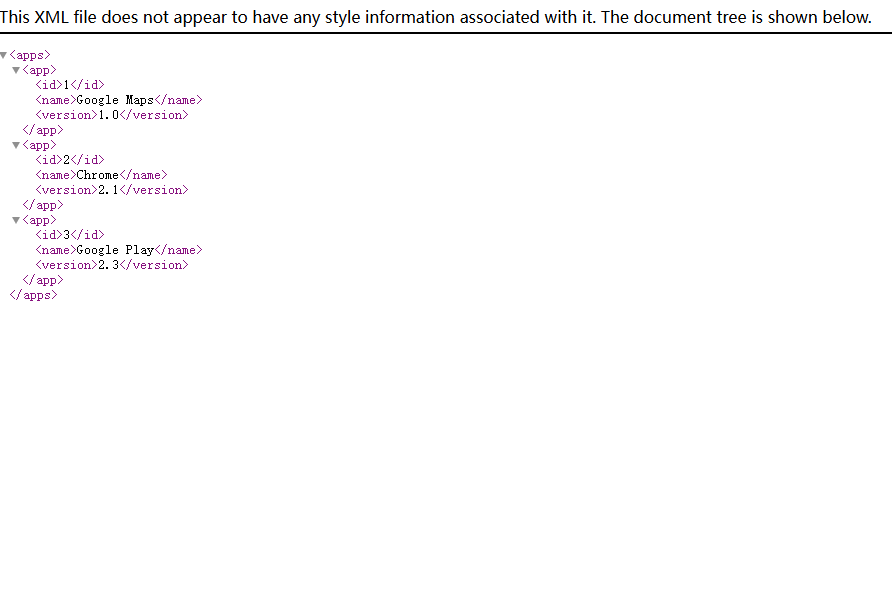
下载安装后在根目录下的htdocs目录下,新建名为get_data.xml文件:
<apps><app><id>1</id><name>Google Maps</name><version>1.0</version></app><app><id>2</id><name>Chrome</name><version>2.1</version></app><app><id>3</id><name>Google Play</name><version>2.3</version></app>
</apps>
访问的内容为:
Pull解析
修改MainActivity中的代码:
public class MainActivity extends AppCompatActivity implements View.OnClickListener {TextView responseText;@Overrideprotected void onCreate(Bundle savedInstanceState) {super.onCreate(savedInstanceState);setContentView(R.layout.activity_main);Button sendRequest = (Button) findViewById(R.id.send_request);responseText = (TextView) findViewById(R.id.request_text);sendRequest.setOnClickListener(this);}@Overridepublic void onClick(View v) {if (v.getId() == R.id.send_request) {sendRequestWithOkHttp();}}private void sendRequestWithOkHttp() {new Thread(new Runnable() {@Overridepublic void run() {try {OkHttpClient client = new OkHttpClient();Request request = new Request.Builder().url("https://10.0.2.2/get_data.xml").build();Response response = client.newCall(request).execute();String responseData = response.body().string();parseXmlWithPull(responseData);} catch (Exception e) {e.printStackTrace();}}}).start();}private void parseXmlWithPull(String xmlData) {try {XmlPullParserFactory factory = XmlPullParserFactory.newInstance();XmlPullParser xmlPullParser = factory.newPullParser();xmlPullParser.setInput(new StringReader(xmlData));int eventType = xmlPullParser.getEventType();String id = "";String name = "";String version = "";while (eventType != XmlPullParser.END_DOCUMENT) {String nodeName = xmlPullParser.getName();switch (eventType) {case XmlPullParser.START_TAG:if ("id".equals(nodeName)) {id = xmlPullParser.nextText();} else if ("name".equals(nodeName)) {name = xmlPullParser.nextText();} else if ("version".equals(nodeName)) {version = xmlPullParser.nextText();}break;case XmlPullParser.END_TAG:if ("app".equals(nodeName)) {Log.d("MainActivity", "id is " + id);Log.d("MainActivity", "name is " + name);Log.d("MainActivity", "version is " + version);}break;default:break;}eventType = xmlPullParser.next();}} catch (Exception e) {e.printStackTrace();}}private void sendRequestWithHttpURLConnection() {new Thread(new Runnable() {@Overridepublic void run() {HttpURLConnection connection = null;BufferedReader reader = null;try {URL url = new URL("https://www.csdn.net/");connection = (HttpURLConnection) url.openConnection();connection.setRequestMethod("GET");connection.setConnectTimeout(8000);connection.setReadTimeout(8000);InputStream in = connection.getInputStream();reader = new BufferedReader(new InputStreamReader(in));StringBuilder response = new StringBuilder();String line;while ((line = reader.readLine()) != null) {response.append(line);}showResponse(response.toString());} catch (Exception e) {e.printStackTrace();} finally {if (reader != null) {try {reader.close();} catch (IOException e) {e.printStackTrace();}}if (connection != null) {connection.disconnect();}}}}).start();}private void showResponse(final String response) {runOnUiThread(new Runnable() {@Overridepublic void run() {responseText.setText(response);}});}
}
但是开始运行后我们并没有成功解析数据
本人遇到的问题是网络安全策略的限制被禁止。默认情况下,从Android 9(API级别28)开始,应用程序不允许进行明文HTTP流量,所以需要修改应用的网络安全配置来允许明文流量。
创建网络安全配置文件:
在res/xml目录下创建一个名为network_security_config.xml的文件,并添加以下内容:
<?xml version="1.0" encoding="utf-8"?>
<network-security-config><domain-config cleartextTrafficPermitted="true"><domain includeSubdomains="true">192.168.1.75</domain> <!-- 替换为您的局域网IP地址 --></domain-config>
</network-security-config>
引用网络安全配置文件
AndroidManifest.xml中引用这个网络安全配置文件:
<applicationandroid:networkSecurityConfig="@xml/network_security_config"...>...
</application>
修改MainActivity:
public class MainActivity extends AppCompatActivity implements View.OnClickListener {private static final String TAG = "MainActivity";TextView responseText;@Overrideprotected void onCreate(Bundle savedInstanceState) {super.onCreate(savedInstanceState);setContentView(R.layout.activity_main);Button sendRequest = findViewById(R.id.send_request);responseText = findViewById(R.id.request_text);sendRequest.setOnClickListener(this);}@Overridepublic void onClick(View v) {if (v.getId() == R.id.send_request) {sendRequestWithOkHttp();}}private void sendRequestWithOkHttp() {new Thread(new Runnable() {@Overridepublic void run() {try {OkHttpClient client = new OkHttpClient();// 使用电脑的局域网IP地址Request request = new Request.Builder().url("http://192.168.1.75/get_data.xml") .build();Response response = client.newCall(request).execute();String responseData = response.body().string();Log.d(TAG, "Response data: " + responseData);parseXmlWithPull(responseData);} catch (Exception e) {Log.e(TAG, "Request failed", e);}}}).start();}private void parseXmlWithPull(String xmlData) {try {XmlPullParserFactory factory = XmlPullParserFactory.newInstance();XmlPullParser xmlPullParser = factory.newPullParser();xmlPullParser.setInput(new StringReader(xmlData));int eventType = xmlPullParser.getEventType();String id = "";String name = "";String version = "";while (eventType != XmlPullParser.END_DOCUMENT) {String nodeName = xmlPullParser.getName();switch (eventType) {case XmlPullParser.START_TAG:if ("id".equals(nodeName)) {id = xmlPullParser.nextText();} else if ("name".equals(nodeName)) {name = xmlPullParser.nextText();} else if ("version".equals(nodeName)) {version = xmlPullParser.nextText();}break;case XmlPullParser.END_TAG:if ("app".equals(nodeName)) {Log.i(TAG, "id is " + id);Log.i(TAG, "name is " + name);Log.i(TAG, "version is " + version);}break;default:break;}eventType = xmlPullParser.next();}} catch (Exception e) {Log.e(TAG, "XML parsing failed", e);}}private void sendRequestWithHttpURLConnection() {new Thread(new Runnable() {@Overridepublic void run() {HttpURLConnection connection = null;BufferedReader reader = null;try {URL url = new URL("http://192.168.1.75/get_data.xml"); connection = (HttpURLConnection) url.openConnection();connection.setRequestMethod("GET");connection.setConnectTimeout(8000);connection.setReadTimeout(8000);InputStream in = connection.getInputStream();reader = new BufferedReader(new InputStreamReader(in));StringBuilder response = new StringBuilder();String line;while ((line = reader.readLine()) != null) {response.append(line);}showResponse(response.toString());} catch (Exception e) {Log.e(TAG, "Request failed", e);} finally {if (reader != null) {try {reader.close();} catch (IOException e) {e.printStackTrace();}}if (connection != null) {connection.disconnect();}}}}).start();}private void showResponse(final String response) {runOnUiThread(new Runnable() {@Overridepublic void run() {responseText.setText(response);}});}
}
解析JSON格式数据
相比于XML,JSON的主要优势在于它的体积更小,在网络传输时可以更省流量
但是缺点在于它的语义性较差
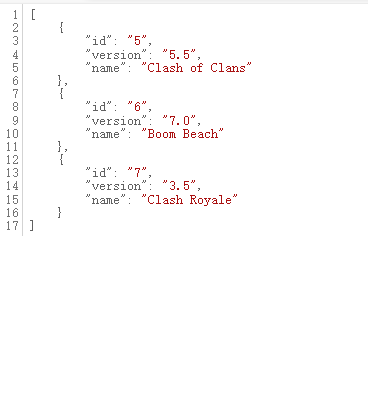
首先在Apache目录下的htdocs目录中新建一个get_data.json文件,加入以下内容:
[{"id":"5","version":"5.5","name":"Clash of Clans"},
{"id":"6","version":"7.0","name":"Boom Beach"},
{"id":"7","version":"3.5","name":"Clash Royale"}]
在浏览器打开为:
下面就可以开始解析数据了:
使用JSONObject
修改MainActivity中的代码:
public class MainActivity extends AppCompatActivity implements View.OnClickListener {private static final String TAG = "MainActivity";TextView responseText;@Overrideprotected void onCreate(Bundle savedInstanceState) {super.onCreate(savedInstanceState);setContentView(R.layout.activity_main);Button sendRequest = findViewById(R.id.send_request);responseText = findViewById(R.id.request_text);sendRequest.setOnClickListener(this);}@Overridepublic void onClick(View v) {if (v.getId() == R.id.send_request) {sendRequestWithOkHttp();}}private void sendRequestWithOkHttp() {new Thread(new Runnable() {@Overridepublic void run() {try {OkHttpClient client = new OkHttpClient();Request request = new Request.Builder().url("http://192.168.1.75/get_data.json") // 确认返回的是JSON数据.build();Response response = client.newCall(request).execute();String responseData = response.body().string();Log.d(TAG, "Response Data: " + responseData);parseJSONWithJSONObject(responseData);} catch (Exception e) {Log.e(TAG, "Request failed", e);}}}).start();}private void parseJSONWithJSONObject(String jsonData) {try {JSONArray jsonArray = new JSONArray(jsonData);for (int i = 0; i < jsonArray.length(); i++) {JSONObject jsonObject = jsonArray.getJSONObject(i);String id = jsonObject.getString("id");String name = jsonObject.getString("name");String version = jsonObject.getString("version");Log.d(TAG, "id is " + id);Log.d(TAG, "name is " + name);Log.d(TAG, "version is " + version);}} catch (JSONException e) {Log.e(TAG, "JSON parsing failed", e);}}private void parseXmlWithPull(String xmlData) {try {XmlPullParserFactory factory = XmlPullParserFactory.newInstance();XmlPullParser xmlPullParser = factory.newPullParser();xmlPullParser.setInput(new StringReader(xmlData));int eventType = xmlPullParser.getEventType();String id = "";String name = "";String version = "";while (eventType != XmlPullParser.END_DOCUMENT) {String nodeName = xmlPullParser.getName();switch (eventType) {case XmlPullParser.START_TAG:if ("id".equals(nodeName)) {id = xmlPullParser.nextText();} else if ("name".equals(nodeName)) {name = xmlPullParser.nextText();} else if ("version".equals(nodeName)) {version = xmlPullParser.nextText();}break;case XmlPullParser.END_TAG:if ("app".equals(nodeName)) {Log.i(TAG, "id is " + id);Log.i(TAG, "name is " + name);Log.i(TAG, "version is " + version);}break;default:break;}eventType = xmlPullParser.next();}} catch (Exception e) {Log.e(TAG, "XML parsing failed", e);}}private void sendRequestWithHttpURLConnection() {new Thread(new Runnable() {@Overridepublic void run() {HttpURLConnection connection = null;BufferedReader reader = null;try {URL url = new URL("http://192.168.1.75/get_data.json"); // 确认返回的是JSON数据connection = (HttpURLConnection) url.openConnection();connection.setRequestMethod("GET");connection.setConnectTimeout(8000);connection.setReadTimeout(8000);InputStream in = connection.getInputStream();reader = new BufferedReader(new InputStreamReader(in));StringBuilder response = new StringBuilder();String line;while ((line = reader.readLine()) != null) {response.append(line);}showResponse(response.toString());} catch (Exception e) {Log.e(TAG, "Request failed", e);} finally {if (reader != null) {try {reader.close();} catch (IOException e) {e.printStackTrace();}}if (connection != null) {connection.disconnect();}}}}).start();}private void showResponse(final String response) {runOnUiThread(new Runnable() {@Overridepublic void run() {responseText.setText(response);}});}
}
使用GSON
要想使用GSON,首先需要添加依赖库:
implementation("com.google.code.gson:gson:2.7")
新建App类:
package com.example.networktest;public class App {private String id;private String name;private String version;public String getId() {return id;}public void setId(String id) {this.id = id;}public String getName() {return name;}public void setName(String name) {this.name = name;}public String getVersion() {return version;}public void setVersion(String version) {this.version = version;}}修改MainActivity中的代码:
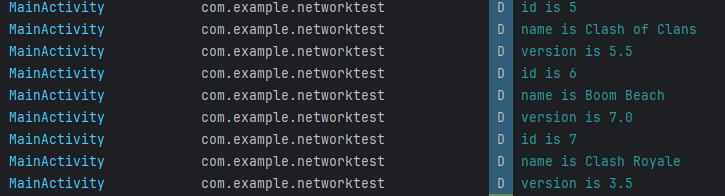
public class MainActivity extends AppCompatActivity implements View.OnClickListener {private static final String TAG = "MainActivity"; // 日志标签TextView responseText; // 用于显示响应数据的TextView@Overrideprotected void onCreate(Bundle savedInstanceState) {super.onCreate(savedInstanceState);setContentView(R.layout.activity_main); // 设置活动布局Button sendRequest = findViewById(R.id.send_request); // 获取发送请求按钮responseText = findViewById(R.id.request_text); // 获取用于显示响应的TextViewsendRequest.setOnClickListener(this); // 为按钮设置点击事件监听器}@Overridepublic void onClick(View v) {if (v.getId() == R.id.send_request) { // 检查点击的视图ID是否为发送请求按钮sendRequestWithOkHttp(); // 调用方法发送HTTP请求}}// 使用OkHttp发送HTTP请求private void sendRequestWithOkHttp() {new Thread(new Runnable() {@Overridepublic void run() {try {OkHttpClient client = new OkHttpClient();Request request = new Request.Builder().url("http://192.168.1.75/get_data.json") // 请求URL.build();Response response = client.newCall(request).execute(); // 执行请求String responseData = response.body().string(); // 获取响应数据parseJSONWithGSON(responseData); // 解析JSON数据} catch (Exception e) {Log.e(TAG, "Request failed", e); // 记录请求失败的日志}}}).start();}// 使用GSON解析JSON数据private void parseJSONWithGSON(String jsonData) {Gson gson = new Gson();List<App> appList = gson.fromJson(jsonData, new TypeToken<List<App>>(){}.getType()); // 将JSON数据转换为App对象列表for (App app : appList) {Log.d("MainActivity", "id is " + app.getId());Log.d("MainActivity", "name is " + app.getName());Log.d("MainActivity", "version is " + app.getVersion());}}// 使用JSONObject解析JSON数据private void parseJSONWithJSONObject(String jsonData) {try {JSONArray jsonArray = new JSONArray(jsonData); // 创建JSON数组for (int i = 0; i < jsonArray.length(); i++) {JSONObject jsonObject = jsonArray.getJSONObject(i);String id = jsonObject.getString("id");String name = jsonObject.getString("name");String version = jsonObject.getString("version");Log.d(TAG, "id is " + id);Log.d(TAG, "name is " + name);Log.d(TAG, "version is " + version);}} catch (JSONException e) {Log.e(TAG, "JSON parsing failed", e); // 记录JSON解析失败的日志}}// 使用Pull解析XML数据private void parseXmlWithPull(String xmlData) {try {XmlPullParserFactory factory = XmlPullParserFactory.newInstance();XmlPullParser xmlPullParser = factory.newPullParser();xmlPullParser.setInput(new StringReader(xmlData));int eventType = xmlPullParser.getEventType();String id = "";String name = "";String version = "";while (eventType != XmlPullParser.END_DOCUMENT) {String nodeName = xmlPullParser.getName();switch (eventType) {case XmlPullParser.START_TAG:if ("id".equals(nodeName)) {id = xmlPullParser.nextText();} else if ("name".equals(nodeName)) {name = xmlPullParser.nextText();} else if ("version".equals(nodeName)) {version = xmlPullParser.nextText();}break;case XmlPullParser.END_TAG:if ("app".equals(nodeName)) {Log.i(TAG, "id is " + id);Log.i(TAG, "name is " + name);Log.i(TAG, "version is " + version);}break;default:break;}eventType = xmlPullParser.next();}} catch (Exception e) {Log.e(TAG, "XML parsing failed", e); // 记录XML解析失败的日志}}// 使用HttpURLConnection发送HTTP请求private void sendRequestWithHttpURLConnection() {new Thread(new Runnable() {@Overridepublic void run() {HttpURLConnection connection = null;BufferedReader reader = null;try {URL url = new URL("http://192.168.1.75/get_data.json"); // 请求URLconnection = (HttpURLConnection) url.openConnection();connection.setRequestMethod("GET");connection.setConnectTimeout(8000);connection.setReadTimeout(8000);InputStream in = connection.getInputStream();reader = new BufferedReader(new InputStreamReader(in));StringBuilder response = new StringBuilder();String line;while ((line = reader.readLine()) != null) {response.append(line);}showResponse(response.toString()); // 显示响应数据} catch (Exception e) {Log.e(TAG, "Request failed", e); // 记录请求失败的日志} finally {if (reader != null) {try {reader.close();} catch (IOException e) {e.printStackTrace();}}if (connection != null) {connection.disconnect();}}}}).start();}// 在主线程上显示响应数据private void showResponse(final String response) {runOnUiThread(new Runnable() {@Overridepublic void run() {responseText.setText(response);}});}
}
打印结果如图所示:
已经到底啦!!
)

)


